
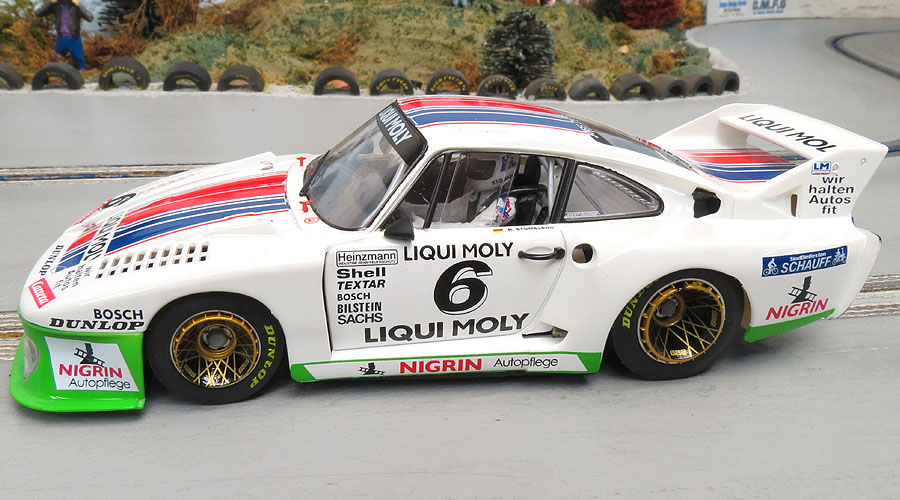
Rebuilding the 1/32nd Scale
Scaleauto Porsche 935 J
You just finished routing your own track and ready to take on the world of scale racing in non-magnet form. You are excited and cannot wait to start tuning all the models in your collection so they run smoothly and deliver all the fun they did on your plastic track. Or maybe you just bought a new model and although you love the looks of it, the car just doesn't run very well. It hops, skips, and jumps all over the place and can hardly move under it's own power. Maybe it does not move at all? Sound familiar?
In a way I hope so because this article is intended for you, the newcomer. Not a newcomer to our hobby, just new to the world of tuning. Tuning doesn't just mean a quick tire change or stacking more magnets in it anymore. No, not for you. Now it is time to start discovering what is making that car behave the way it is and how to adjust it.
The latest offering from Scaleauto is a good example of many ready to run models in our hobby. It has all the parts inside to make it run but it just doesn't run very well. But during testing you realized that it has POTENTIAL. My first version of this model arrived and it had a few issues here and there, but it just needed a set of tires and some light tuning using the original parts. It runs pretty good now and I have been enjoying it. Please read the full review here if you haven't yet.
My second model arrived here and I had plans for a special repaint project. But testing the model revealed we had more trouble than the first. This time the rear wheels and axle were both too far out of round for even the Tire Razor to address. The tire to body rub was so bad it would not even move under power.
So it was time to decide what to do and the answer was easy: Rebuild it. I could ask my dealer to send me another one but to be honest I have a good chance of getting another car that has the same issue. Is the investment to keep it worth it? It is to me. Tinkering and tuning slot cars to see if I can get it right is FUN to me.
During the process I will show you the tools and parts used to get the job done.
I also want to share not just WHAT to buy, but HOW you can determine it for yourself.
It is important for to remind you that these special tools and parts are what I feel are needed to achieve the end result. Some of these items require a substantial investment and only you can decide if you are ready to do so.
Our first example is how I used the Tire Razor to discover the problem.
From this point on I knew it was time for an all out rebuild.
PARTS & TOOLS LIST
PARTS
C.B. Design 17x10 Insert Wheels
Slot.it 19 MM/36 Tooth Sidewinder Spur Gear
NSR 6.5 MM/11 Tooth Pinion (Gear is actually 6.75)
Slot Car Corner Assorted Axle Spacer Pack
SPECIAL TOOLS *Example only. Shop around and choose what fits your budget.
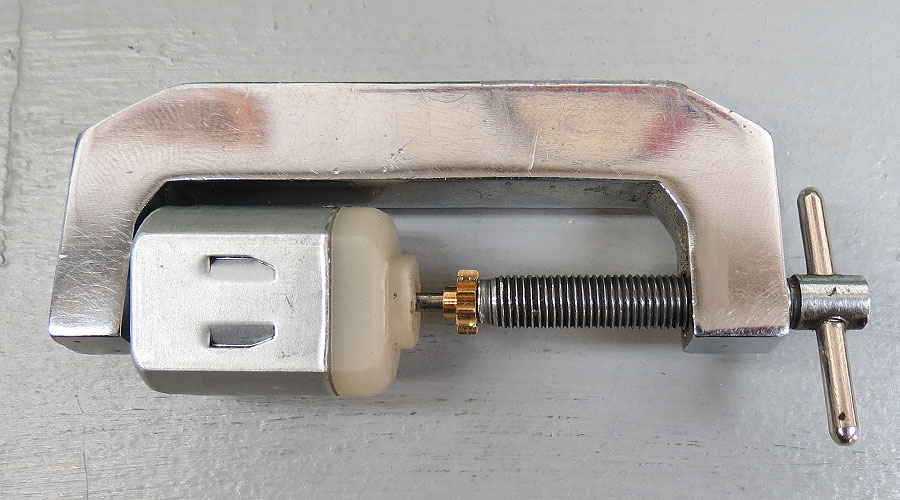
Tire Razor Wheel and Tire Truing Machine
Gear Puller/Press* (Slot.it Combo System works as well)
Dremel with assorted attachments*
Pin Vise with bits.*
How do I find out what I need?
Now that we know we will be changing out the full running gear, how do we start determining what parts to buy?
STEP ONE: Get Your Caliper
This tool is more important than you might think. You could swap gears and wheels if you have a vast inventory on hand to find out what fits. But most of us do not have that. So the only way I know of to determine what is needed is a caliper.
WHEELS
I start by measuring the wheels.
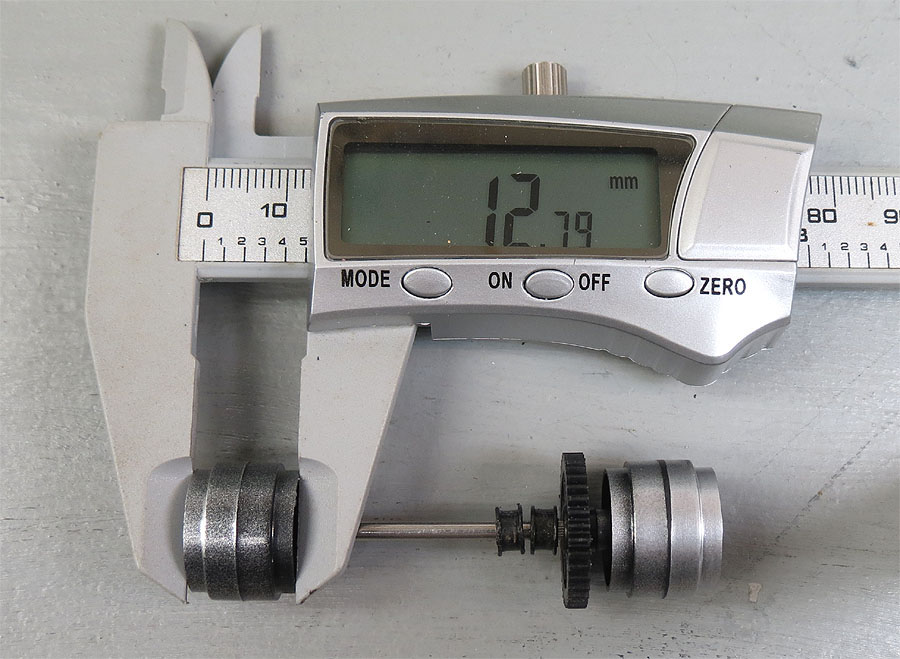
I start my measuring overall width. In this case it is almost 13 MM. But remember one thing, this car has an issue of the inside of the tire rubbing the interior.
Please read this review where we discuss this.
I also need to have the room for the gear to fit properly. Since the Slot.it gear I am using has a flange on it to hold the set screw, this adds to the required space I need.
The diameter of a wheel is measured from the center rib as shown above. These ribs vary in diameter and width. You do not need to match the stock wheel perfectly when it comes to the rib width. Most after-market wheels come in a standard width and the tires you choose for it match that width.
It is the diameter you want to try and match so that the wheel you choose looks as close to scale as possible.
And the wheel I chose was the C.B. Design 17x10. Slot Car Corner has a wide range of C.B. Design insert wheels and have a very handy photo showing them by size.
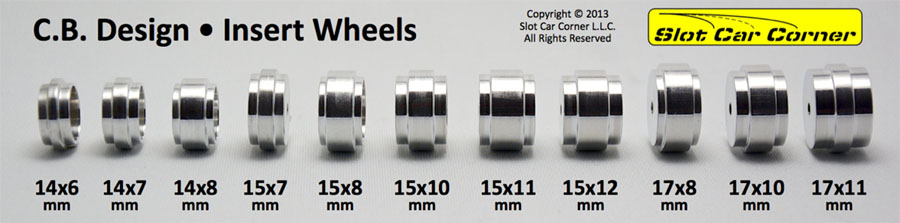
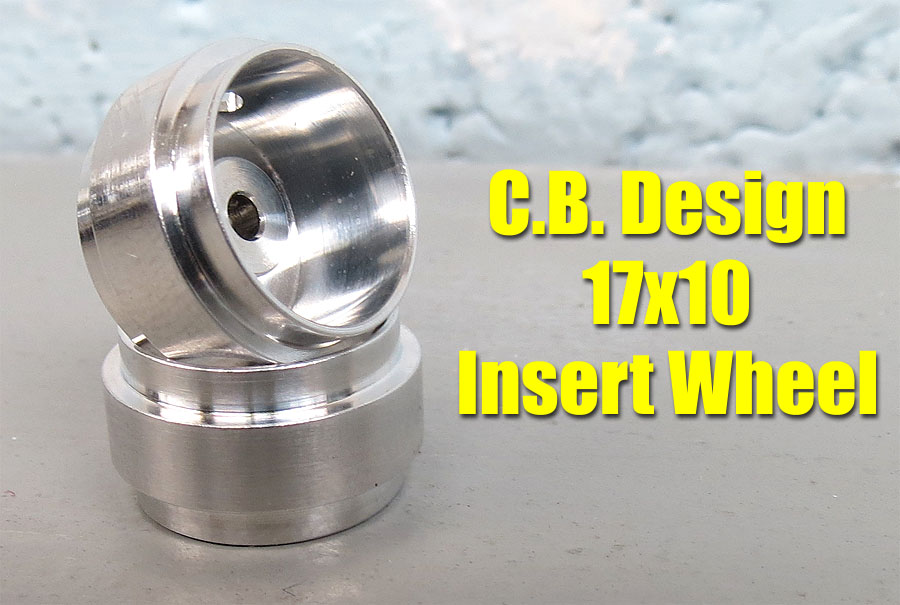
Why not the 17x11? Because I wanted to make sure I had clearance, PLUS the tire selection in Paul Gage urethanes that matched the center rib width provided the look I wanted. Am I going to give up some width advantage? Certainly, but not very much.
TIRES
Choosing the tire that fits the wheel I chose is easy if you take a minute to understand the Paul Gage Identification System Here
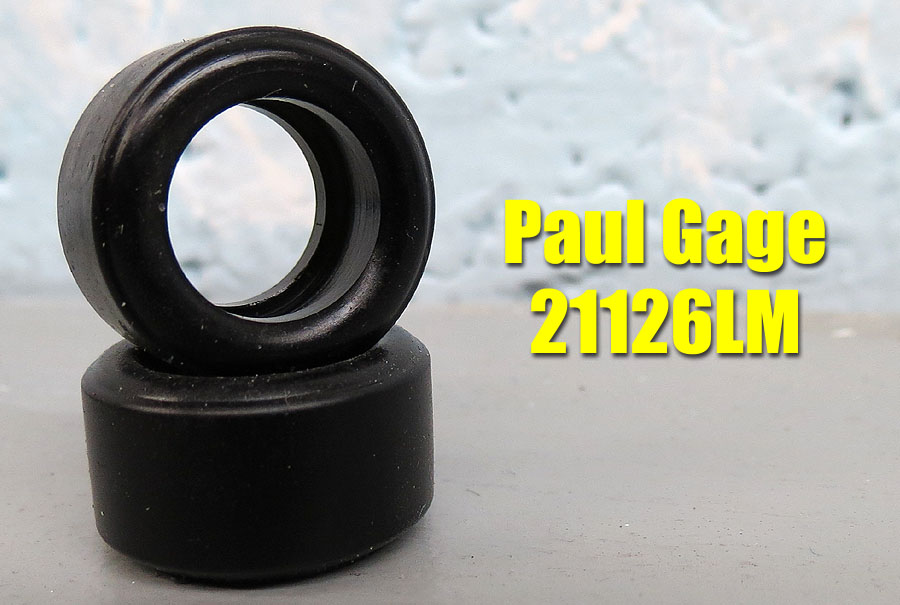
In this case I chose the 21126LM tire. Although the center rib on the 17x10 is a 5, the tire is designed to fit both 5 and 6 rib sizes without excess stretching.
GEARS
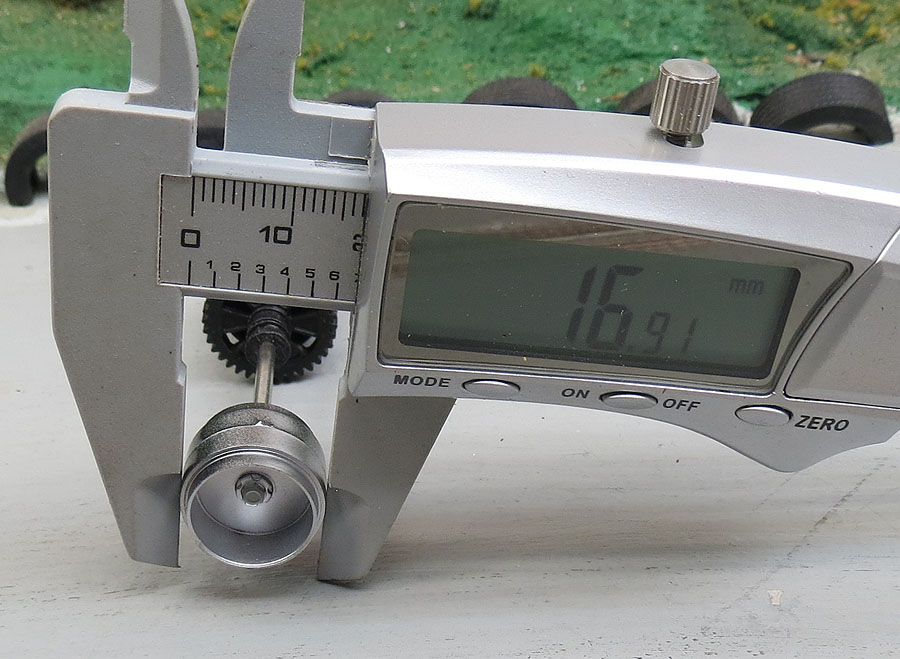
Time to figure out what gears to purchase. I start by grabbing those handy calipers and measuring the larger spur gear on the axle.
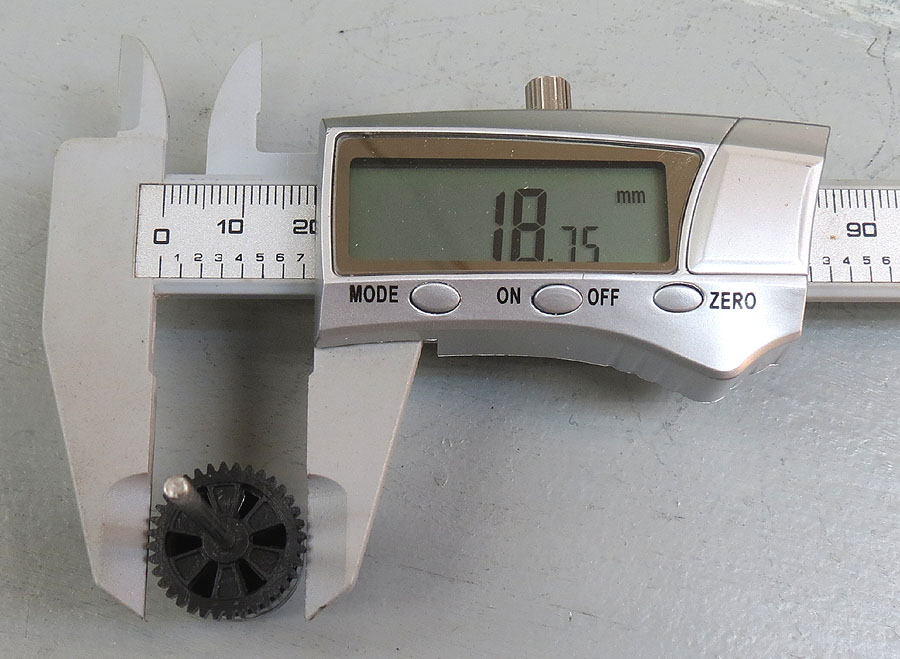
This told me I needed the 19 MM sized spur gear.
I decided to see if the stock pinion and the new Slot.it 19 MM spur gear would work together. I found they would not be an ideal match. I first measured the stock pinion so I knew what size I was working with.
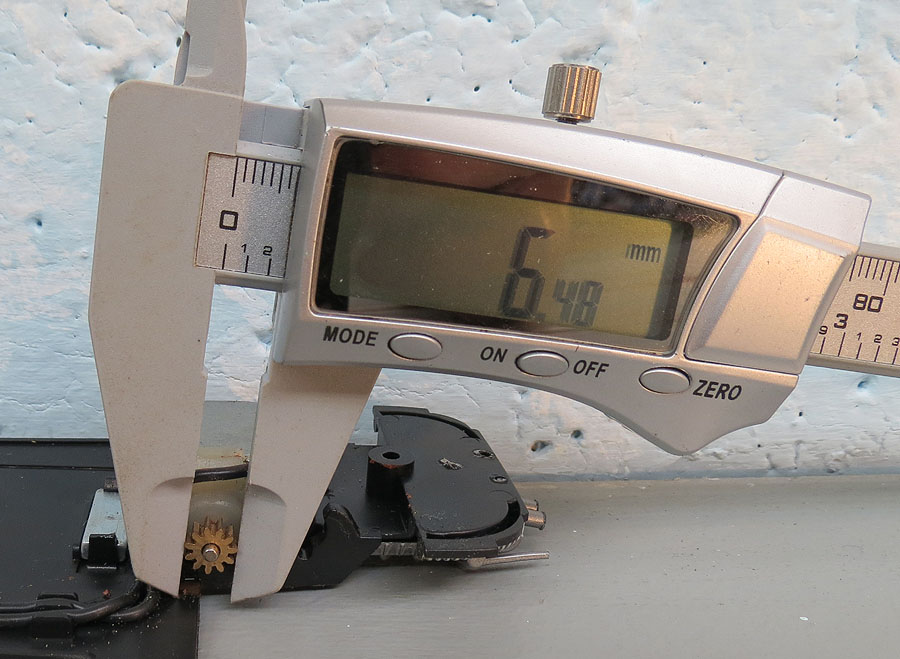
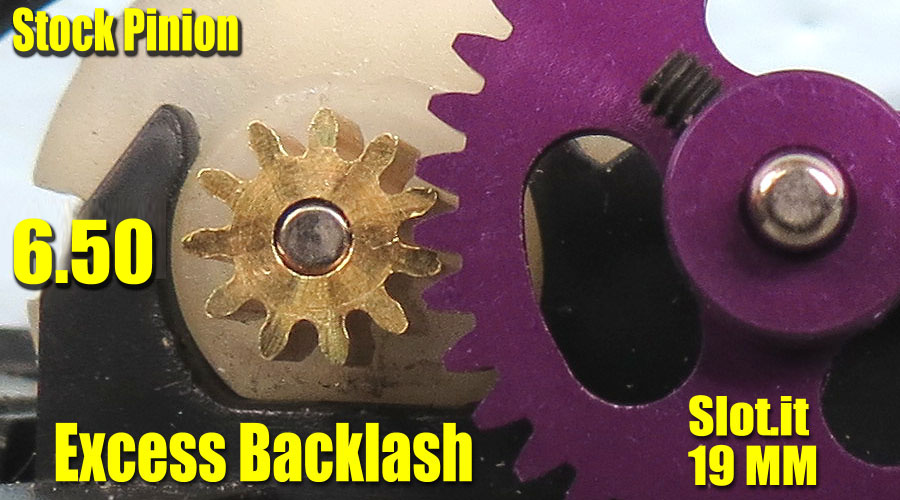
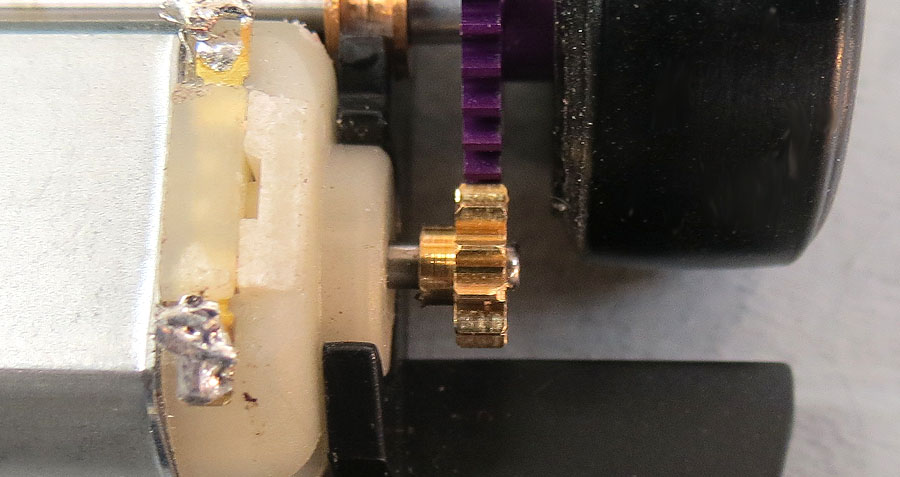
If you look at where the teeth meet up you should notice there is too much gap, or backlash. What we needed is a pinion gear that was larger in diameter.
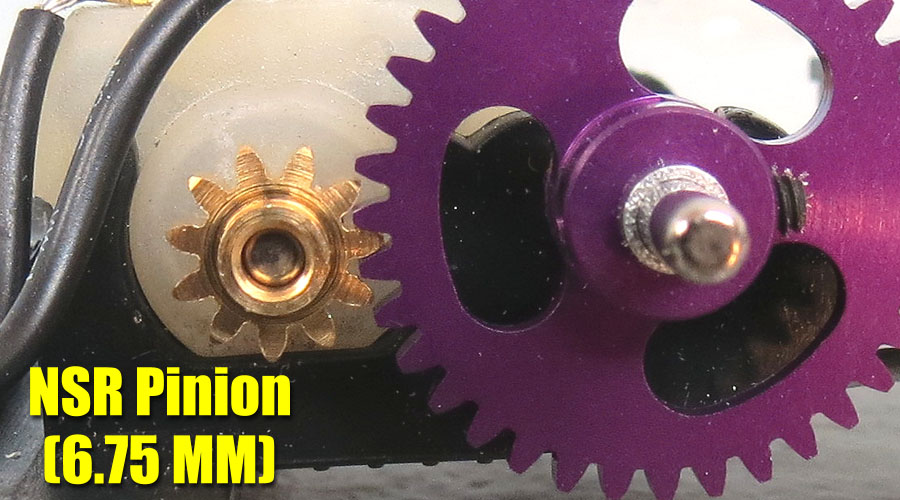
I test fitted an NSR pinion that is incorrectly marked on the package at all dealers as a 6.5 MM. It is NOT. It is actually a 6.75 MM pinion. I discovered this while testing different sizes for this article. Once I found this pinion to fit I double checked to make sure what size to recommend. I have had this confirmed by advanced dealers who pulled the pinions off the wall and measured them. So although my link points to a 6.5 MM pinion, it is only because the package is incorrectly marked and that is what all dealers I have researched list it under.
I must state that having a variety of pinion and spur gear sizes on hand is highly advised. It can be costly to do so but over time you will find it to be worth it. If you want to experiment with different gear ratios then you can order some pinions in a variety pack that helps your budget. Slot Car Corner has an excellent gear ratio chart as a free download as well.
In my models I keep the stock gear ratios. In most cases this means an 11 tooth pinion and 36 tooth spur gear. But I am tuning for myself and not for a competition. Always check the rules of your club or home series and simply gear it to your preference.
Hopefully this shows you how to determine what parts you need. In our hobby there are many sources of information and it can be quite overwhelming when asking what parts to use for a certain project. Now you should be able to start figuring this out for yourself.
Assembly
Changing the running gear to higher quality parts does not just mean a gear change. Your axle and bushings are just as critical to performance and operation. Bushings that come on the models almost always have too large of an inner diameter. This means the axle literally can bounce around inside. I like to use the Slot Car Corner standard bushings in most builds because they fit a wide variety of models and when matched with a quality axle such as a Slot.it, there is no excess slop.
I cannot stress how valuable this tutorial is. They explain everything very clearly and the end result speaks for itself. This is what I followed to install these bushings with one TWO ADDITIONAL steps.
If you cannot snap the bushings in place by by hand do NOT use a needle nose pliers to force them. I have found that doing so can also fracture the chassis. I use a very small flat file to reduce the top tabs (ears) of the chassis. Doing so allows the bushing to be snapped in with less stress, yet still allows a firm install where you can align the bushings.
TEST FIT WITH MOTOR
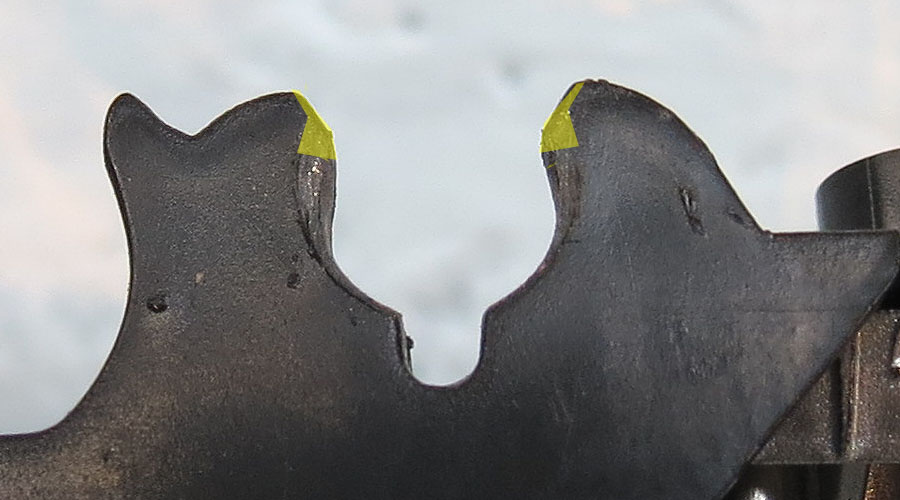
On many sidewinder models that I replace the bushings on, I always test fit the motor in place before gluing. The reason is that the outer flanges on after-market bushings are usually thicker or even larger in diameter than the stock bushings. That means the motor can end and endbell might rub against them causing them to bind or to cause the motor to sit incorrectly in it's mount.

The solution? Your call. I find it much easier to just file the corners of the motor can and endbell slightly. That let's you know how little we are talking about doesn't it? You could sand and profile the bushing but I find that a very tedious process. You have to make sure the bushings are sitting exactly where they need to be and while trying to align it, can be a frustration you want to avoid.

Sanding the motor ends does not harm the motor and it gives me the results I want.
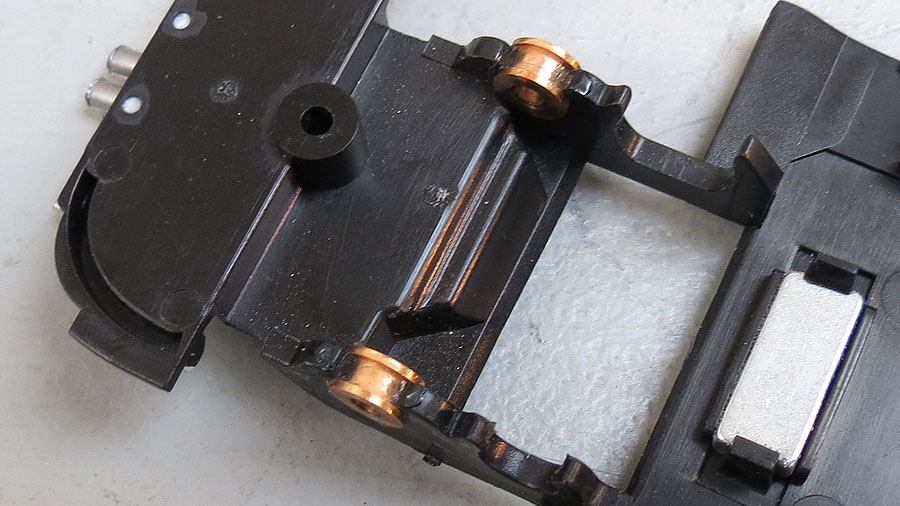
After this step I installed the bushings and aligned them according to the video and glued them in place with super glue. I concur with the video and feel gluing these in permanently is a safe idea. Properly lubricated it should last you as long as you own the car, so once you install a high quality bushing then there should not be a reason for you to ever remove it.
Now that our bushings are glued in place we are ready to install our axle to check for length and to set up the gearing.
***I always buy the longest 54 MM axle. They are easily trimmed to suit. Remember it's easy to take away, a lot harder to add on.***
For this model I did not have to trim because I wanted the excess showing through.
Install one wheel and set it to the depth you want. In MOST cases you want the axle end flush with the hub center. When you are using inserts for the wheels, you want to make sure the insert can be installed flush and having excess axle material sticking out could prevent this.
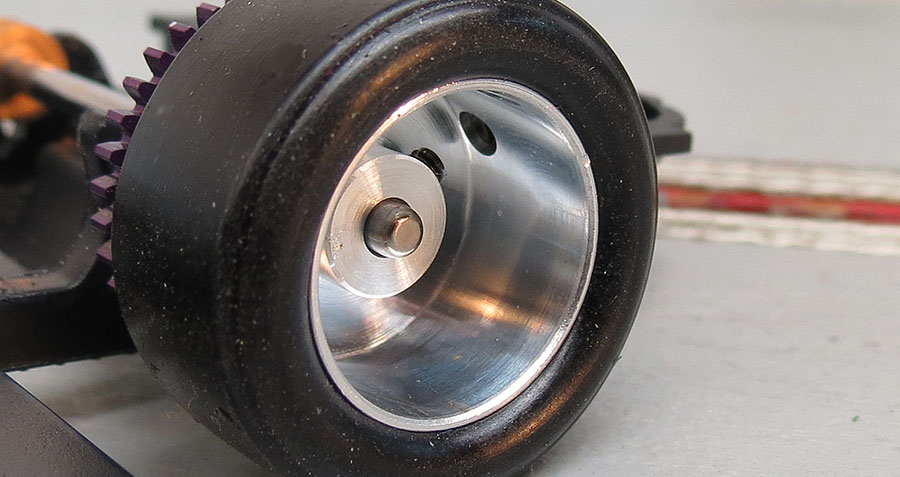
HOWEVER in this particular case I want a little of the axle sticking out. It's just a personal preference because I think it will look better using the insert from the original wheel.
![]()
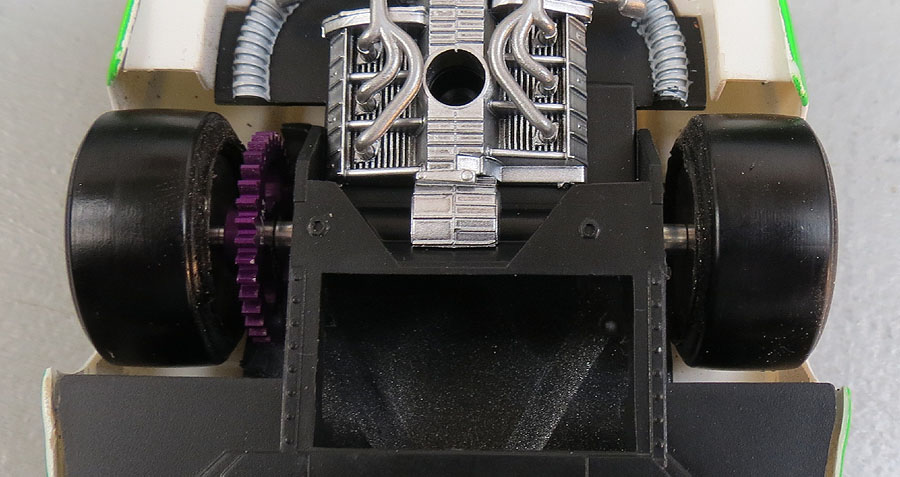
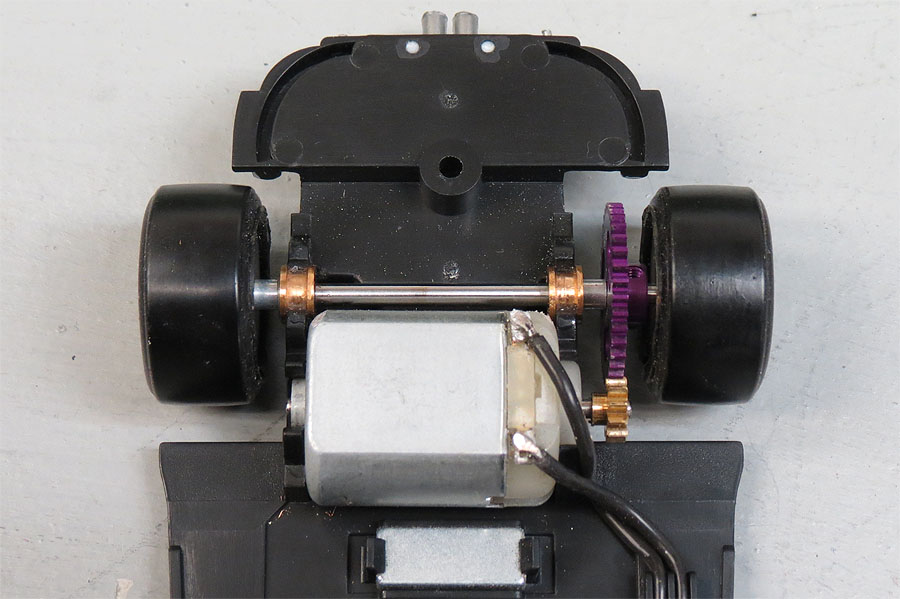
Now is when these little spacers we linked to earlier come in VERY handy. Once I set the first wheel I slip on the gear with the hub (boss) side towards the wheel. This allows the gear and then the pinion to clear the tire.
I then test fit the assembly to make sure it is where I need it to be. This is a trial and error process. Just keep stacking/swapping spacers until you have the distance set correctly for each side. Remember the gear and opposite wheel is what sets your side to side free-play. The wheel outside the gear can be adjusted without a shim.
![]()
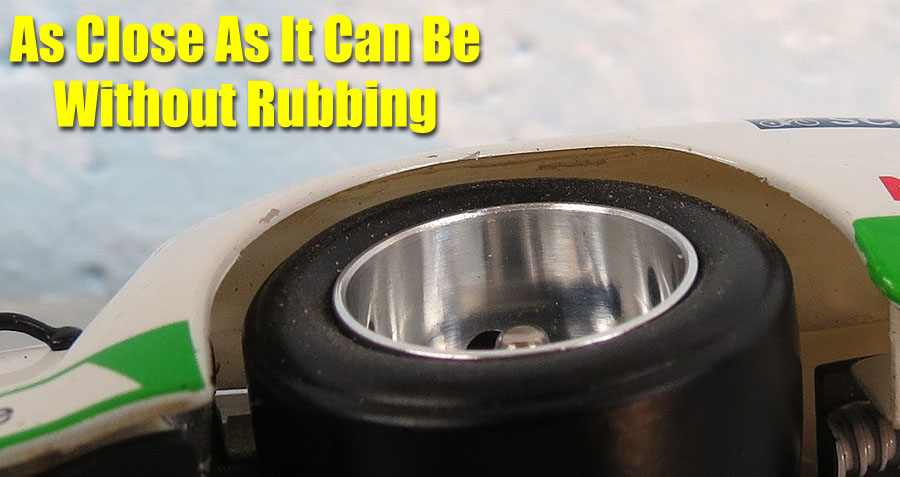
This is how close you can set it without the tire rubbing the body. In my opinion the body sets a little too low and I will put a small shim in between the body post and chassis during final assembly. if you like it this way, you might still have rubbing but remember you will be sanding/truing these tires and during that process you will reduce the diameter enough to clear the body work.
Pinion Gear Install
Before we can install a new pinion, we need to remove the old one. Here is where a good puller is worth the investment.
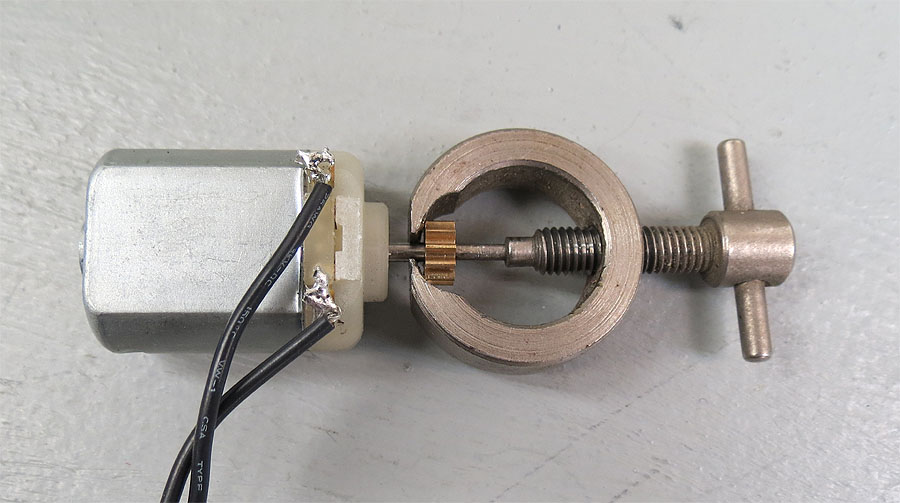
When you install the lightweight NSR pinion, do not press the pinion too far onto the shaft. The small diameter should you see should not touch the endbell. Doing so will make it VERY difficult to remove.
Why mount it like this? Because I want as much of the pinion bore to have contact with the motor shaft as possible for reliability.
Again this is trial and error. Start by installing the pinion to where it just seats onto the motor shaft. Test fit the motor and see how far you need to go. Keep test fitting until you have the pinion mated evenly with the spur gear.
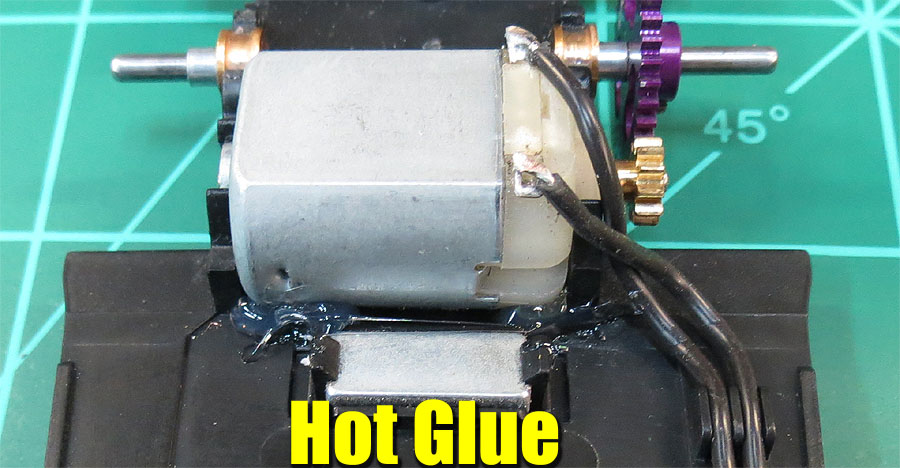
Once you have finished, you can now glue in the motor. I use just a little on each side. High temp hot glue will work fine and keeps the motor solid for a long time.
I cannot advise using any adhesive such as super glue on a motor. That will hold it, but removing it if you ever need to is going to be a lot harder and you may end up damaging the chassis doing so. You could drill the chassis and motor and install screws. But hot glue does the job for me and is much easier.