Page 1 of 4
testing, testing...

Posted:
Sat Feb 15, 2014 3:03 pmby bkrownd
For proxy development I need a test loop appropriate to that task. I had to buy the router and appropriate bits of hardware and woodware. ($$$)
I'm thinking to embed bits of Ninco track into the edge so I can expand that way if desired, and just stick a rally loop on that if I don't.
need to search for foil now...
Re: testing, testing...
Posted:
Sat Feb 15, 2014 9:51 pmby dreinecke
Are you going to seal both sides of the wood? I recall another member years ago in HI that had issues with the wood swelling up?
Either way, glad you are building one!
Re: testing, testing...
Posted:
Sun Feb 16, 2014 1:18 amby bkrownd
Yes, paint. It isn't among the more vulnerable things we own. I lose much more valuable stuff to the humidity and fungus every year, but we aren't in a really bad area. MDF will sag without an extensive backing structure, though.
Re: testing, testing...
Posted:
Sun Feb 16, 2014 4:38 pmby bkrownd
I should have 3 4x6 panels built by this evening and can start drawing on them. Now, where did I put that giant "french curve"?
I also need to look into paint. I was wondering if green felt or "velvet" might be fun for "grass", or just a PITA?
I'm wondering if this thing might be able to do double duty as a giant gaming table, for the Dungeons & Dragons events, the sailing ship battles, and such. Each panel is larger than any table we currently have. I'm wishing we didn't buy that fancy mango wood table the cats have claimed as a jungle gym and catfight arena.
Re: testing, testing...
Posted:
Sun Feb 16, 2014 10:04 pmby dreinecke
Catfight arena? I'll bet you could make money on Pay-per-View...
I'd do some felt for the grass - that should work pretty well I'd think. Would also work for your marathon D&D events.
Re: testing, testing...
Posted:
Mon Feb 17, 2014 2:36 pmby bkrownd
I need to think about a way to align the panels when assembling everything. It could be challenging to get a level surface along the 2 edges where panels meet every time they're put together. I should make sure the slot only crosses each edge in 2 places to make that easier to align.
Re: testing, testing...
Posted:
Mon Feb 17, 2014 4:21 pmby WB2
Mold makers' alignment pins would be the cat's meow for keeping surfaces aligned. Wood pins wear after a while or swell from moisture.
See:
http://www.009.cd2.com/members/how_to/alignment.htm .
Poor man's way:
http://railwaybobsmodulebuildingtips.bl ... bolts.html .
Re: testing, testing...
Posted:
Mon Feb 17, 2014 4:45 pmby bkrownd
Thanks for the links
Re: testing, testing...
Posted:
Sat Feb 22, 2014 11:08 pmby bkrownd
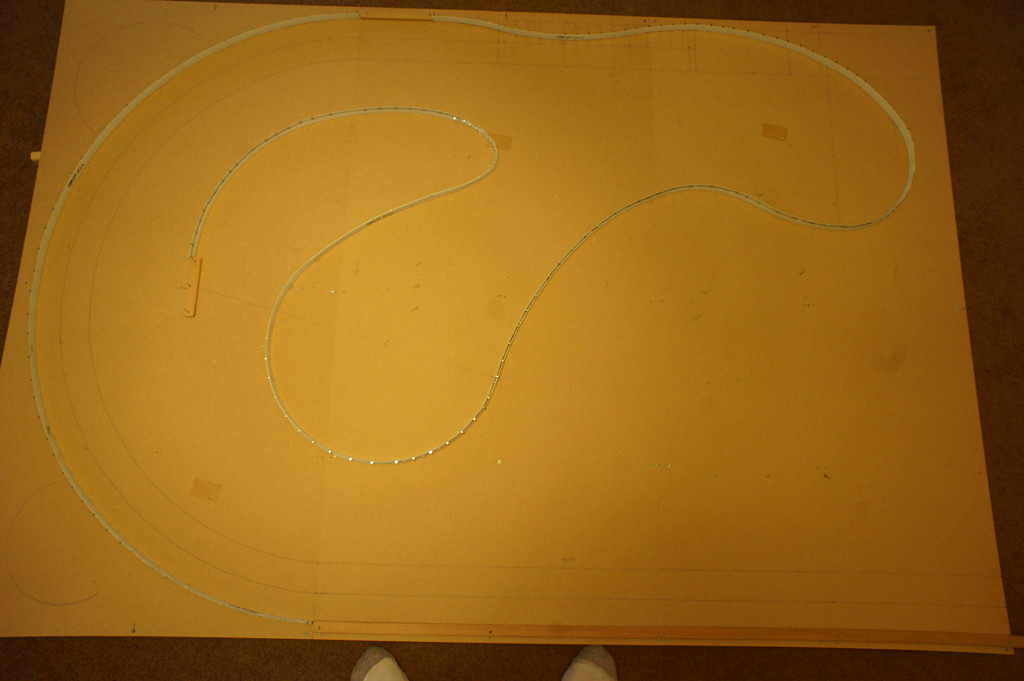
I started drawing something freehand but then switched to CAD, and after some noodling I have the following possible layout for the first 4x6 panel
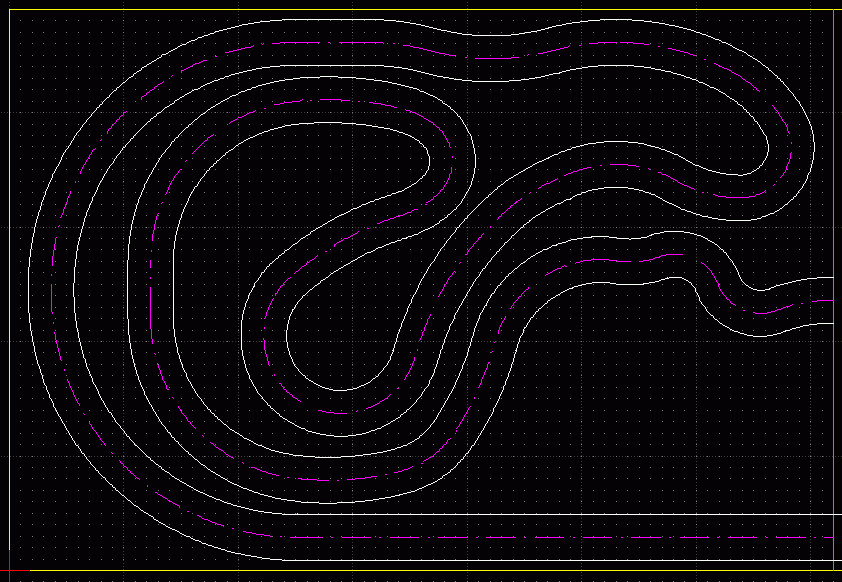
The straight along the bottom edge runs along all 3 panels, with the big curve at each end. This panel has a variety of curves, with a minimum slot radius of 4 inches. The middle 4x6 panel will have more of a large simple S shape, and I haven't decided on what to put in the last 4x6 panel yet.
My copper tape arrived, but I still need paint.
Re: testing, testing...
Posted:
Mon Feb 24, 2014 3:19 pmby bkrownd
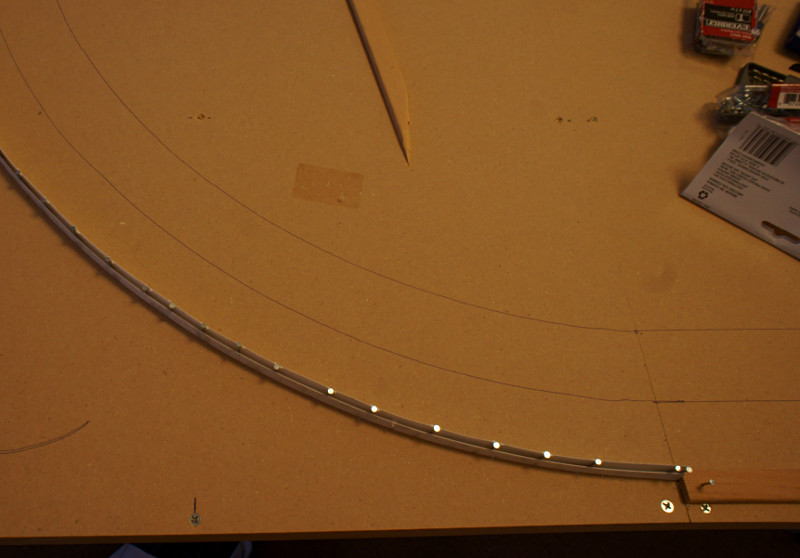
I've (unintentionally) spent the entire weekend on design and layout. I was going to cut in sections, but after laying out and aligning the first part of the routing guide fence I decided it would be much smoother if I did the entire panel at once even though it's consuming my entire weekend. The plastic strip I'm using can just (barely) do the 4" slot radius hairpins smoothly. (5.75 inch guide fence radius) Lots of nails.
I'm trying to decide what depth I should set the slot at - 7, 8 or 9mm? I was expecting to do 7mm, but after more looking around the interwebs I'm seeing 9-10mm suggested, which seems a lot in 12.5mm thick material. I may need to add more backstructure
Re: testing, testing...
Posted:
Sat Mar 01, 2014 6:35 pmby bkrownd
I didn't make any progress during the work week. As I get back to it I feel the need to make faster progress. As much as CAD helped design the tight sections smoothly, it was tedious to lay out - placing all the centers and marking all the curves - so I decided to freehand the rest of this panel, and entirely freehand the less compact configuration of the middle panel.
Re: testing, testing...
Posted:
Sun Mar 02, 2014 4:46 pmby bkrownd
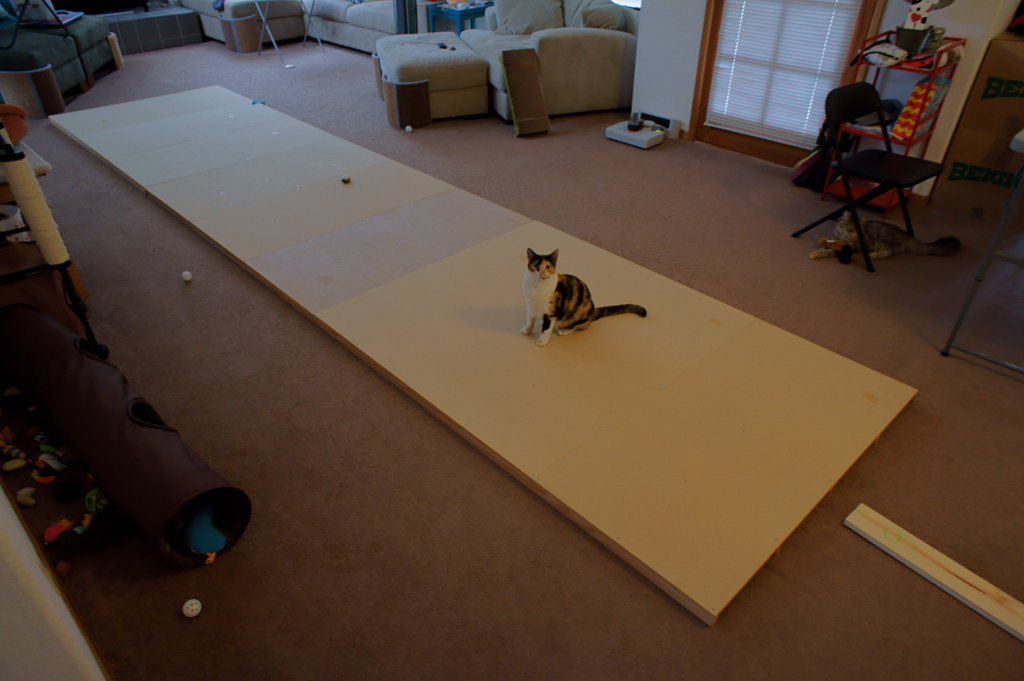
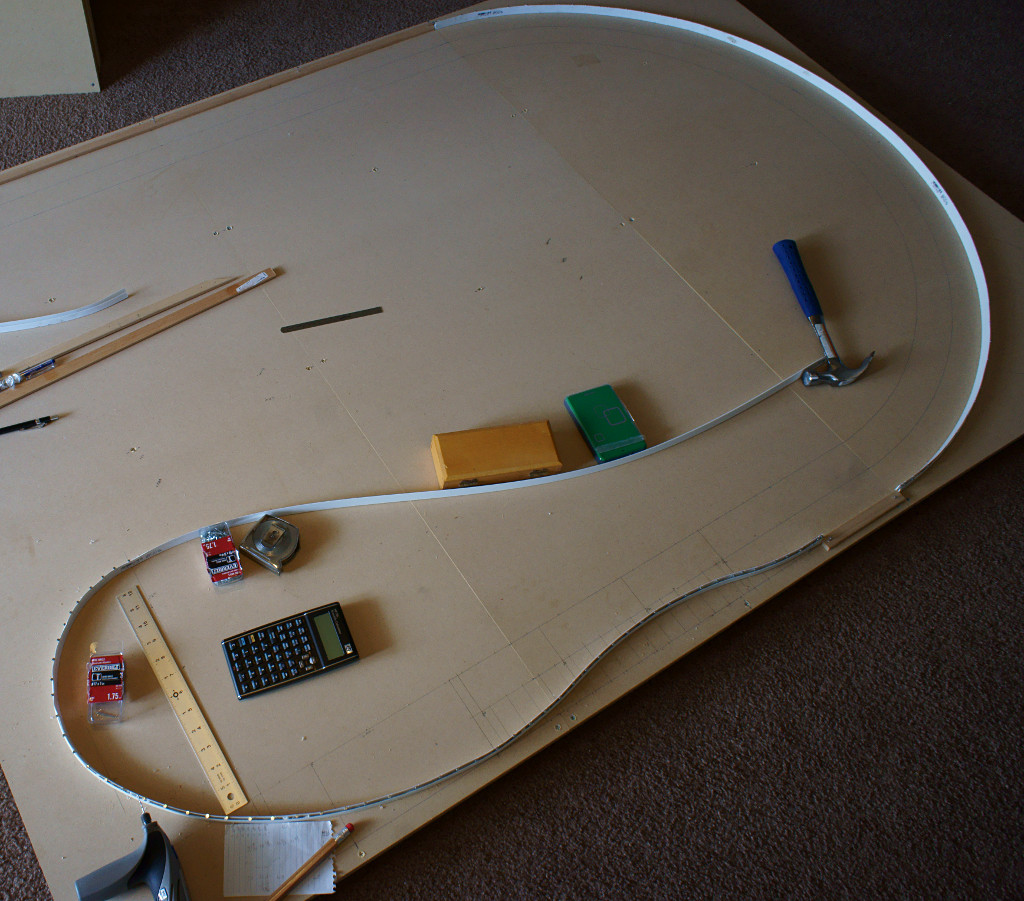
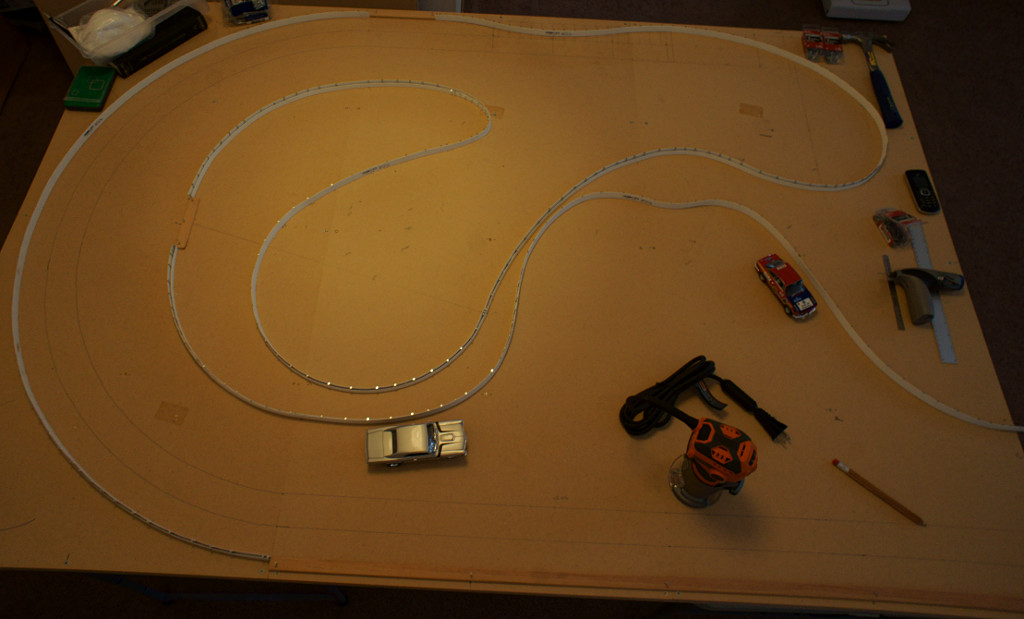
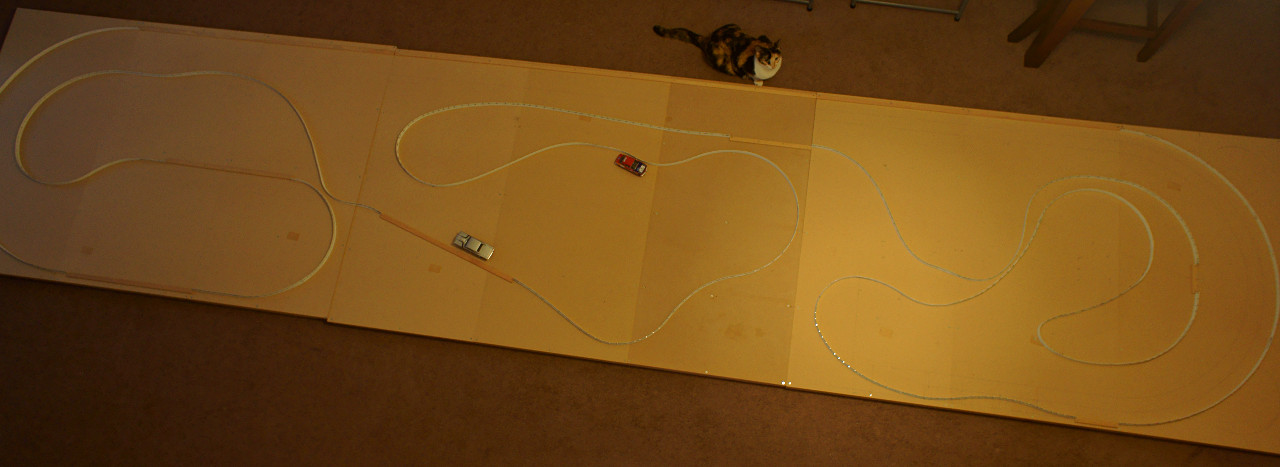
Panels 2 and 3 laid out
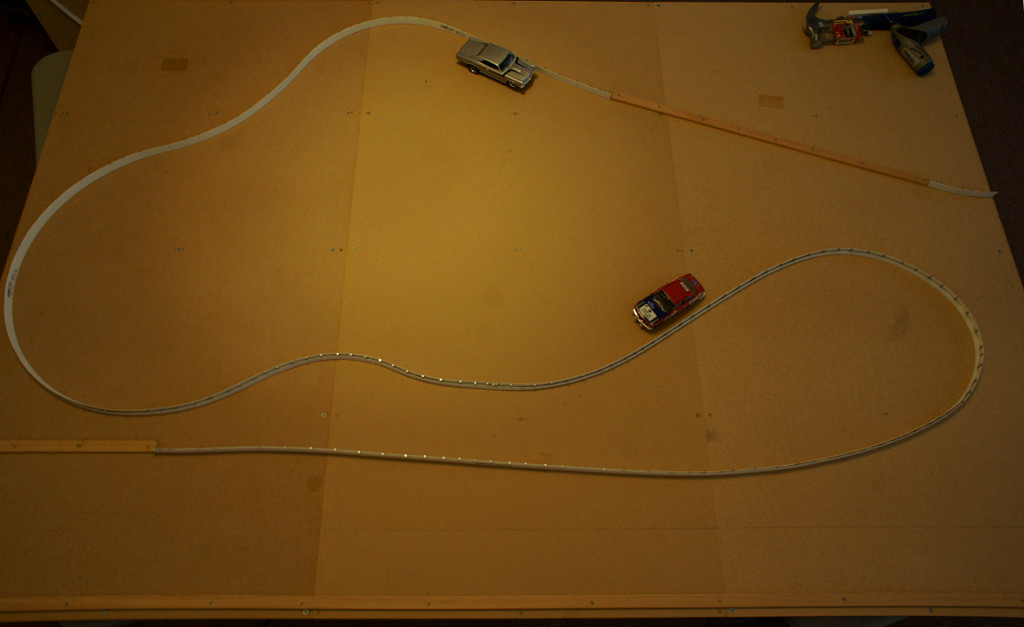
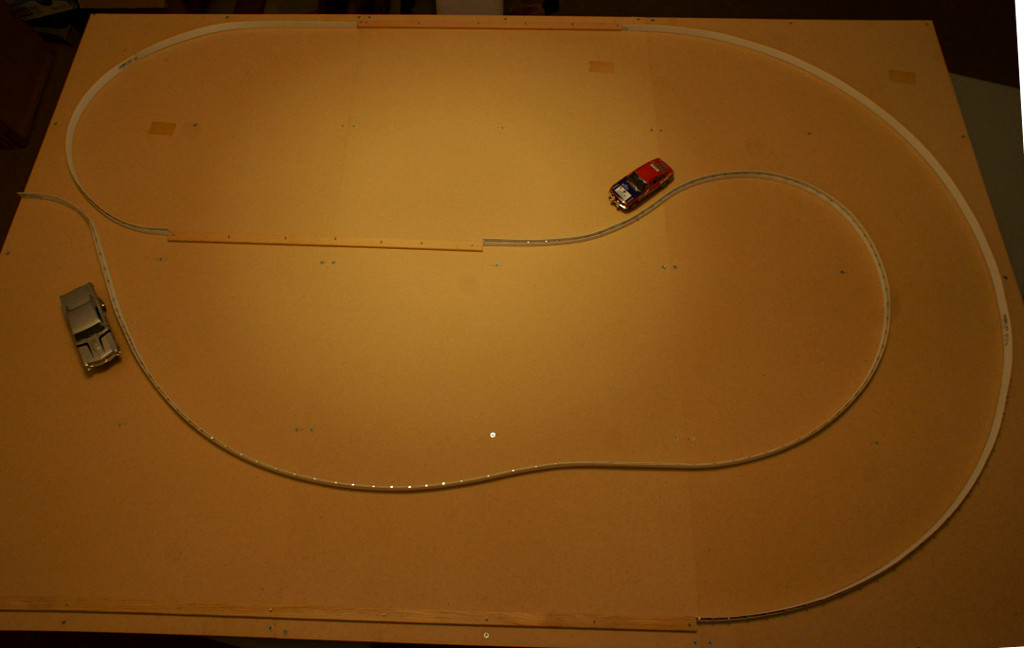
All 3 together for the first time: (the router will run on the inside of the guide pattern, where the cars are for scale)
Re: testing, testing...
Posted:
Sun Mar 02, 2014 10:46 pmby dreinecke
Really looks like you're getting there! So, you're routing it all at once?
BTW - your track manager says get back to work and stop posting pictures...
Re: testing, testing...
Posted:
Mon Mar 03, 2014 1:57 pmby bkrownd
Hopefully today. A plumbing disaster set me back a couple of hours.
I'll have to do this on the patio. Router says only 1/8" depth per pass, so it will take 2 passes. I may start using the second bit halfway through.
Re: testing, testing...
Posted:
Mon Mar 03, 2014 4:32 pmby bkrownd
LOL - the router spec is 20,000-30,000 RPM. The speed control dial on the front is numbered 1-7. ....um...OK...
Unfortunately the fine print on the bits I have says max RPM 24,000, and the fine print on the router says "never use bits rated less than 30,000 RPM"
went out and bought new bit....