Guide tongue design

In honor of one of the best slot car builders in our hobby.
Share your chassis & scratchbuilt artwork here.

Guide tongue design

Postby HomeRacingWorld » Wed Nov 12, 2014 12:22 pm

Ok, this is NOT your high end commercial track design. BUT it works for the smaller shaft guides we have available. This works for Pro Motor, Devis, that have long shafts designed to be trimmed OR the Slot.it wood track guide (CH07) with the shorter shaft.

Image

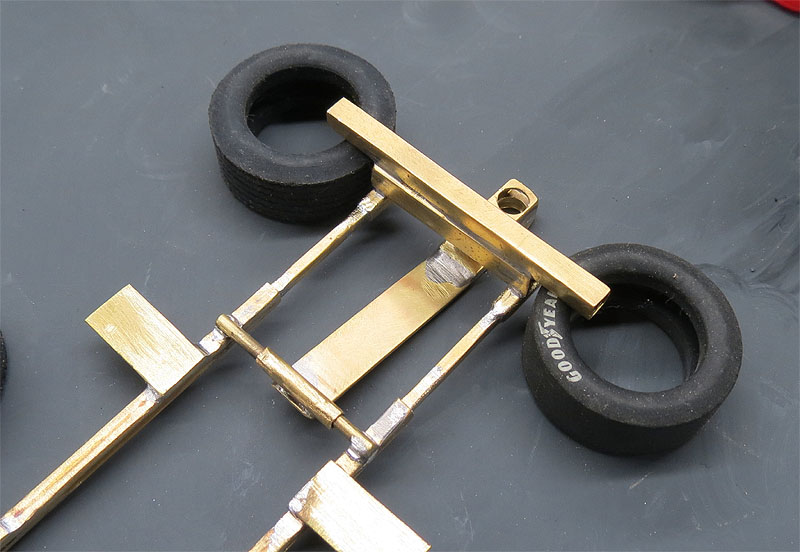
I used to measure and cut tubing but found this a quicker and easier solution. I stack a small section of 3/16th Square tubing on the brass strip and solder.

Image

Notice how messy it is. That's ok because you will have to sand/contour it to fit in the guide.

Image

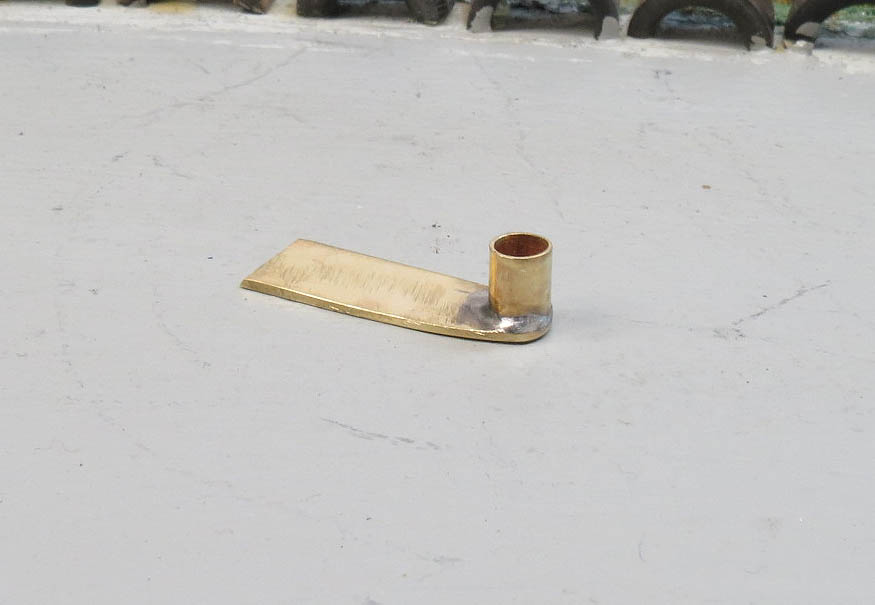
Next drill your hole. Since you are a builder you have calipers and drill bits. Find the one that matches your guide post diameter.

Image

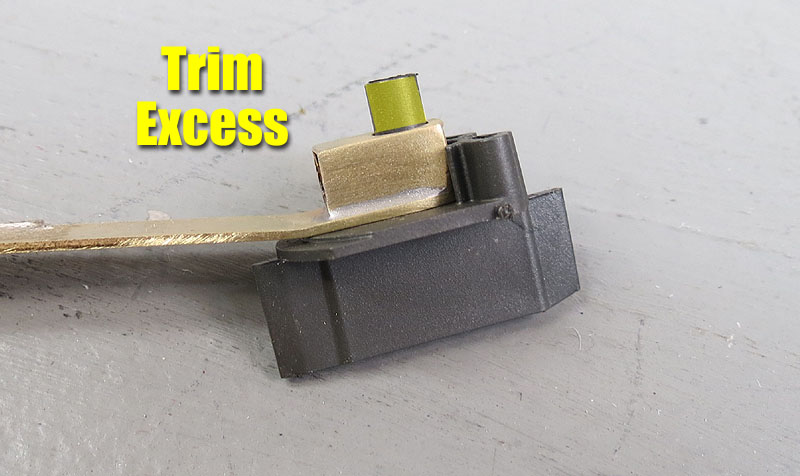
Trim the post if it needs it.

Image

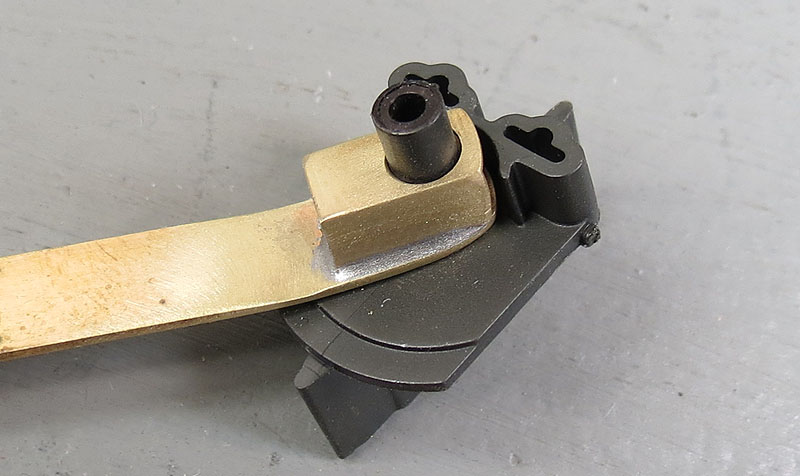
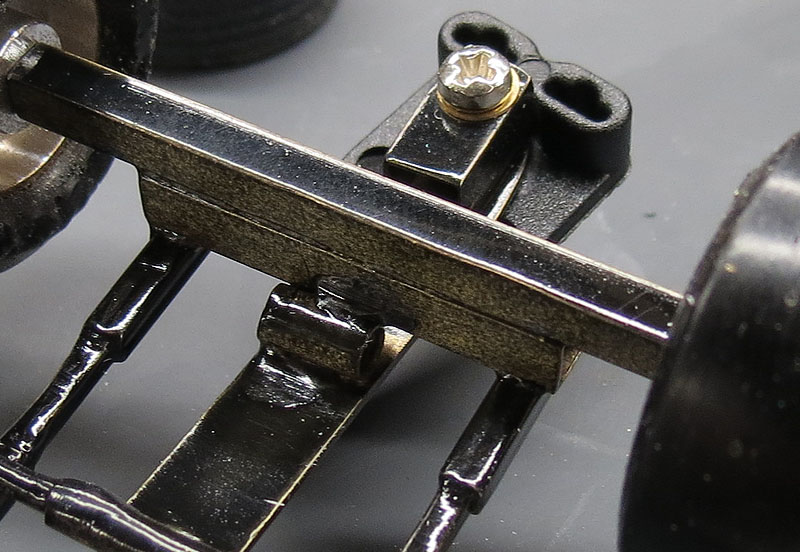
You can see it has been sanded/contoured to fit cleanly.

Hope it helps some of you.
User avatar
HomeRacingWorld
HRW Janitor
 
Posts: 15569
Joined: Wed Aug 08, 2012 2:05 pm
Location: HRW Skunkworks

Re: Guide tongue design

Postby btaylor » Wed Nov 12, 2014 12:26 pm

Great Design Harry, Is The other end of that a drop arm arrangement?, seems like it would be great for that type set-up.
Bob
User avatar
btaylor
Uncle Bob
 
Posts: 4519
Joined: Mon Mar 24, 2014 3:50 am

Re: Guide tongue design

Postby btaylor » Wed Nov 12, 2014 12:55 pm

And what would THAT be pray tell? :lol:

Bob
User avatar
btaylor
Uncle Bob
 
Posts: 4519
Joined: Mon Mar 24, 2014 3:50 am

Re: Guide tongue design

Postby HomeRacingWorld » Wed Nov 12, 2014 1:09 pm

Yes, just a simple "temp" drop arm.

Image

After I install the front wheel assembly, I install the guide. I place the car on the setup block, make sure the guide is seated and lined up center, then solder it in place.

Image

I then add a little scrap section of tubing (anything really) and solder it to increase the strength and reduce flex.
User avatar
HomeRacingWorld
HRW Janitor
 
Posts: 15569
Joined: Wed Aug 08, 2012 2:05 pm
Location: HRW Skunkworks

Re: Guide tongue design

Postby btaylor » Wed Nov 12, 2014 1:19 pm

Thats a cool set up Harry! those of us that like a small torch,can pre assemble that unit without heating up everything else.
Put me down as another thief of this idea please.
Bob
User avatar
btaylor
Uncle Bob
 
Posts: 4519
Joined: Mon Mar 24, 2014 3:50 am

Re: Guide tongue design

Postby HomeRacingWorld » Wed Nov 12, 2014 2:05 pm

Great, steal away!

HINT...take a alligator clip, one for each side. Place them on the frame before the front axle bulkhead. They act as heat sinks and help keep it from coming loose.

Image

I do this BEFORE I mount the mounting plates. When I mount the plates, I use the clips on the other side.

Hope this helps.
User avatar
HomeRacingWorld
HRW Janitor
 
Posts: 15569
Joined: Wed Aug 08, 2012 2:05 pm
Location: HRW Skunkworks

Re: Guide tongue design

Postby Retro Racer 44 » Wed Nov 12, 2014 4:23 pm

A slight variation to the guide hole is to drill a 3/16 hole through the square tubing, cut across the middle of the hole and then place a short piece of 3/16 tubing against it and solder it. This way there is very little filing to do as the curved face of the tubing is against the front of the guide. You could do what Harry has done only in the middle of the strip, cut it through and solder a tube to each and you could make two at once.

D3D guides or SCX Pro are a good fit inside 3/16 tubing. There are probably others out there that fit it also.
Last edited by Retro Racer 44 on Wed Nov 12, 2014 7:59 pm, edited 1 time in total.
Retro Racer 44
HRW SlotCar Veteran!
 
Posts: 1385
Joined: Mon Nov 18, 2013 4:37 pm
Location: Maple Ridge, BC, Canada

Re: Guide tongue design

Postby HomeRacingWorld » Wed Nov 12, 2014 4:52 pm

You are right, do it how you are comfortable with. There are many ways. There is not much filing/sanding to me, using a Dremel and sanding barrel it's shaped in seconds.

Here is how I used to do it.

Image

BUT that is the cool thing about sharing our build techniques. We always learn from them. Like your method of using the Honeycomb block...priceless.
User avatar
HomeRacingWorld
HRW Janitor
 
Posts: 15569
Joined: Wed Aug 08, 2012 2:05 pm
Location: HRW Skunkworks

Re: Guide tongue design

Postby Ky.Slot Racer » Wed Nov 12, 2014 5:21 pm

You sell ? :dance:
Ky.Slot Racer
HRW Master Modeler
 
Posts: 918
Joined: Sun Feb 09, 2014 7:18 am

Re: Guide tongue design

Postby HomeRacingWorld » Wed Nov 12, 2014 5:31 pm

Sure! For you? $1.00

FIRM.
User avatar
HomeRacingWorld
HRW Janitor
 
Posts: 15569
Joined: Wed Aug 08, 2012 2:05 pm
Location: HRW Skunkworks

Re: Guide tongue design

Postby HRWJim » Wed Nov 12, 2014 7:30 pm

That is slick. This is what I have the most trouble with. Jim.
User avatar
HRWJim
HRW SlotCar Veteran!
 
Posts: 882
Joined: Mon Sep 03, 2012 8:03 pm

Re: Guide tongue design

Postby dreinecke » Wed Nov 12, 2014 10:06 pm

Nice work! If I ever have some time I may take up playing with brass...
User avatar
dreinecke
King of the Dum-Dums!
 
Posts: 7360
Joined: Wed Aug 08, 2012 5:39 pm
Location: Colorado

Re: Guide tongue design

Postby bill from nh » Thu Nov 13, 2014 8:15 am

One alternative to the 3/16" square tubing would be to solder a short length of 1/4" X .064 or .093 brass strip on top of the 1/4" X .032 brass strip. You could drill through either for the size of your guide posts. K&S sells both these sizes of brass & neither will bend easily.
bill from nh
HRW SlotCar Veteran!
 
Posts: 373
Joined: Wed Sep 05, 2012 5:32 pm
Location: New Boston, NH

Re: Guide tongue design

Postby noddaz » Thu Nov 13, 2014 2:27 pm

Pretty darn slick...
I will have to use this idea also...

Thank you!
Scott
User avatar
noddaz
HRW SlotCar Veteran!
 
Posts: 672
Joined: Wed Sep 19, 2012 6:21 am
Location: Arnold, Maryland


Return to The Marty Stanley Scratchbuilders Shop


Who is online

Users browsing this forum: No registered users and 3 guests

cron