Page 1 of 2
1/25 CHEVY TRUCK BUILD, PIC HEAVY

Posted:
Tue Feb 19, 2013 6:50 amby Beach Oval
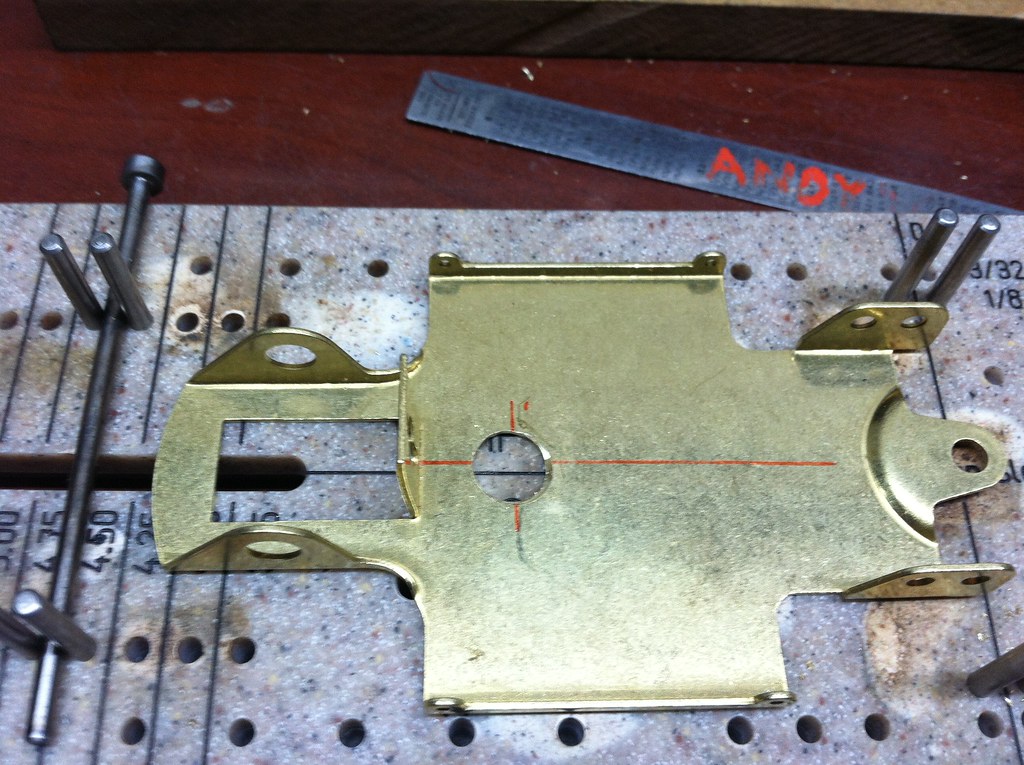
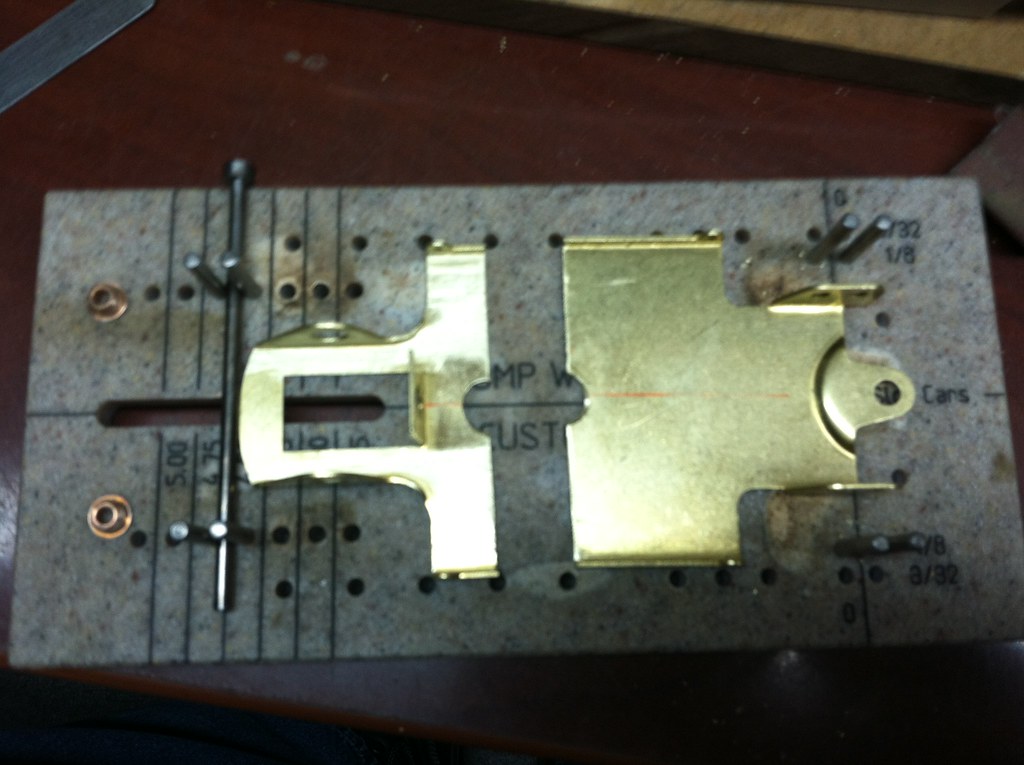
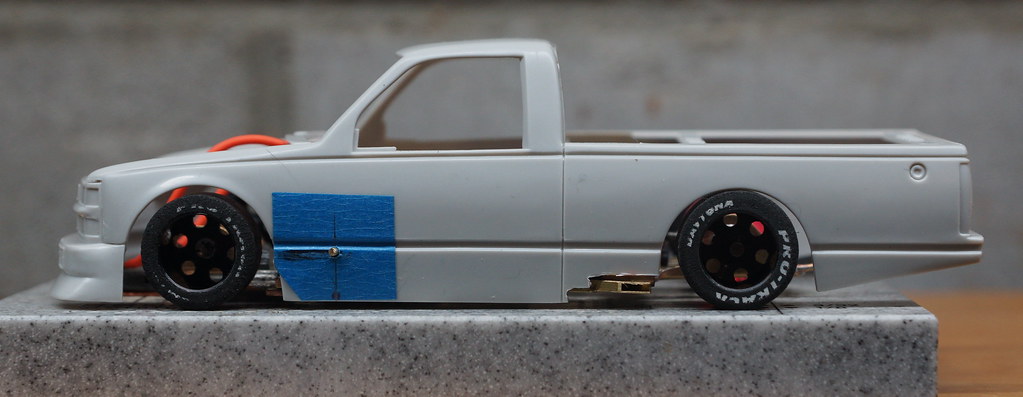
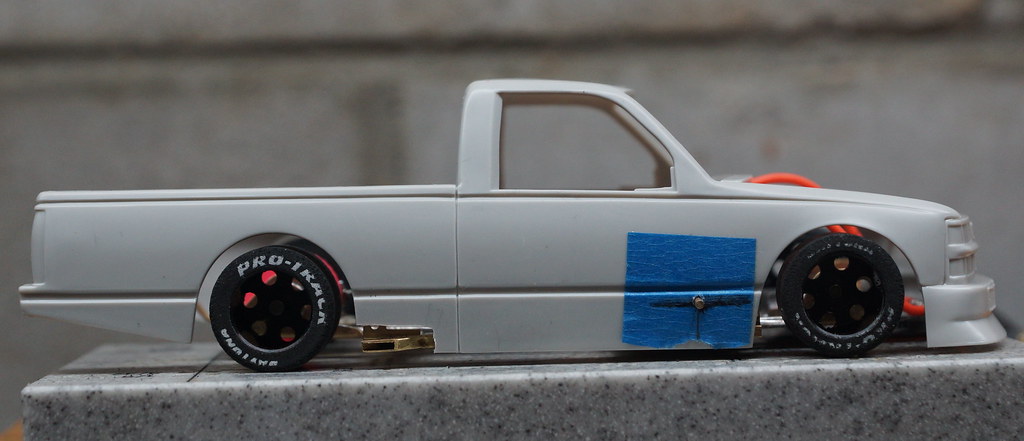
Starting a 1/25 CHEVY TRUCK on a 1 CUT WOMP CHASSIS.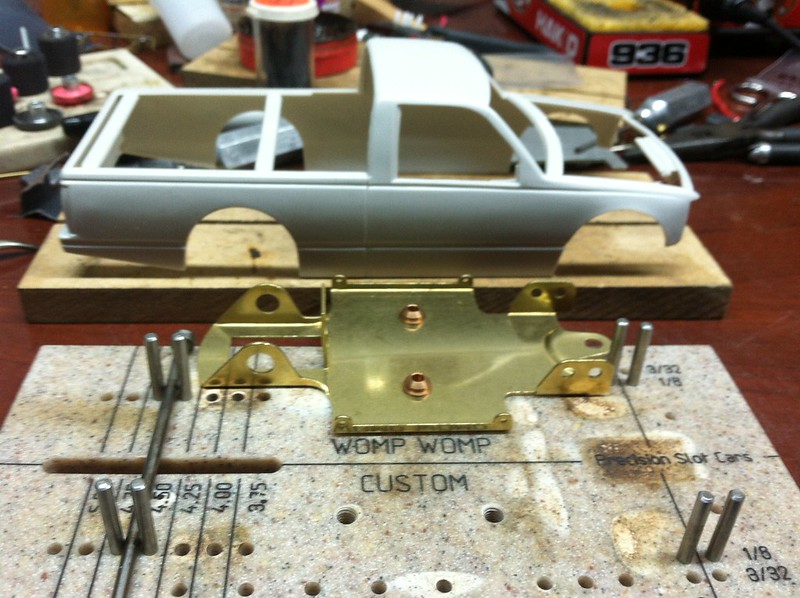 More pics as build progresses.
Re: 1/25 CHEVY TRUCK BUILD
Posted:
Tue Feb 19, 2013 9:11 amby proxieken
Is that an S-10 truck or full size?
I am curious to see how the parts fit in the truck bed. I want to build a truck someday but I keep thinking it will need a bed cover.
Re: 1/25 CHEVY TRUCK BUILD
Posted:
Tue Feb 19, 2013 12:53 pmby Beach Oval
It is a NASCAR TRUCK kit I am using, so it is a FULL SIZE PICK UP proxieken.
Nice bibb, maybe some flat styren sheet if you wanted to make and put a bed cover on.
Re: 1/25 CHEVY TRUCK BUILD
Posted:
Wed Feb 20, 2013 7:47 amby Vintage 1/24
I will be watching this - I am building a very similar chassis for my Ford Falcon - to run as a Street Stock at South Shore Speedway.
It looks like you are going to build this in that "Street Stock" spec - with bronze bushings in the "stock" Womp location and 1" tires?
That truck should be cool - maybe just run some wide black cloth duct tape as a tonneau cover or use really thin styrene - keep it as light as you can for a full size truck... The body already is pretty wide so that works well for the Womp pan.
I will look forward to see how this one plays out.
Re: 1/25 CHEVY TRUCK BUILD
Posted:
Wed Feb 20, 2013 8:47 amby Beach Oval
Yes Ron, same set up as a STREET STOCK CHASSIS. The BRONZE BUSHING is better than the standard PARMA.
Going to set TIRE HEIGHT up at .950 to get a little lower.
MOTOR will be a PARMA SEALED 16D DEATHSTAR with a ARP 8 TOOTH ANGLED PINION and a PINK PARMA 35 CROWN.
We use to run a Truck class, MOTOR, TIRE and GEAR RULE. Was some of the best Racing we had. Plenty of BANGING and being a little TOP HEAVY, you had to DRIVE the Truck.
I have 2 already from years past, but my Building has become CLEANER and a little better since then. Since I have Kits and all parts needed, what the hell, I was going to do another STREET STOCK, but how many of those do I need? Guess you can never have enough!
Re: 1/25 CHEVY TRUCK BUILD
Posted:
Wed Feb 20, 2013 6:58 pmby SpeedyNH
nice. but an 8t angled pinion for inline? (assume 48p)
Re: 1/25 CHEVY TRUCK BUILD
Posted:
Thu Feb 21, 2013 7:26 amby Beach Oval
Hi Speedy,
Thanks, Yes, I am using 48p.
Re: 1/25 CHEVY TRUCK BUILD
Posted:
Thu Feb 21, 2013 3:31 pmby Vintage 1/24
BeachOval-
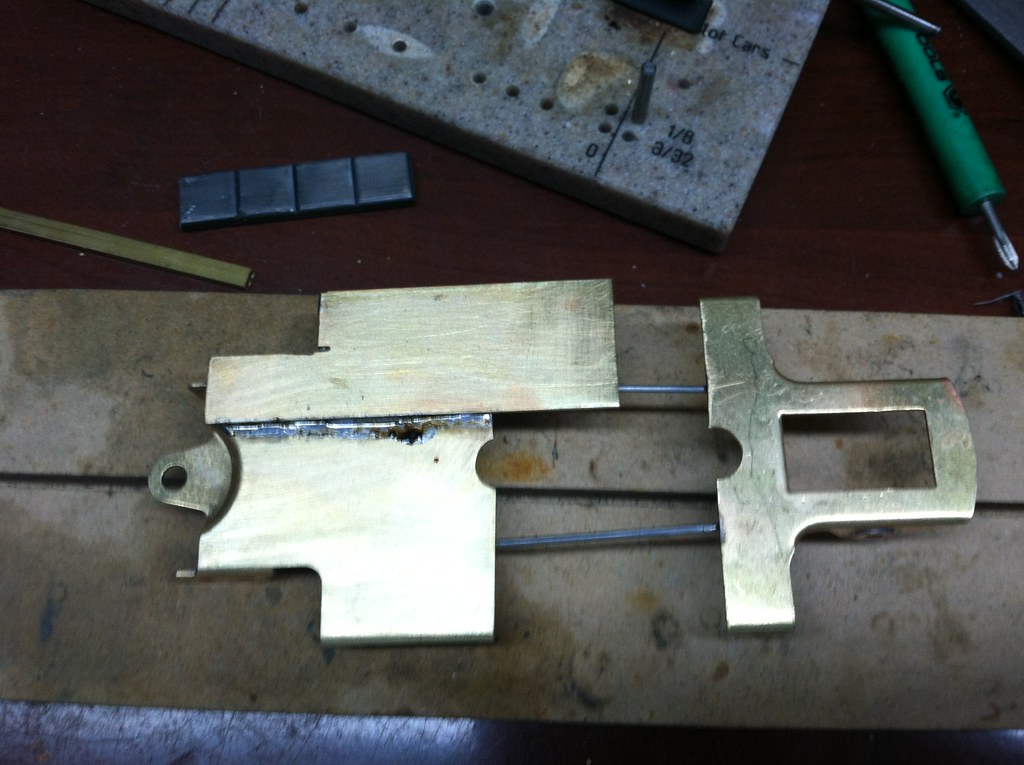
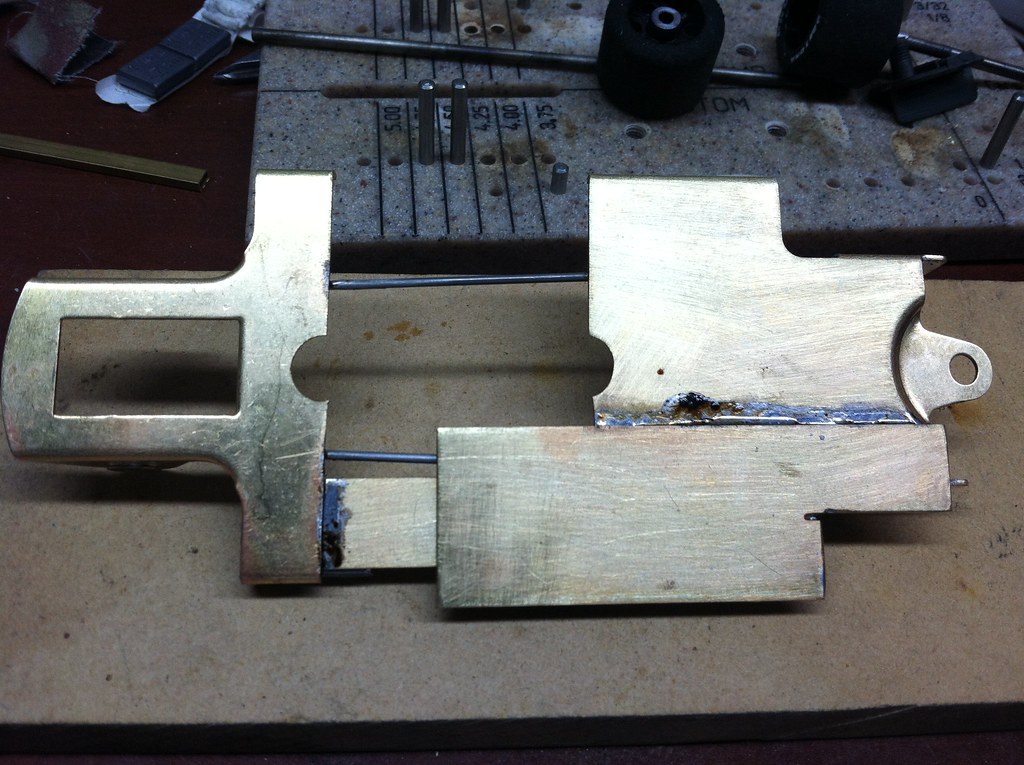
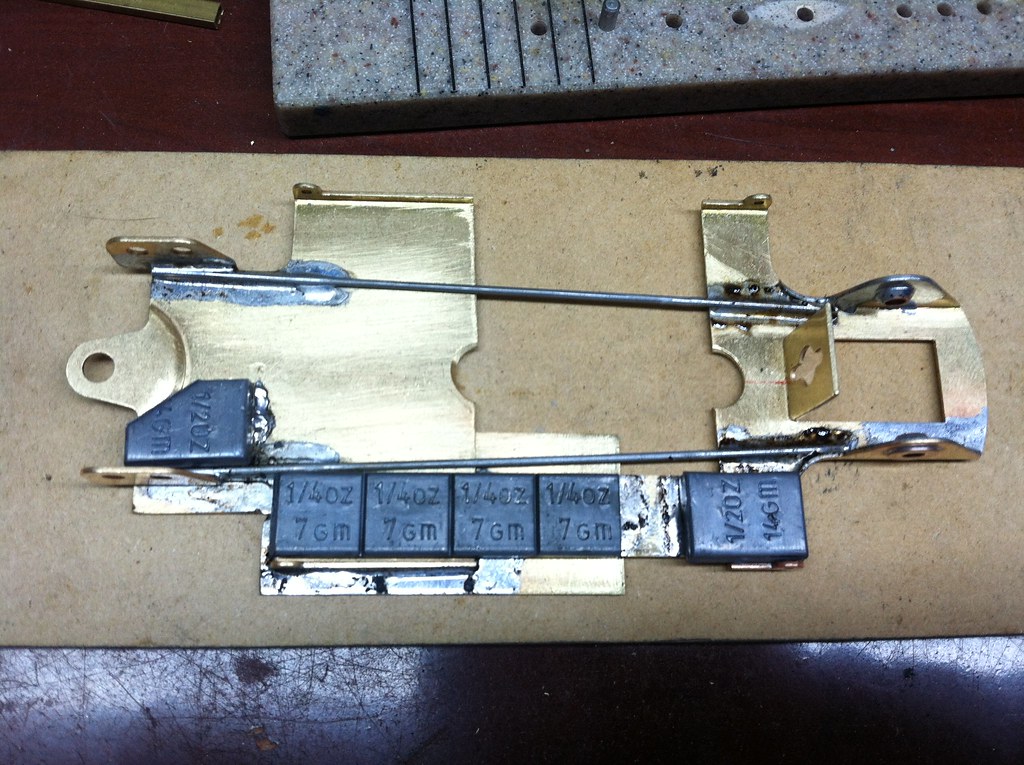
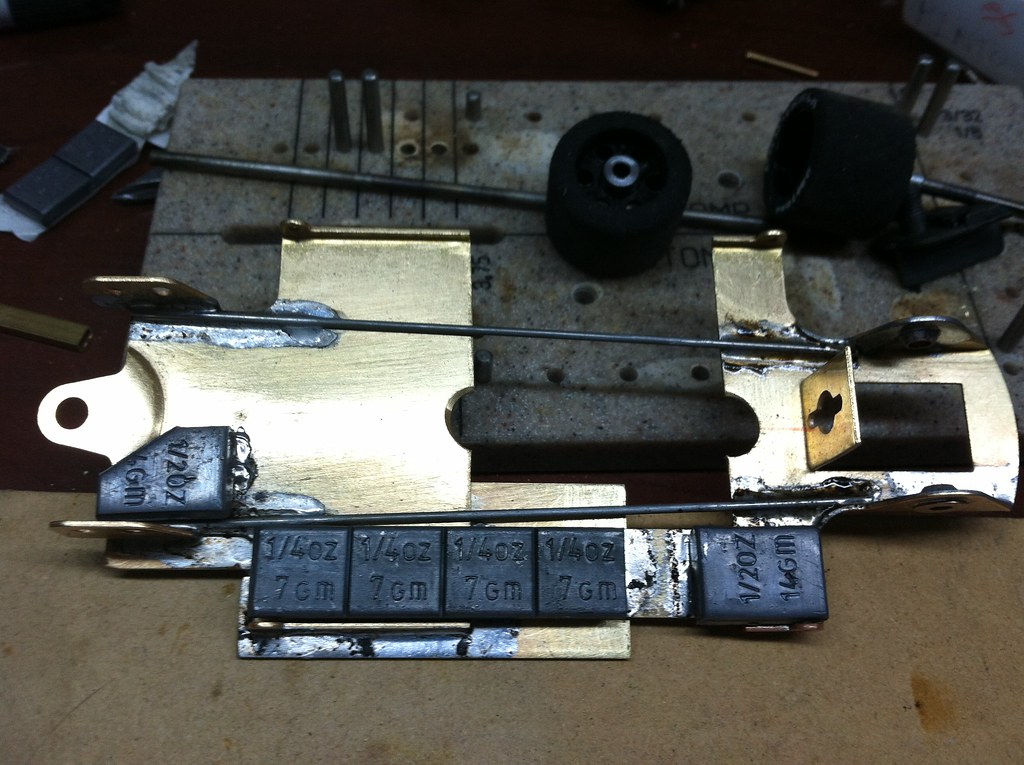
That sure does look like a lot of weight!
Are you buying the .950s "off the rack" somewhere or are you cutting down 27mm ProTracks?
I figure that angled pinion is a Beach Oval Corporate secret or something - but I like the plate on the bottom and the weighted lever plate - looks like a good design.
- Vintage 1/24
Re: 1/25 CHEVY TRUCK BUILD
Posted:
Thu Feb 21, 2013 5:04 pmby Foamy
If you have a car with the motor not on the exact same line as the axle, an angled pinion will give you a quieter gear mesh. Noise is wasted power after all. . .
Re: 1/25 CHEVY TRUCK BUILD
Posted:
Thu Feb 21, 2013 6:09 pmby Beach Oval
Ron, I'll probably cut down some 27mm so I can use Wheel Inserts.
The Angled Pinion is not a secret, had a hard time converting @ $6.00 a Gear. Worth every cent as it is a much better Gear Mesh.
And as Foamy said; "an angled pinion will give you a quieter gear mesh. Noise is wasted power after all. . ."
Did you wonder why some of us have Cars that run Quiet? That's the TICKET.
Leadfinger, your welcome. Glad your enjoying the build. Pics are a great guide line to help others and maybe bring out new ideas.
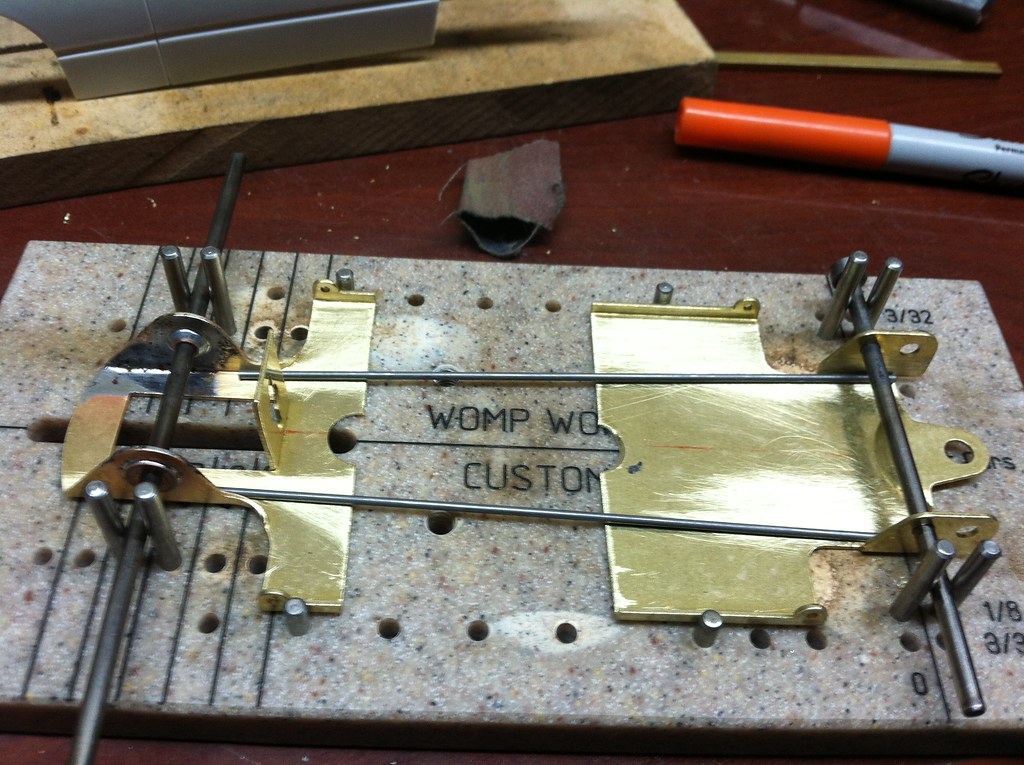
Hopefully I'll get in the DUNGEON tomorrow to get some more work done. Want to add some more Brass on side of Chassis and then it will be Mounting the Body to Chassis and a quick mock up of Assembly.
Re: 1/25 CHEVY TRUCK BUILD
Posted:
Fri Feb 22, 2013 3:57 pmby Beach Oval
OK, Body is mounted! I have pics that I will post when I get my PC back from the shop.
Truck is coming a long very nicely.
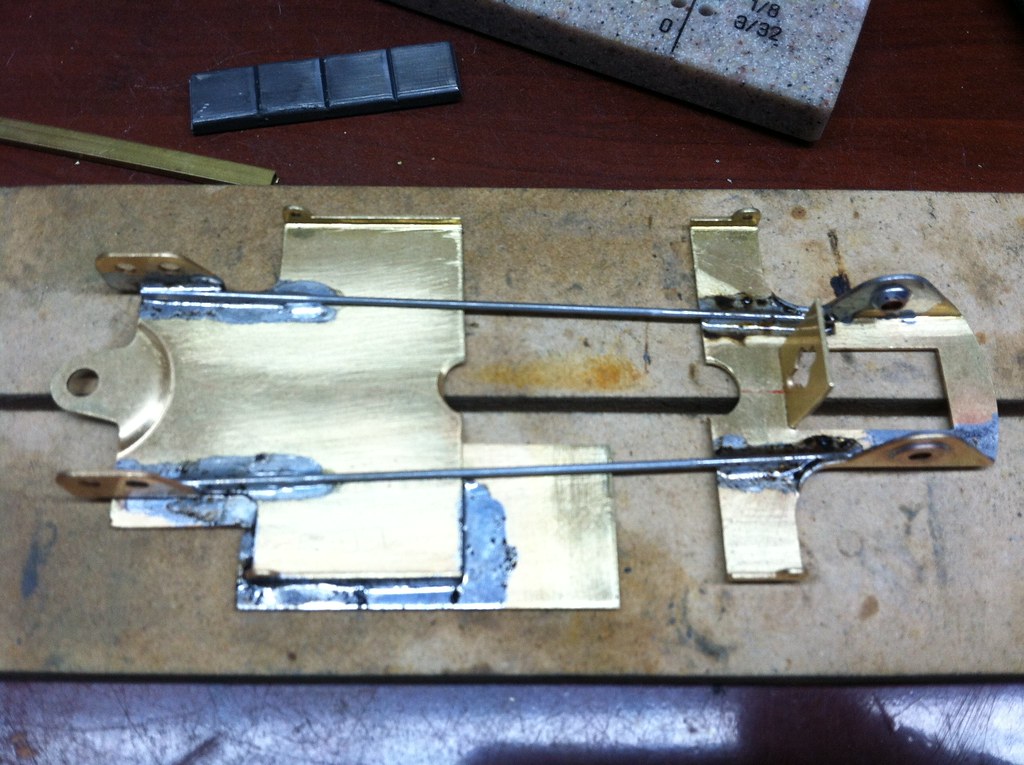
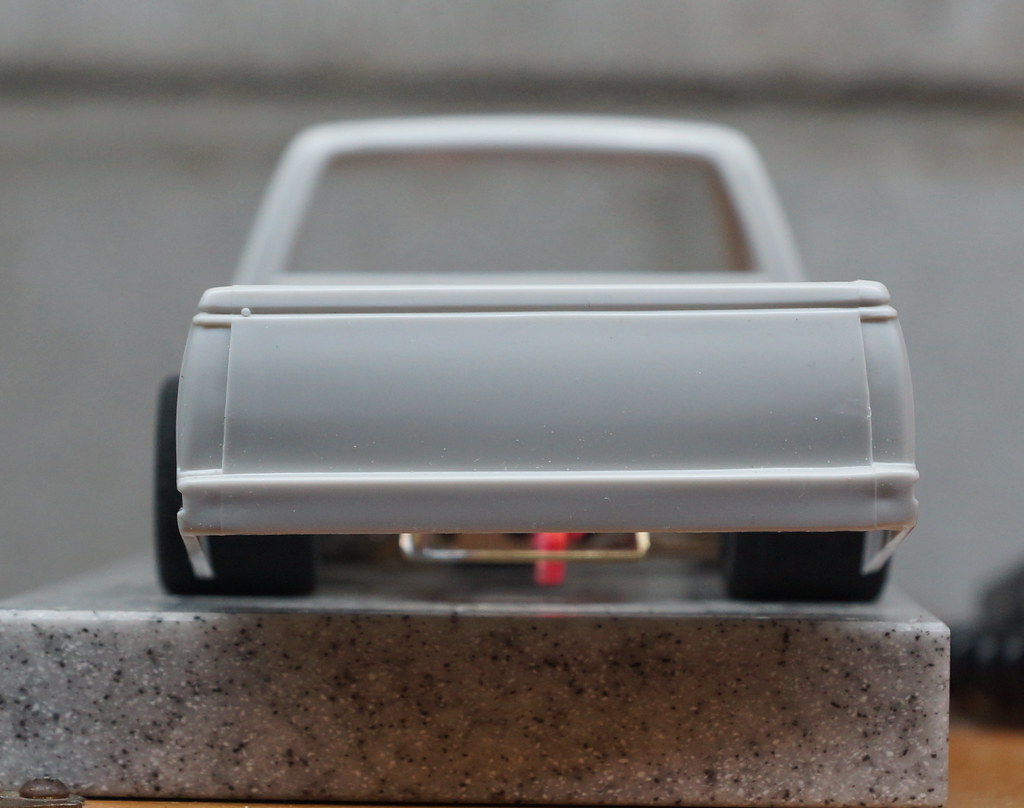
To help the side play for the body on the chassis, I put Brass Square Vent like tubing Soldered along the sides of the Chassis and then Bent the Rear Outward before the Rear Tires and they became the Exhaust Dumps.
Next will be Glueing the Body together and Painting and Decaling it up.
Re: 1/25 CHEVY TRUCK BUILD, PIC HEAVY
Posted:
Fri Mar 01, 2013 7:36 amby Vintage 1/24
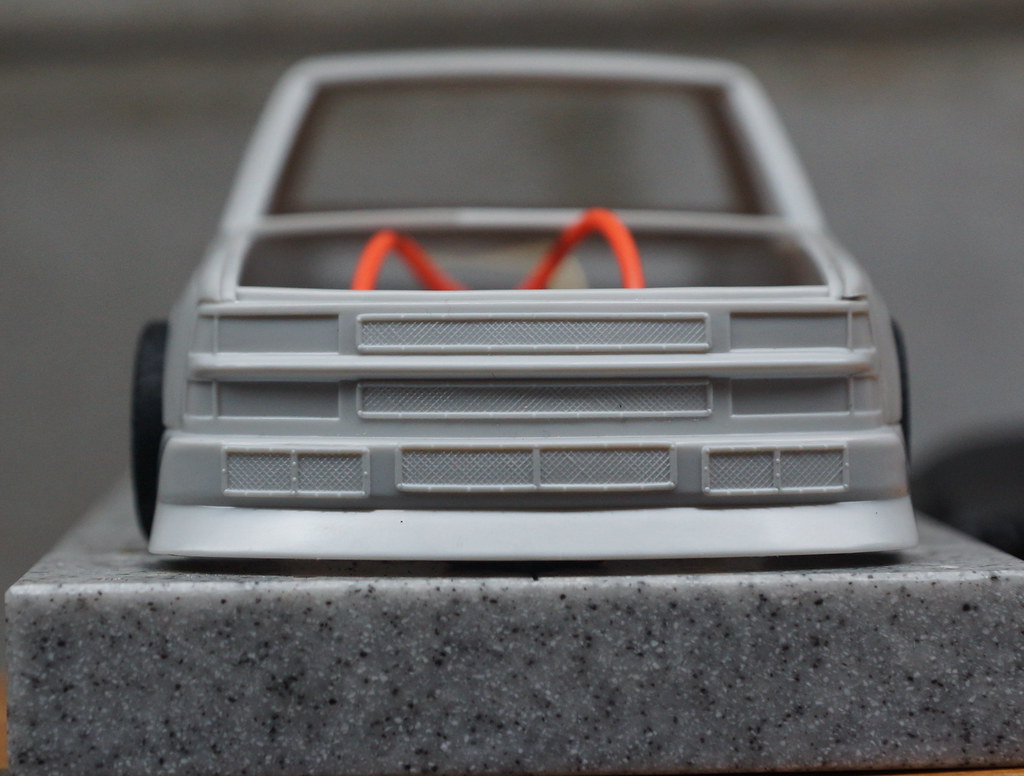
That truck body really works well! - Wide enough to handle the Womp Womp width with ease, and the front end encloses the guide completely and already has a spoiler - all sitting about 1/16" off the track - for a super clean look.
Would you race this in the Street Stock class at SSS or... ? I can see by the what is left of the sidewalls you have the tires turned down to meet the new SSS .940" minimum diameter limit (an odd number choice I think?).
It works so well I want to build one up - Really looks great - Make sure to show a pic after paint and decals...