

If there is a series of cars that have really impressed me in the last few years, it’s this one from Carrera. The DTM line of models are just beautifully done on the outside, and not much to do on the inside to get them how I prefer.
There more advanced approaches to tuning these, but this one works for me. I’m just a simple home racer. My goal is to get them as smooth as possible using most of the stock parts. With the investments I have made in tools for tuning, getting this car to perform to my standards is quite easy. So let’s get started shall we?
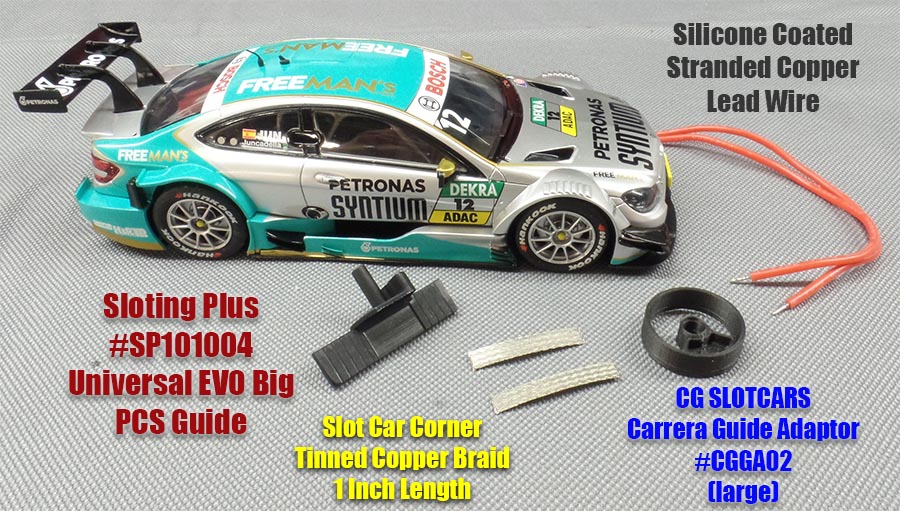
Here is the parts list I will use for this tuning. I am including links to the source for your convenience and reference.
I do own a tire machine. Mine is the Tire Razor. Just about any machine that allows the axles installed will work. You don’t need one, but these machines pay for themselves in a very short time. The amount of stock wheels I have “saved” by truing them has in turn saved me quite a bit of money in aluminum replacement wheels, axles, gears, etc.
The one change I make from stock is the guide system. I like getting the guide lower in order to create that ideal tripod effect. Other than this, the rest of the car is all stock aside from the rear tires.
CG Slotcars Large Guide Adaptor
Silicone Stranded Copper Lead Wire


My first step is to disassemble the car and remove the stock guide system and front axle assembly.

I install the front axle assembly into the Tire Razor and true the wheels first.
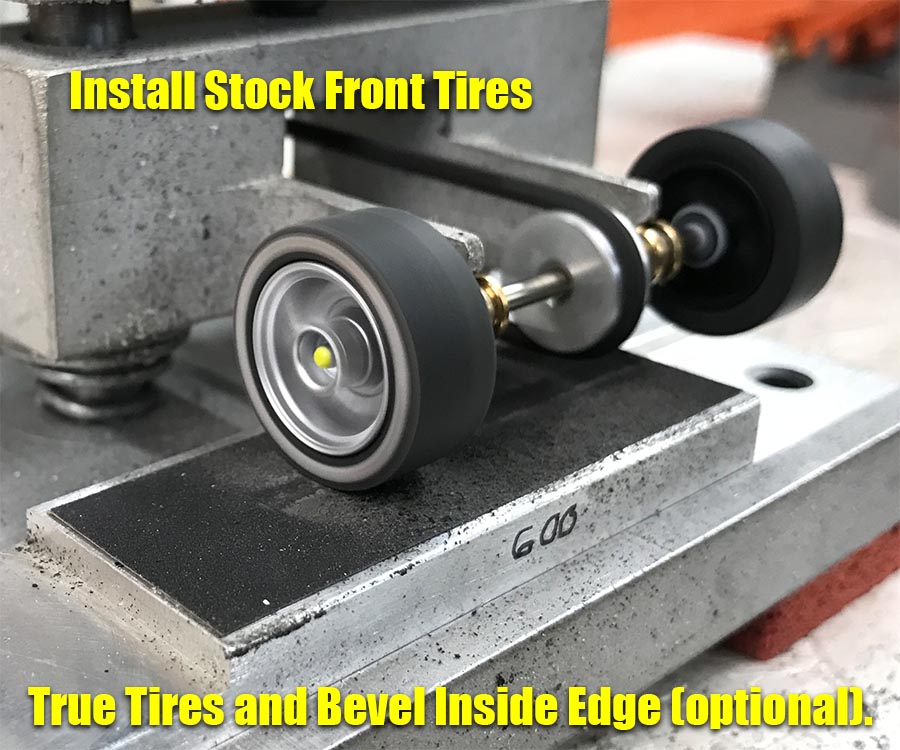
Next we install the tires and true them up. Some like to bevel the inside a little. Less tire contact is sometimes a good thing.

When using the large CG Slotcars adaptor, you will have to sand just a little of the guide opening. This doesn’t take much effort really.

Just test fit the adaptor as you go. You want it to slide in easily, but still hold under pressure. Just to make it easy to set the desired depth.

Since aftermarket guides have a variety of post sizes, you might need to file out the original hole as shown. Again, very quick and easy.

I like to install one .010″ shim on my guides. It just gives smoother rotation.

Install guide into adaptor and mark the post for trimming. I use a razor saw but a Dremel and cut off disc makes fast work of it as well.

Next is the lead wires. I like to tin (solder) the ends first and then crimp them flat. I do this as it gives a stronger connection using the set screws. The screws actually thread the solder and do not cut the wires or braid.

Braid is installed and ready for the wires to be secured with set screws.
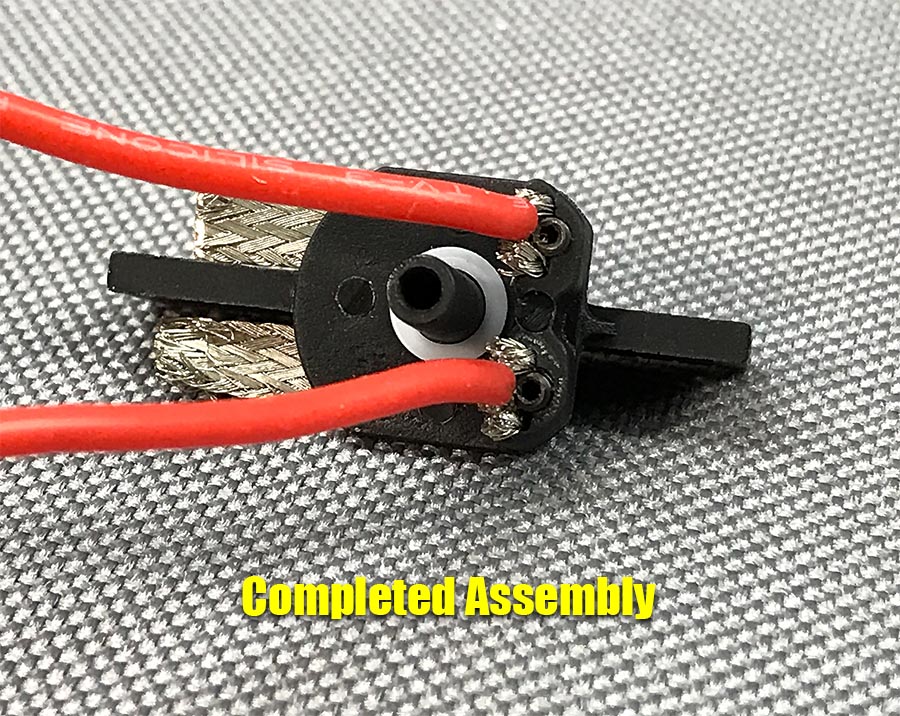

Entire assembly is completed and ready to install. Take the front axle assembly and re-install it into the chassis.
I like to set mine up right on the track. The braid is flush for the most part, but to make sure I get it just right, I do it trackside.


This takes a little trial and error. Just push the assembly down until you have the front tires where you want them. I like them to just touch the track (will turn at speed) but not support much weight.

You can double check the level of the guide blade by placing it in a set up block as shown.

Now it’s all set and you secure it in place with adhesive. The best adhesive seems to be the least expensive. The generic super glues found at dollar stores is very thin and activates quickly. This flows around and into the adaptor edges perfectly.

Time to get the rear axle ready. I installed the axle into the machine and trued up the wheels.

Now to install the tires. I like to use adhesive to make sure the tires are secure. Not required, but advised. I like the Hansens’s Hard As Nails, but any clear nail polish works fine. Why this instead of super glue? Because it allows you more time to install the tires and make sure they are fully seated. Just my way of doing it, approach it at your own discretion.

I wait about an hour for the adhesive to dry. Then begin sanding. I use a very fine grit to sand as it gives a very smooth finish. 2000 grit is my usual, but 1000 or 1500 will work fine enough.

Once the surface of the tire is evenly sanded, I stop. This is why I like to choose a slightly larger diameter tire. It allows me the freedom to sand to the diameter I like. Still too tall? Keep sanding. Easier to take away than to add to in this case.
All finished. Button it all back up and time for a track test!

Hope these modifications help you with fine tuning your models.
-Harry
