[phpBB Debug] PHP Warning: in file [ROOT]/includes/bbcode.php on line 543: preg_replace(): The /e modifier is no longer supported, use preg_replace_callback instead
[phpBB Debug] PHP Warning: in file [ROOT]/includes/bbcode.php on line 543: preg_replace(): The /e modifier is no longer supported, use preg_replace_callback instead
[phpBB Debug] PHP Warning: in file [ROOT]/includes/bbcode.php on line 543: preg_replace(): The /e modifier is no longer supported, use preg_replace_callback instead
[phpBB Debug] PHP Warning: in file [ROOT]/includes/bbcode.php on line 543: preg_replace(): The /e modifier is no longer supported, use preg_replace_callback instead
[phpBB Debug] PHP Warning: in file [ROOT]/includes/bbcode.php on line 543: preg_replace(): The /e modifier is no longer supported, use preg_replace_callback instead
[phpBB Debug] PHP Warning: in file [ROOT]/includes/bbcode.php on line 543: preg_replace(): The /e modifier is no longer supported, use preg_replace_callback instead
[phpBB Debug] PHP Warning: in file [ROOT]/includes/bbcode.php on line 543: preg_replace(): The /e modifier is no longer supported, use preg_replace_callback instead
[phpBB Debug] PHP Warning: in file [ROOT]/includes/bbcode.php on line 543: preg_replace(): The /e modifier is no longer supported, use preg_replace_callback instead
[phpBB Debug] PHP Warning: in file [ROOT]/includes/bbcode.php on line 543: preg_replace(): The /e modifier is no longer supported, use preg_replace_callback instead
[phpBB Debug] PHP Warning: in file [ROOT]/includes/bbcode.php on line 543: preg_replace(): The /e modifier is no longer supported, use preg_replace_callback instead
[phpBB Debug] PHP Warning: in file [ROOT]/includes/bbcode.php on line 543: preg_replace(): The /e modifier is no longer supported, use preg_replace_callback instead
[phpBB Debug] PHP Warning: in file [ROOT]/includes/bbcode.php on line 543: preg_replace(): The /e modifier is no longer supported, use preg_replace_callback instead
[phpBB Debug] PHP Warning: in file [ROOT]/includes/bbcode.php on line 543: preg_replace(): The /e modifier is no longer supported, use preg_replace_callback instead
[phpBB Debug] PHP Warning: in file [ROOT]/includes/bbcode.php on line 543: preg_replace(): The /e modifier is no longer supported, use preg_replace_callback instead
[phpBB Debug] PHP Warning: in file [ROOT]/includes/bbcode.php on line 543: preg_replace(): The /e modifier is no longer supported, use preg_replace_callback instead
[phpBB Debug] PHP Warning: in file [ROOT]/includes/bbcode.php on line 543: preg_replace(): The /e modifier is no longer supported, use preg_replace_callback instead
[phpBB Debug] PHP Warning: in file [ROOT]/includes/bbcode.php on line 543: preg_replace(): The /e modifier is no longer supported, use preg_replace_callback instead
[phpBB Debug] PHP Warning: in file [ROOT]/includes/bbcode.php on line 543: preg_replace(): The /e modifier is no longer supported, use preg_replace_callback instead
[phpBB Debug] PHP Warning: in file [ROOT]/includes/bbcode.php on line 543: preg_replace(): The /e modifier is no longer supported, use preg_replace_callback instead
[phpBB Debug] PHP Warning: in file [ROOT]/includes/bbcode.php on line 543: preg_replace(): The /e modifier is no longer supported, use preg_replace_callback instead
[phpBB Debug] PHP Warning: in file [ROOT]/includes/bbcode.php on line 543: preg_replace(): The /e modifier is no longer supported, use preg_replace_callback instead
[phpBB Debug] PHP Warning: in file [ROOT]/includes/bbcode.php on line 543: preg_replace(): The /e modifier is no longer supported, use preg_replace_callback instead
[phpBB Debug] PHP Warning: in file [ROOT]/includes/bbcode.php on line 543: preg_replace(): The /e modifier is no longer supported, use preg_replace_callback instead
[phpBB Debug] PHP Warning: in file [ROOT]/includes/bbcode.php on line 543: preg_replace(): The /e modifier is no longer supported, use preg_replace_callback instead
[phpBB Debug] PHP Warning: in file [ROOT]/includes/bbcode.php on line 543: preg_replace(): The /e modifier is no longer supported, use preg_replace_callback instead
[phpBB Debug] PHP Warning: in file [ROOT]/includes/bbcode.php on line 543: preg_replace(): The /e modifier is no longer supported, use preg_replace_callback instead
[phpBB Debug] PHP Warning: in file [ROOT]/includes/bbcode.php on line 543: preg_replace(): The /e modifier is no longer supported, use preg_replace_callback instead
[phpBB Debug] PHP Warning: in file [ROOT]/includes/bbcode.php on line 543: preg_replace(): The /e modifier is no longer supported, use preg_replace_callback instead
[phpBB Debug] PHP Warning: in file [ROOT]/includes/bbcode.php on line 543: preg_replace(): The /e modifier is no longer supported, use preg_replace_callback instead
[phpBB Debug] PHP Warning: in file [ROOT]/includes/bbcode.php on line 543: preg_replace(): The /e modifier is no longer supported, use preg_replace_callback instead
[phpBB Debug] PHP Warning: in file [ROOT]/includes/bbcode.php on line 543: preg_replace(): The /e modifier is no longer supported, use preg_replace_callback instead
[phpBB Debug] PHP Warning: in file [ROOT]/includes/bbcode.php on line 543: preg_replace(): The /e modifier is no longer supported, use preg_replace_callback instead
[phpBB Debug] PHP Warning: in file [ROOT]/includes/bbcode.php on line 543: preg_replace(): The /e modifier is no longer supported, use preg_replace_callback instead
[phpBB Debug] PHP Warning: in file [ROOT]/includes/bbcode.php on line 543: preg_replace(): The /e modifier is no longer supported, use preg_replace_callback instead
[phpBB Debug] PHP Warning: in file [ROOT]/includes/bbcode.php on line 543: preg_replace(): The /e modifier is no longer supported, use preg_replace_callback instead
[phpBB Debug] PHP Warning: in file [ROOT]/includes/bbcode.php on line 543: preg_replace(): The /e modifier is no longer supported, use preg_replace_callback instead
[phpBB Debug] PHP Warning: in file [ROOT]/includes/bbcode.php on line 543: preg_replace(): The /e modifier is no longer supported, use preg_replace_callback instead
[phpBB Debug] PHP Warning: in file [ROOT]/includes/bbcode.php on line 543: preg_replace(): The /e modifier is no longer supported, use preg_replace_callback instead
[phpBB Debug] PHP Warning: in file [ROOT]/includes/bbcode.php on line 543: preg_replace(): The /e modifier is no longer supported, use preg_replace_callback instead
[phpBB Debug] PHP Warning: in file [ROOT]/includes/bbcode.php on line 543: preg_replace(): The /e modifier is no longer supported, use preg_replace_callback instead
[phpBB Debug] PHP Warning: in file [ROOT]/includes/bbcode.php on line 543: preg_replace(): The /e modifier is no longer supported, use preg_replace_callback instead
[phpBB Debug] PHP Warning: in file [ROOT]/includes/bbcode.php on line 543: preg_replace(): The /e modifier is no longer supported, use preg_replace_callback instead
[phpBB Debug] PHP Warning: in file [ROOT]/includes/bbcode.php on line 543: preg_replace(): The /e modifier is no longer supported, use preg_replace_callback instead
[phpBB Debug] PHP Warning: in file [ROOT]/includes/bbcode.php on line 543: preg_replace(): The /e modifier is no longer supported, use preg_replace_callback instead
[phpBB Debug] PHP Warning: in file [ROOT]/includes/bbcode.php on line 543: preg_replace(): The /e modifier is no longer supported, use preg_replace_callback instead
[phpBB Debug] PHP Warning: in file [ROOT]/includes/bbcode.php on line 127: preg_replace(): The /e modifier is no longer supported, use preg_replace_callback instead
[phpBB Debug] PHP Warning: in file [ROOT]/includes/bbcode.php on line 127: preg_replace(): The /e modifier is no longer supported, use preg_replace_callback instead
[phpBB Debug] PHP Warning: in file [ROOT]/includes/functions.php on line 4773: Cannot modify header information - headers already sent by (output started at [ROOT]/includes/functions.php:3887)
[phpBB Debug] PHP Warning: in file [ROOT]/includes/functions.php on line 4775: Cannot modify header information - headers already sent by (output started at [ROOT]/includes/functions.php:3887)
[phpBB Debug] PHP Warning: in file [ROOT]/includes/functions.php on line 4776: Cannot modify header information - headers already sent by (output started at [ROOT]/includes/functions.php:3887)
[phpBB Debug] PHP Warning: in file [ROOT]/includes/functions.php on line 4777: Cannot modify header information - headers already sent by (output started at [ROOT]/includes/functions.php:3887)
Home Racing World • View topic - 1/32 M/T Nova *Finished*

1/32 M/T Nova *Finished*

Your home for scale slot car oval racing!

1/32 M/T Nova *Finished*

Postby HomeRacingWorld » Tue Jul 15, 2014 12:36 pm

Thought I would share a little more on how I go about building a new resin model. Now I am FAR from an expert builder, but perhaps some might be interested.

Everyone has thier own approach. For me, the first part is research if I am not familiar with the car. :techie-studyingbrown: When the body arrives I like to clean it up and make it "chassis ready". In other words I want the body/wheel wells to be VERY close to the final result when it comes time to bolt'er down. I might add an air cleaner, maybe a add or remove a spoiler or wing, etc at a later time. But at this stage I just want the car to be ready for me to start the chassis build.

It is worth mentioning that I am famous for changing my plans midstream. My buddy Locoracer Tom says that if you sand on my finished car, you should see at least 3 colors on top of the primer :) It's true. I'll bet I could a knock a couple 10ths or better on my laptimes on some of my cars, if I just sanded them to remove all that excess paint weight. :scared-eek:

But I am doing better, or at least trying. So like I said above, the body is just cleaned up and ready for the chassis. It is now that I do what the great JYD (Eddie) in Chicago does: "Have coffee with it."

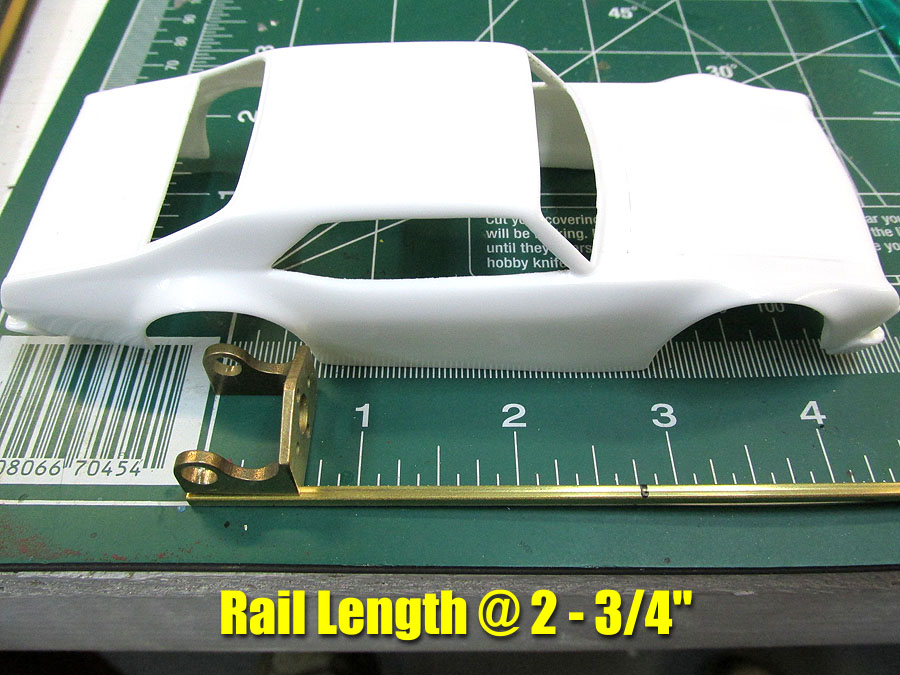
I really am not sure what I will add or take away. Nor am I sure what color combo or decals to use. I just know I want a Nova stocker. So in this form I can sit back and keep looking at it and think about what I want, :techie-eureka: meanwhile have it good enough to start chassis building.

Image

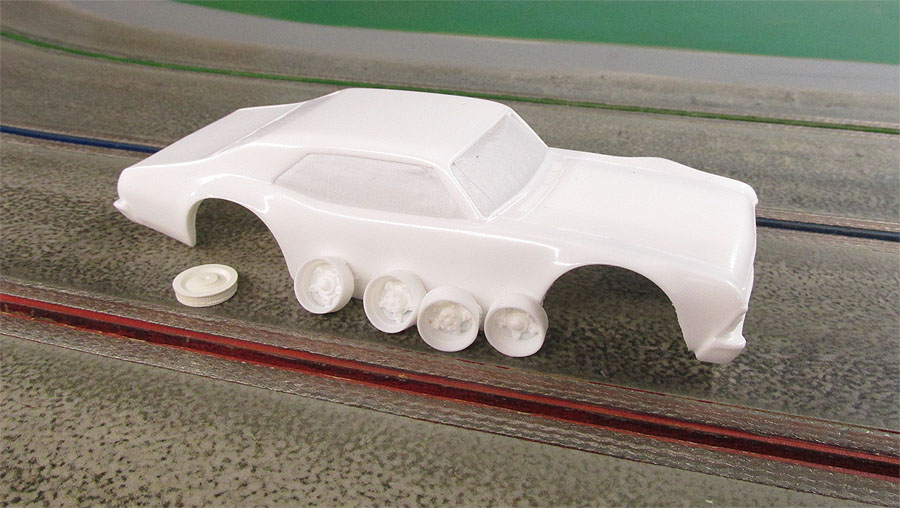
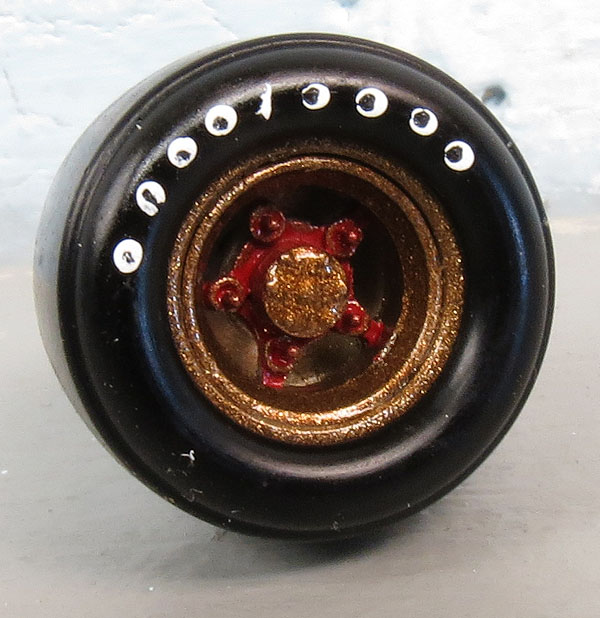
This is how the model arrives. I also have some nice new wheels for this one.

Image

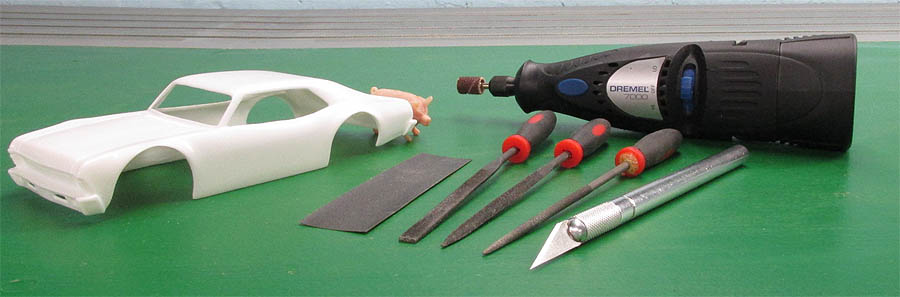
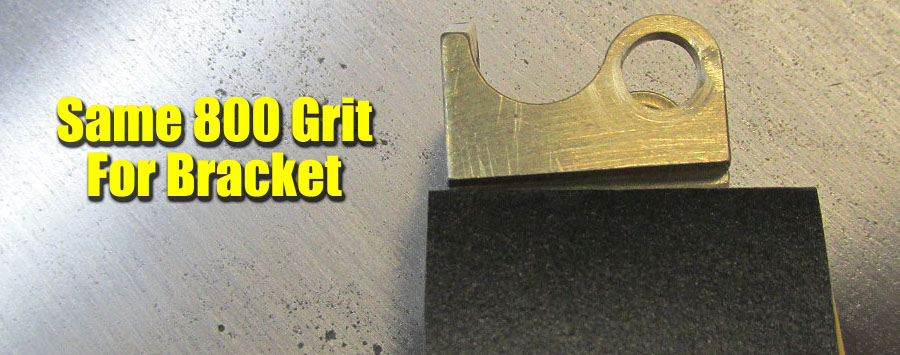
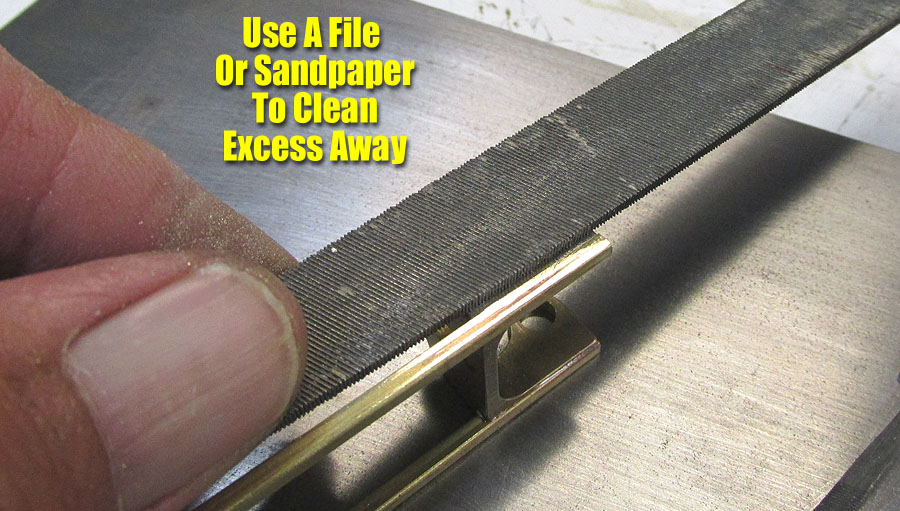
To clean out the flash molding I use a variety of tools. Assorted small files in flat, traingular, and round (rat tail). Some 800 grip sandpaper, our variable speed Dremel with sanding barrel, and our good old trusty Exacto knife. Please think about installing a new blade or keep a knife on hand just for this purpose. A fresh, sharp blade makes the trimming much easier.

Image

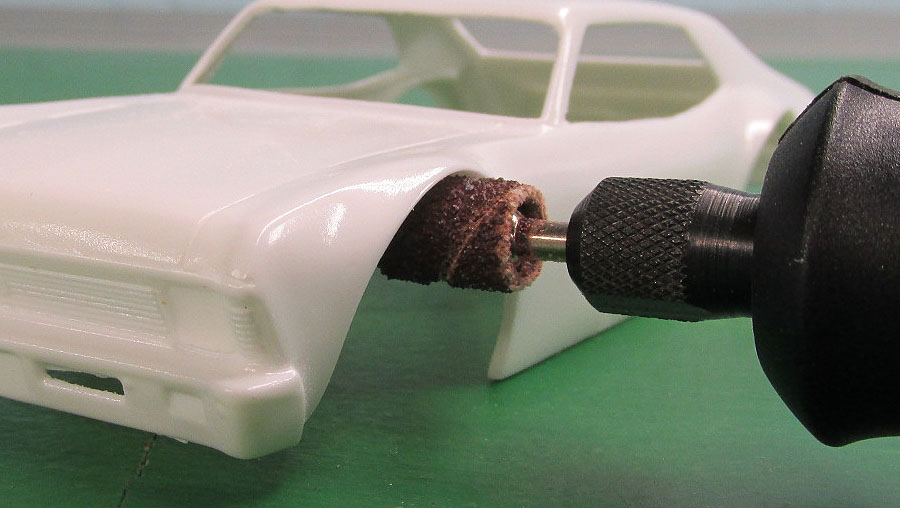
Sometimes there is a little more molding OR I want to open the wells a little more. For this I like using my Dremel and sanding barrel. Could you do it by hand? Of course, but we are discussing MY methods and I am quite the lazy craftsman.

Image

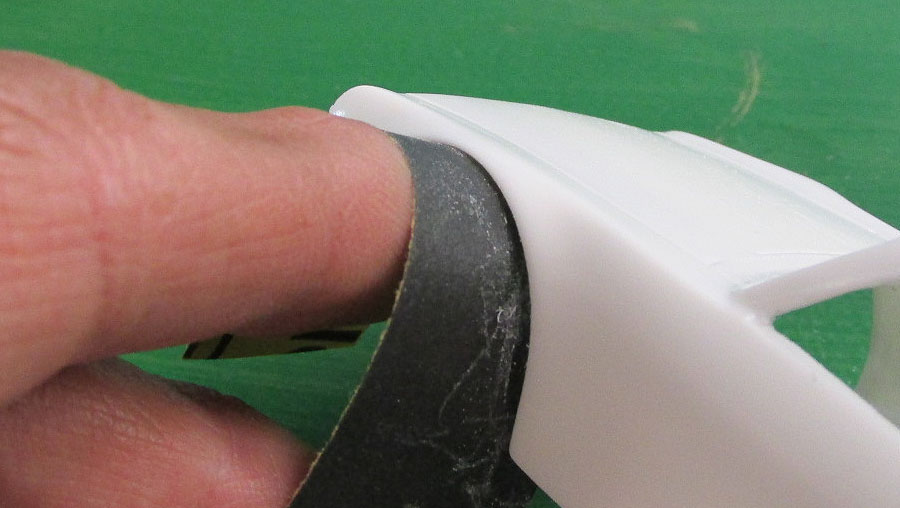
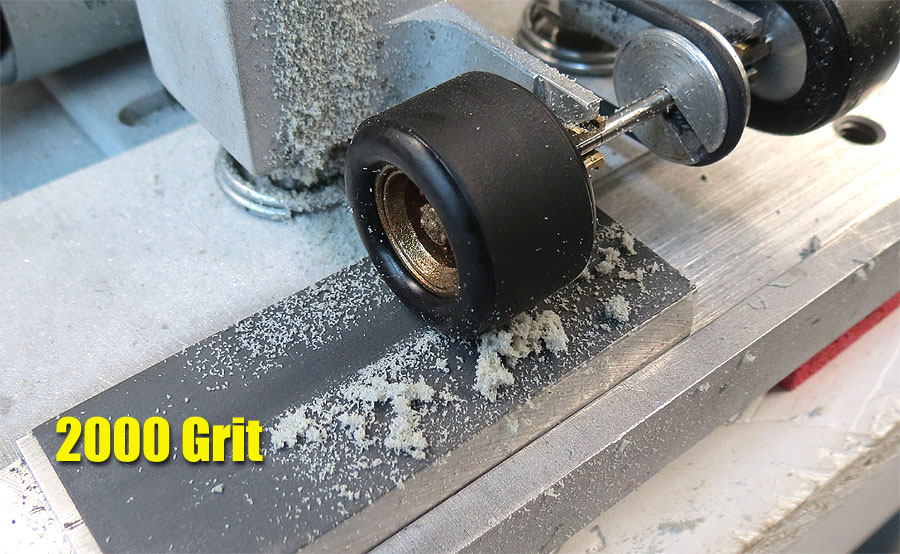
Then I follow that up with some 800 grit to smooth out the edges.

I won't wash the body up just yet as there is a lot of fumbling/handling to come. I'll wait for the bath when it's finally paint time.

More to come (Insomnia? Stay tuned!).
User avatar
HomeRacingWorld
HRW Janitor
 
Posts: 15569
Joined: Wed Aug 08, 2012 2:05 pm
Location: HRW Skunkworks

Re: 1/32 M/T Nova WIP

Postby HomeRacingWorld » Tue Jul 15, 2014 8:05 pm

Sounds good Jeremy. Yes sir Dave, this class needs your skills so it has...class!

Image

I like this bracket by Professor Motor. Slot Car Corner carries it and I just order from there when I am getting all the other toys I cannot live without. As you can see it has the motor mount holes pre-drilled and has notches cut into the bottom to help you attach the rod/tubing a little easier. Being a newcomer to brass chassis building, I need all the help I can get keeping things straight.

Image

Here is the brass part sizes/part numbers I am using for my chassis. *PLEASE NOTE* This is not a "pro" level commercial/retro/competition style chassis. I just found a design that suits me and the tracks we race on. I am not using any insane speed demon motors either. Just a simple design that you can get started with, but also one that runs pretty well as is. You can always add to it, take away from it, etc and so forth :)

The two smaller sections on the left are the "frame rails" of the chassis. According to the Pro Motor bracket, you are supposed to used the round rod or tube. I don't. I like the square tubing. But have used round, so either way you go you will get a chassis. The ones on the right are the ones I use for the front axle set up.

Image

Pretty simple to order/pick out at the hobby shop. You know you have the right ones when they fit inside each other as shown.

Image

Here is what I use to make the rear axle housing.

Image

One part that some might object to is my use of the tubing to act as the "bushings". In all the chassis I have built using this method, the axle fit in the tube is about as good as you could ask for. I have tested 4 different major brands of bushings along with different brands of axles. The variance in tolerances between brands is more than you might think. Even axles of the same brand are rarely exact from axle to axle. Same is said for bushing inside diameter tolerances. So using this tube method works just as well as any bushing method I have tested.

The other reason I like using it is to simplify the build. When I have used bushings, I need to cut this same size tubing to make the "shims" to set the width and eliminate side to side free-play. WHY? Because this motor bracket, as much as I like it, does not allow the for a standard motor shaft to sit far enough inside the flange of the crown gear. It just barely makes contact which is not going to work when raced in anger. If I do not take the time to measure and cut the tubing, I could use axle collars. These also work but we just added even more cost to the project.

Image

This is the strip I have been using for the body mounts and guide tongue. For the guide you could and likely should use a thicker material, but it works well enough. And it can be braced if needed.

Now time to get started building it. :dance:
User avatar
HomeRacingWorld
HRW Janitor
 
Posts: 15569
Joined: Wed Aug 08, 2012 2:05 pm
Location: HRW Skunkworks

Re: 1/32 M/T Nova WIP

Postby dge467 » Tue Jul 15, 2014 8:09 pm

Looks like a great car in the making!
User avatar
dge467
The King of Foil
 
Posts: 3636
Joined: Tue Sep 04, 2012 9:07 pm
Location: N.E. Massachusetts

Re: 1/32 M/T Nova WIP

Postby dreinecke » Wed Jul 16, 2014 5:21 am

Another fine tutorial! Where did you find my picture?
User avatar
dreinecke
King of the Dum-Dums!
 
Posts: 7360
Joined: Wed Aug 08, 2012 5:39 pm
Location: Colorado

Re: 1/32 M/T Nova WIP

Postby ListerStormGT » Wed Jul 16, 2014 7:11 am

Great tutorial Boss, great picture of Doc you found. Must have been one of his good hair days. :lol:
User avatar
ListerStormGT
HRW SlotCar Veteran!
 
Posts: 1196
Joined: Sun Sep 02, 2012 11:24 pm
Location: Florida

Re: 1/32 M/T Nova WIP

Postby HomeRacingWorld » Wed Jul 16, 2014 7:05 pm

Thanks guys, getting a good shot of Doc is not that easy.

Well, onto more fun.

Image

Time to measure and cut my first pair of frame rails. As you can see this is not that critical of a job. I basically set the car on my cutting mat and get a good idea how long I want it. In this case I needed about 2 & 3/4's.

Image

Image

Everyone has their own method of soldering. In fact, I am pretty sure it's slot car law that no one can own the same soldering iron or solder a chassis in the same method as another.

My appraoch is to first clean up the brass using some 800 grit sandpaper. This de-burrs the edges and gets the brass pretty clean so the solder will flow easier.

Image

Here is my high tech method. And you thought slot car magnets were evil. As you can see I was a little heavy-handed with the solder. I don't care. I am not here to win any awards, so not worried that it looks rough.

I do not use an iron either. I like a torch. I use 60/40 solder and just a touch of flux to make sure it's clean. Is this the "proper" way? Well, it works for me.

Image

When finished I flip the bracket over and check to see how the solder flowed. Usually I see what you are seeing. This is about as good as it gets in my book.

Image

You can clean up the excess solder and make it look better using a file or sandpaper. I just like using an old fashioned flat blade file.

Image

Looks good enough for me.

Ok, time to get back to work Shotgun Dave is working on his Camaro and I have to try and keep up. :lol:
User avatar
HomeRacingWorld
HRW Janitor
 
Posts: 15569
Joined: Wed Aug 08, 2012 2:05 pm
Location: HRW Skunkworks

Re: 1/32 M/T Nova WIP

Postby dreinecke » Wed Jul 16, 2014 10:06 pm

Dang that looks like a nice chassis. I can't wait to start building again. I really need to learn brass.
User avatar
dreinecke
King of the Dum-Dums!
 
Posts: 7360
Joined: Wed Aug 08, 2012 5:39 pm
Location: Colorado

Re: 1/32 M/T Nova WIP

Postby sixtiesracer » Thu Jul 17, 2014 11:16 am

sixtiesracer
The Rustinator
 
Posts: 526
Joined: Wed Nov 07, 2012 10:58 am

Re: 1/32 M/T Nova WIP

Postby HomeRacingWorld » Sat Jul 19, 2014 7:34 pm

User avatar
HomeRacingWorld
HRW Janitor
 
Posts: 15569
Joined: Wed Aug 08, 2012 2:05 pm
Location: HRW Skunkworks

Re: 1/32 M/T Nova WIP

Postby ListerStormGT » Sat Jul 19, 2014 8:14 pm

Very cool boss, coming along nicely.Cant wait to see it finished!
User avatar
ListerStormGT
HRW SlotCar Veteran!
 
Posts: 1196
Joined: Sun Sep 02, 2012 11:24 pm
Location: Florida

Re: 1/32 M/T Nova WIP

Postby ourwayband » Sat Jul 19, 2014 8:44 pm

Dang that looks good Boss!!!!

Rusty
User avatar
ourwayband
HRW SlotCar Veteran!
 
Posts: 2471
Joined: Wed Sep 05, 2012 12:10 pm
Location: West Tennessee

Re: 1/32 M/T Nova WIP

Postby HomeRacingWorld » Sun Jul 20, 2014 1:20 pm

Thanks guys, yes Dave it does. I know I am slow, but I like to keep my audience riveted :)

Painted the chassis.

Image

Image

I use some 1000 grit and wet sand the bottom to make it as slick as I can. Helps guide swivel stay smooth.

Wheels/inserts painted.

Image

Testors Bronze laquer with Apple Barrel acrylic red brushed on. I sealed them with 2 coats of Krylon acrylic clear. Went with Goodyears on this setup as you can see :whistle:
User avatar
HomeRacingWorld
HRW Janitor
 
Posts: 15569
Joined: Wed Aug 08, 2012 2:05 pm
Location: HRW Skunkworks

Re: 1/32 M/T Nova WIP

Postby munter » Sun Jul 20, 2014 1:39 pm

The painted chassis looks great
User avatar
munter
HRW SlotCar Veteran!
 
Posts: 1014
Joined: Thu May 16, 2013 11:18 am
Location: New Zealand

Re: 1/32 M/T Nova WIP

Postby HomeRacingWorld » Sun Jul 20, 2014 1:46 pm

Thanks sir. Just something I like to do. It sometimes helps "hide" it on some builds.

Little tire sanding method to share.

When I sand, I only do one side at a time. With PGT's I like using 2000 grit. This allows a very smooth result. Keeping the rpms at a mild level I lower it down and take slow passes.

Image

I only need to sand the contact patch smoothly. Another thing I do is wet my finger a little with good old spit and coat the tire as it turns. This is a quick way to check and see if you have the entire tire sanded. Does it help smooth the surface? I cannot say either way. In any case, I think the result is good enough for me.
User avatar
HomeRacingWorld
HRW Janitor
 
Posts: 15569
Joined: Wed Aug 08, 2012 2:05 pm
Location: HRW Skunkworks

Re: 1/32 M/T Nova WIP

Postby TuscoTodd » Sun Jul 20, 2014 1:58 pm

SHARP on all accounts!
I like it! :D

Also like your "split" bushings on the Razor! :)
I cut a "v" out of some spare scalextric plastic ones that I pop over the axle to use, but I would be that yours do a better job of keeping things "level" side to side for axles you can't pull the wheels off of.
Thank you for sharing the picture and the detail on "how" you are truing your PGT/XPG tires. :)
User avatar
TuscoTodd
HRW Bouncer
 
Posts: 7145
Joined: Sat Aug 17, 2013 11:25 am
Location: Rural Ohio

Next

Return to Oval Racing HQ!


Who is online

Users browsing this forum: No registered users and 18 guests

cron