Page 1 of 1

Sportsman Charger

PostPosted: Fri Sep 22, 2017 10:30 pm
by BARC 1
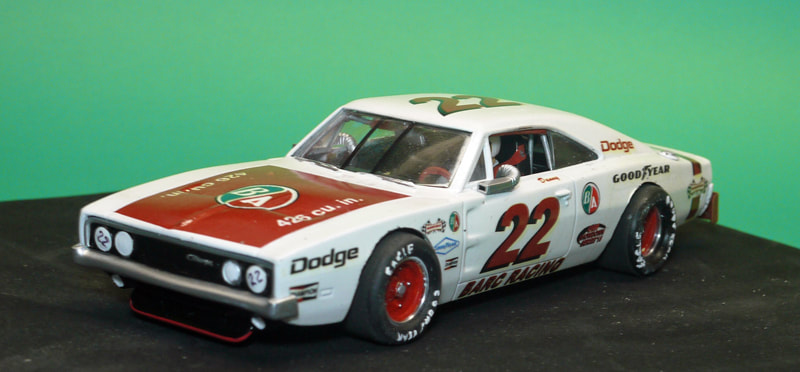
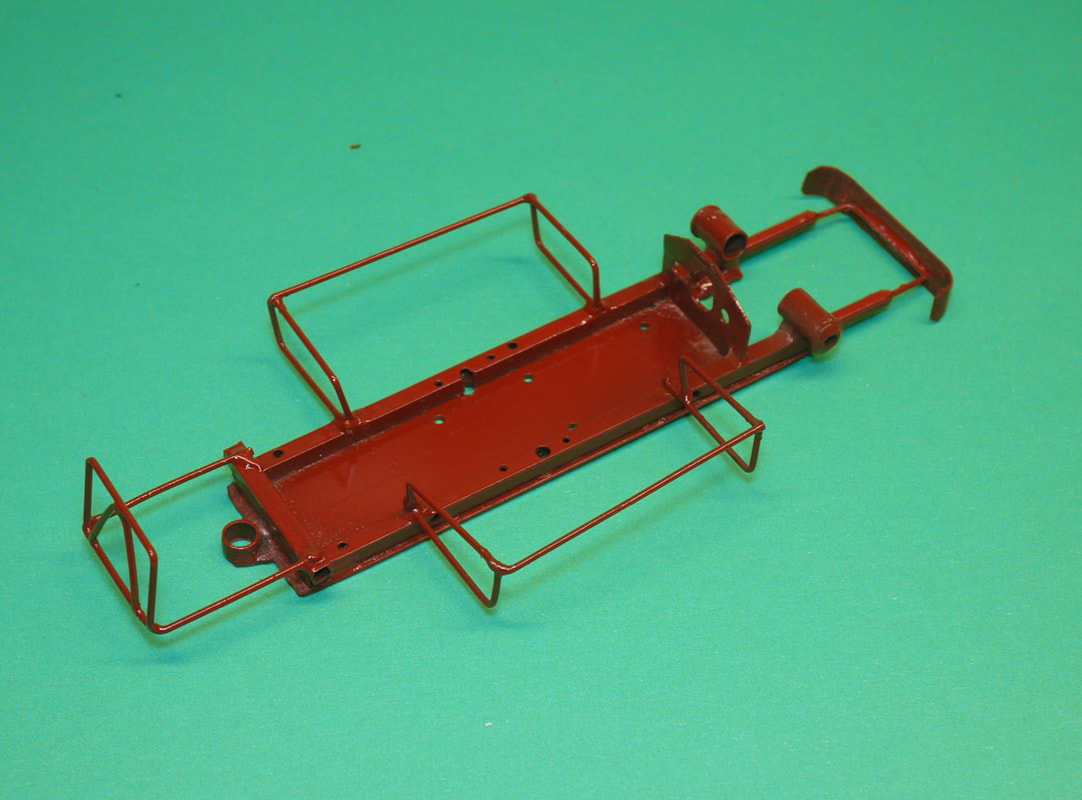
After unsuccessfully trying to convince Harry that a right hand drive DB 5 should be considered for the sportsman class, I dug out a Carrera Charger I had purchased a few months ago. I took my DB5 frame and modified it to accept the new body, and then got busy getting it ready.

The body shell was soaked in alcohol over night and then stripped. Decals were made on my Laser jet printer

Running gear is not complete yet as I am changing out the crown. Just ordered a bunch of stuff from our friends at Slot Car corner.

Image

Image

Image

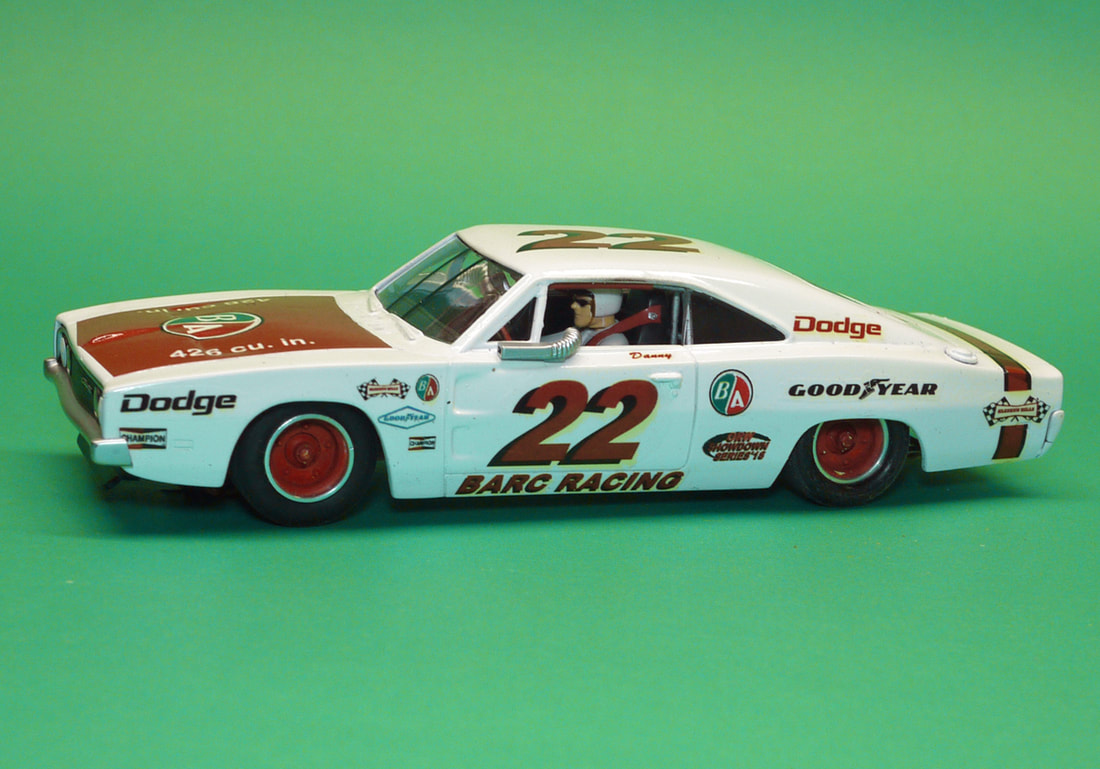
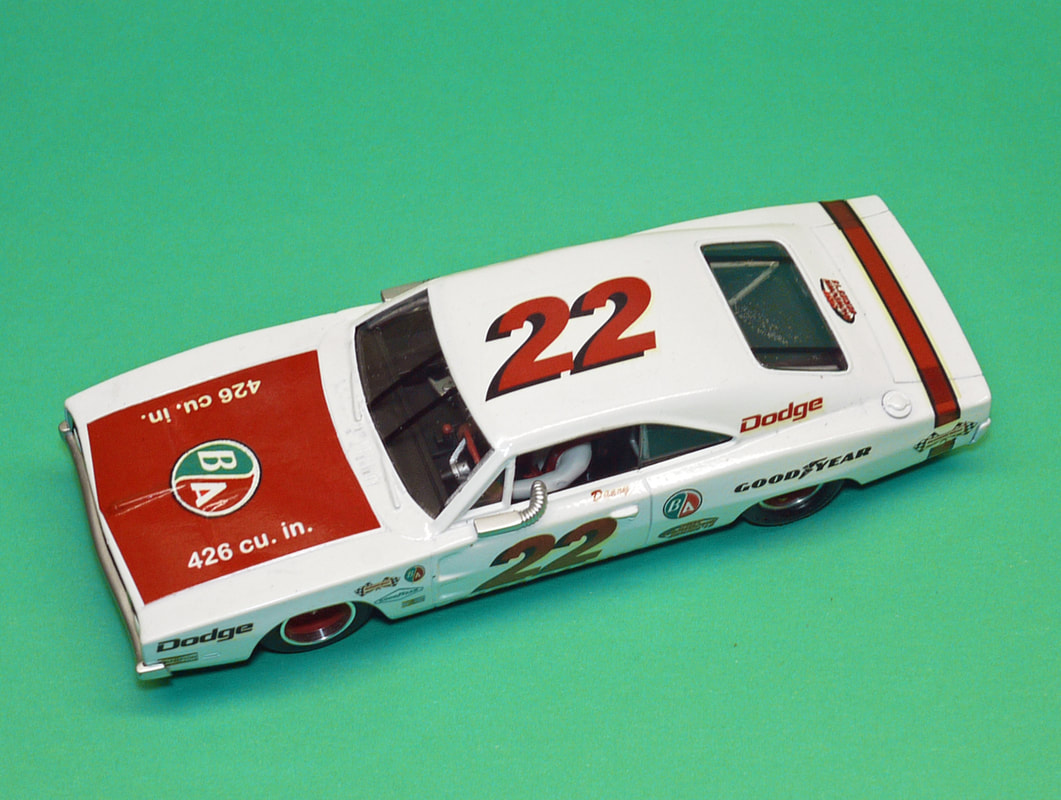
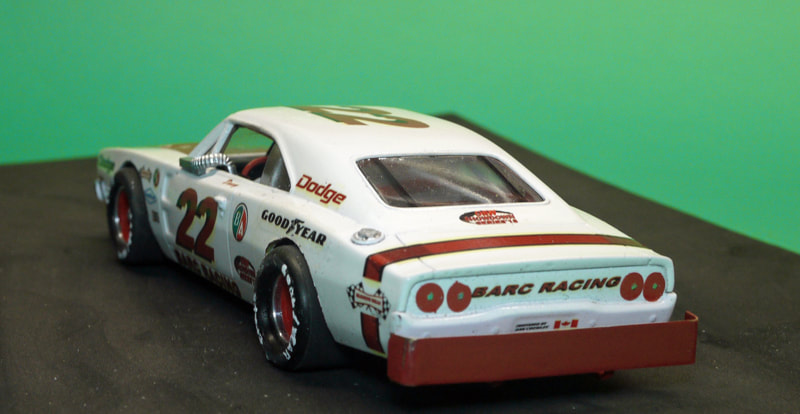
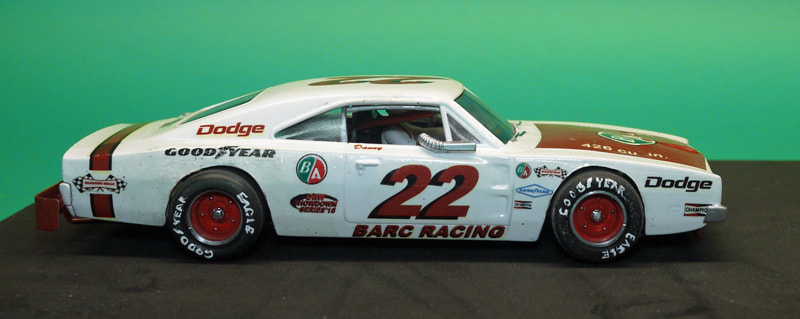
Thought I would post some pictures before it goes under the dremel to open up the wheel wells and open the stance a bit. As much as I like this look, the wider stance will make it handle better and look more the part.

Also started work on my Next Modifed. I took last years chassis and stripped it down. It will be rebuilt using a Piranha in a more traditional form then last years car.

Image

Re: Sportsman Charger

PostPosted: Fri Sep 22, 2017 11:22 pm
by Z-carfan
Dan,
That looks great!!!

Re: Sportsman Charger

PostPosted: Fri Sep 22, 2017 11:27 pm
by HomeRacingWorld
Yes, this is an excellent entry. Well done.

Re: Sportsman Charger

PostPosted: Sat Sep 23, 2017 7:55 am
by bdsharp
That's a very nice ride, and the decals look professional. Tell us more about how you made them. Are the images plain ol' jpegs, or something more accurate? Paper? Clearcoat? The whole car looks great.

Re: Sportsman Charger

PostPosted: Sat Sep 23, 2017 9:35 am
by BARC 1
Thanks for the comments

Decals are made using MS Paint. I find images online, save them and modify them for my use. I work in a large format and then print them out scaled down. For example this set was printed at 9%. The number font for the roof numbers was something like 600 pt. This results in a very fine print the is legible when printed out small.

I use decal paper from Microscale

Decals are coated with Tester Clear coat. However I discovered something this time . I forgot to print out an HRW event decal so did them separately. As it was small and I printed multiples I decided to not clear coat the decal paper prior to submersion in water. The Laser printing was unaffected by the water and stayed true. So next time I do decals, I think I will try this on a grander scale and see if the clear coat is even necessary.

Of course using regular printers mean you don't have white as an option. For this reason all the BARC cars are painted white. The last few cars I have just used decals instead of paint. Ie the front hood is a big red decal with the BA logo and the engine displacement text part of one big decal.

After applied the car was sprayed with a testers product called "Wet Look" Basically a glossy clear finish.

When making large scale model tanks I came up with a technique of using craft paint to make flags. The acrylic craft paint is spread thickly over a rubber pad, and allowed to dry. This paint is a latex and when applied thickly remains kind of flexible when dry. So this is how I make seat belts. A red paint is spread over a rubber pad and allowed to dry. Once dry you can peel the paint layer off the pad. The paint layer is then cut into seat belt strips. You can then pre-fit and get the belts cut to the exact size you need. When you go to apply them, you wet the strips of paint in windex, and then apply them. At this point you need to work quickly as the Windex attacks the paint and softens it much the same as decalset works on decals. After time the paint strip will settle down very nicely, but still has enough mass to span the distance between the driver and the frame attach point.

I have also used this in pin stripping. On the Ferrari Can Am car I did,the blue pin strip was done this way. The picture shows both the pin strip and the seat belts done using this trick

Image

Re: Sportsman Charger

PostPosted: Sat Sep 23, 2017 11:06 am
by TuscoTodd
WOW Dan! GREAT looking build and VERY cool tips on the decals and seat belts!!!
(I'll have to get a chunk of rubber and try that seat belt deal!)
Thanks for sharing!

Re: Sportsman Charger

PostPosted: Sat Sep 30, 2017 1:57 pm
by BARC 1
My New PGT FF showed up, so since the last pictures were taken I have opened up the wheel wells, Added new tires and got it sitting, and ready for racing.

Handpainted the tire graphics as I have no decals for this, and my experience with the decals is that they don't last long.

This is a Brick of a car, The Carrera interior adds some unwanted top weight, but I got it handling OK. Last year both my cars were last, so there is only one way to go. The Modified is definitely the quicker of the two.

Image

Image

Image

Re: Sportsman Charger

PostPosted: Sat Sep 30, 2017 4:30 pm
by TuscoTodd
REALLY like the look with the opened up wheel wells and bigger rubber!
:handgestures-thumbup: :handgestures-thumbup:

Re: Sportsman Charger

PostPosted: Sat Sep 30, 2017 6:28 pm
by HomeRacingWorld
Hey, don't think that weight is going to hurt that much. In fact not likely at all. This is a different style of racing.

Re: Sportsman Charger

PostPosted: Sat Sep 30, 2017 7:34 pm
by strangebrew
Looks ready for the State fair mile dirt tracks.....All you need is " Don White" on the roof.....Great job!!!

Re: Sportsman Charger

PostPosted: Sat Sep 30, 2017 10:38 pm
by bigman
:text-goodpost: WAY COOL LOOKING CAR !!! :text-bravo:
Know one going to want that beast rolling up behind them. :scared-eek: :auto-driving: :auto-driving:
Hope you do as good as it looks, great car :idea: great detail. :text-bravo:

bigman :clap:

Re: Sportsman Charger

PostPosted: Sun Oct 01, 2017 12:08 am
by glasshorsevh
Dan,

The best trick I have found for decaling tires is use a coat of "Mod Podge" matte finish as a sealer over the outer tire face after the decal has been applied. Once dried it is very tough and invisible. It is also great stuff for glueing down track details and can be found in most craft stores. Great job on your Showdown entries!

Val

Re: Sportsman Charger

PostPosted: Thu Oct 05, 2017 4:48 pm
by 32lbking
Val, thanks for the tip on the modge podge. I have been wanting to try some tire decals but was worried about their durability. My wife just happens to have some of that modge podge :think:
And Dan, I never figured it was even possible to paint those small letters and have them be legible. It has to take a pretty steady hand which I do not have. Nice job.
For me, I think I will have to get the decals.
Randy