I have received my new Scaley FORD GT and its a highly detailed car and looks great. But the tires do NOT have any sidewall markings, whereas all the other recent GT Scaleys, such as the Mercedes AMG, have nice sidewall markings.
I have noticed that Carrera have now switched to only marking 'Carrera' on their tires.
Has something changed with the rights to stamp real tire brands on toy models or something? Why are slot car manufacturers moving away from the sidewall markings? I run all my cars stock, so I run the stock tires, and really like the sidewall details. Makes the car look much more scale!
Any insights?
Cheers RvE
Tire Branding missing from Slot Car tires?
25 posts
• Page 1 of 2 • 1, 2
Tire Branding missing from Slot Car tires?
![]() by RvE » Wed Oct 03, 2018 12:07 pm
by RvE » Wed Oct 03, 2018 12:07 pm
- RvE
- Posts: 31
- Joined: Thu Sep 06, 2012 2:22 pm
- Location: Toronto, Canada
Re: Tire Branding missing from Slot Car tires?
![]() by lancelotalove » Wed Oct 03, 2018 12:28 pm
by lancelotalove » Wed Oct 03, 2018 12:28 pm
Money, $$, dinero.
Any time you put a manufacture logo on anything, there has to be a liscense from the company and that cost money and time which cost money. And there are not just 1 tire company in this case. You cannot have Goodyear logos on the GT type cars that run Dunlop or Continental tires. What about the sponsor logos on the car? If the logo on the fender says Dunlop, you cannot have Continental tires on the car.
Goodyear, Dunlop, Continental, Falken, that is 4. Nitto, Toyo,
jim heller may have something that has tire markings.
I'm sure there is someone out there that makes water slide or sticky tire sidewall logos. I have seen some for 1/24 cars but they are over seas.
I also saw a template that you place on the tire and just run a paint brush over the template. Again overseas
Im in USA
Lance
- lancelotalove
- HRW SlotCar Veteran!
- Posts: 177
- Joined: Thu May 12, 2016 2:39 pm
Re: Tire Branding missing from Slot Car tires?
![]() by chappy » Wed Oct 03, 2018 2:04 pm
by chappy » Wed Oct 03, 2018 2:04 pm
At one point the tires on one slot car brand said "Great Decade" or so ething simi
Ar because they couldnt have Goodyear.
There is an article on the forum about making your own markings that i think Harry started.
Bob
Ar because they couldnt have Goodyear.
There is an article on the forum about making your own markings that i think Harry started.
Bob
-

chappy - Minister of Slot Racing
- Posts: 2926
- Joined: Fri Sep 28, 2012 5:22 pm
- Location: Ontario Canada
Re: Tire Branding missing from Slot Car tires?
![]() by DaveKennedy » Thu Oct 04, 2018 7:22 am
by DaveKennedy » Thu Oct 04, 2018 7:22 am
-
DaveKennedy - Master Shutterbug
- Posts: 1583
- Joined: Tue Sep 04, 2012 6:57 am
Re: Tire Branding missing from Slot Car tires?
![]() by HomeRacingWorld » Thu Oct 04, 2018 12:23 pm
by HomeRacingWorld » Thu Oct 04, 2018 12:23 pm
-

HomeRacingWorld - HRW Janitor
- Posts: 15569
- Joined: Wed Aug 08, 2012 2:05 pm
- Location: HRW Skunkworks
Re: Tire Branding missing from Slot Car tires?
![]() by BIG E » Thu Oct 04, 2018 11:39 pm
by BIG E » Thu Oct 04, 2018 11:39 pm
Same with the plastic model kit tires, and to an extent the aftermarket decal makers.
As stated earlier, it's all about the $, $$, $$$ !! Unfortunate but true.
At least we can still get the cars, right? -- Ernie :>)
As stated earlier, it's all about the $, $$, $$$ !! Unfortunate but true.
At least we can still get the cars, right? -- Ernie :>)
- BIG E
- HRW SlotCar Veteran!
- Posts: 939
- Joined: Fri Sep 07, 2012 11:30 am
- Location: NY/Metro area
Re: Tire Branding missing from Slot Car tires?
![]() by WB2 » Fri Oct 05, 2018 5:47 am
by WB2 » Fri Oct 05, 2018 5:47 am
IndyCals has tire decals available in most scales.
Haven’t tried them yet....
Haven’t tried them yet....
- WB2
- HRW SlotCar Veteran!
- Posts: 582
- Joined: Tue Nov 27, 2012 10:35 am
Re: Tire Branding missing from Slot Car tires?
![]() by RvE » Sun Nov 04, 2018 10:50 am
by RvE » Sun Nov 04, 2018 10:50 am
Thanks WB2, I have contacted Mike at Indycals to see if his decals will stick to rubber and silicone tires. He has lots of tire marking in 1/32 and 1/24 scale! Thanks for the tip,
RvE
RvE
- RvE
- Posts: 31
- Joined: Thu Sep 06, 2012 2:22 pm
- Location: Toronto, Canada
Indycals Tire Markings Update - work very well!
![]() by RvE » Tue Jan 15, 2019 12:53 pm
by RvE » Tue Jan 15, 2019 12:53 pm
Sorry, I have been slow to try out my Indycals tire markings, but finally installed my first set last night. I needed to replace some old Scaley F1 tires, and I had ordered the "Bridgestone" tire markings, so the F1 tires were my first shot using these decals. I can report they were easy to apply and work great!
The photo below shows the finished product on the car and a close up of the tire. The decals are very rugged, as I made the mistake of installing the decals on the tires, and then working the tires onto the wheels. I really had to twist and pull the tires, and the decals held up perfectly. There is a gloss sheen to the clear decal surround, but this is nearly invisible to the naked eye. Many of the other Indycal tire markings have a black surround, and those also become invisible at normal viewing. So these work great for 1/32 tire markings. A few points to consider:
- the 1/32 sizing varies a bit for manufacturers and types of models, so you may need to check sizes. For instance, I applied the front tire decals to my rear Scaley tires since the front decal size looked to be a better match for my rear size of tires.
- Indycals recommends using a decal setting solution, so I used Solvaset.
- not all tire manufacturers are available from Indycals. He does not have Michelin yet, so I will use the modern Dunlop markings on my GT cars.
-the decals need to be cut from the sheet since they are not precut - I used an exacto knife for this and only cut lightly to cut the decal (not the backing paper) and then removed the decal from the sheet when it was wet.
This is the first time I have worked with water slide decals in 20+ years, so if I can do it, anyone can!
Cheers RvE
- RvE
- Posts: 31
- Joined: Thu Sep 06, 2012 2:22 pm
- Location: Toronto, Canada
Adding the Dunlop lettering to tires
![]() by RvE » Wed Jan 16, 2019 10:29 pm
by RvE » Wed Jan 16, 2019 10:29 pm
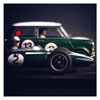
Well, I am on a roll now, literally! I added the Dunlop Indycal decals to the tires on my new Scalextric Ford GT. These are the decals with a black surround. I trimmed them very close to the lettering, and this makes the surround nearly invisible once applied. I used Solvaset to make sure the decal conformed to the tire after the decal was applied to the tire. These "tire markings" really came out well. The photos show the overall car and the close up of the tire. This is a great solution to the problem of the slot car manufacturer's no longer putting tire markings on their slot cars!
Note, yes the Ford GT ran on Michelins, but that logo is not available, so I used Dunlop since some teams are running Dunlops. I also painted my wheels silver since I have seen the Ford GT in both wheel colours.....and I like the silver much better.
Cheers RvE
PS - I should add, Wow, the Scalextric Ford GT is my current favourite slot car. It runs super fast, has lights, perfect finish, and great scale looks. It was worth the wait for this slot car....even without the tire markings!
- RvE
- Posts: 31
- Joined: Thu Sep 06, 2012 2:22 pm
- Location: Toronto, Canada
Re: Tire Branding missing from Slot Car tires?
![]() by Cincyslots » Thu Jan 17, 2019 7:02 am
by Cincyslots » Thu Jan 17, 2019 7:02 am
those look great.
for me, i upgrade the rear tires anyhow which then leaves me with the fronts, potentially, with lettering and the rears without. so i normally just flip the fronts to the black wall. while the lettering definitely looks better, it's not the end of the world for me.
Bruce
for me, i upgrade the rear tires anyhow which then leaves me with the fronts, potentially, with lettering and the rears without. so i normally just flip the fronts to the black wall. while the lettering definitely looks better, it's not the end of the world for me.
Bruce
-

Cincyslots - HRW SlotCar Veteran!
- Posts: 1635
- Joined: Mon Sep 03, 2012 1:36 pm
Re: Tire Branding missing from Slot Car tires?
![]() by Ky.Slot Racer » Thu Jan 17, 2019 8:14 am
by Ky.Slot Racer » Thu Jan 17, 2019 8:14 am
seems odd if that Michelin logo on the car is stock from the slot car co. why it cannot also be on the tire. :think:
- Ky.Slot Racer
- HRW Master Modeler
- Posts: 918
- Joined: Sun Feb 09, 2014 7:18 am
Goodyear lettering
![]() by RvE » Sun Jan 20, 2019 7:41 pm
by RvE » Sun Jan 20, 2019 7:41 pm
I added the Goodyear letting from Indycals to my 1/32 Carrera Porsche 917/30. I am not sure what tires these monsters were running, but I wanted to see how the Goodyear logo would fit on these different size tires. The decal set also came with the "Eagle" lettering, but I omitted it as its a hard to handle, small, decal! So for now, this car is running Goodyears! Enjoy the pic, RvE
- RvE
- Posts: 31
- Joined: Thu Sep 06, 2012 2:22 pm
- Location: Toronto, Canada
Re: Tire Branding missing from Slot Car tires?
![]() by noddaz » Thu Mar 28, 2019 4:31 pm
by noddaz » Thu Mar 28, 2019 4:31 pm
If the tire companies do not want the exposure.... Then the heck with them. The slotcar companies should sick a finger in the tire companies eye with "Good 'Nuff", "Span-stone" and "Dunslap" lettering.
Of course other tire companies may want the exposure for FREE.
Scott
Of course other tire companies may want the exposure for FREE.
Scott
-

noddaz - HRW SlotCar Veteran!
- Posts: 672
- Joined: Wed Sep 19, 2012 6:21 am
- Location: Arnold, Maryland
25 posts
• Page 1 of 2 • 1, 2
Who is online
Users browsing this forum: No registered users and 50 guests

Powered by phpBB® Forum Software © phpBB Group