Mold progress
Re: Mold progress
![]() by FC47 » Wed May 16, 2018 6:41 pm
by FC47 » Wed May 16, 2018 6:41 pm
Keep goin man! Pretty cool project and you're getting there!
-

FC47 - HRW SlotCar Veteran!
- Posts: 644
- Joined: Sun Jun 25, 2017 7:48 pm
- Location: Berkshire foothills
Re: Mold progress
![]() by waaytoomuchintothis » Wed May 16, 2018 7:01 pm
by waaytoomuchintothis » Wed May 16, 2018 7:01 pm
Great work. I actually had given up, because its so far over my head I couldn't imagine it would work. But I'm hooked now! Go, man, go!
-

waaytoomuchintothis - "Seasoned SlotRacer"
- Posts: 7576
- Joined: Wed Aug 29, 2012 7:16 pm
- Location: Chesterfield, Virginia
Re: Mold progress
![]() by RazorJon » Wed May 16, 2018 10:33 pm
by RazorJon » Wed May 16, 2018 10:33 pm
Do you have any vents cut into your mold?
Gasses can build up stopping plastic from flowing in the mold cavity
some of the bigger molds I have made needed 5-10 vents
Gasses can build up stopping plastic from flowing in the mold cavity
some of the bigger molds I have made needed 5-10 vents
-

RazorJon - Tire Razor Guy
- Posts: 2419
- Joined: Thu Aug 30, 2012 10:51 pm
- Location: Union Missouri
Re: Mold progress
![]() by proxieken » Thu May 17, 2018 4:59 am
by proxieken » Thu May 17, 2018 4:59 am
I will try to include some vents. In the rear of the car, around the spot where my real one rusted out and my trunk formed its own vents. :cry:
This is a DIY project and I have learned to "stay in my lane". Since I can not make things precise I make them adjustable. The side wedges can be shimmed and I think that is half the issue. 2 shims was too much but one was definitely not enough. I have to find some in between options regarding thickness.
The other issue is the plastic is cooling about the time it reaches the door handle and the rest can not push past so has to blow out somewhere.
I am going to try again as soon as I have some time and play with the shims and increase the heat and pressure to slam the plastic down the side of the car before it cools and forms a dam.
One issue that can not be worked around is that the 28 ton machine I am using may not have the clamping pressure required to hold this much surface area and pressure. In that case I have to resign myself to having flash no matter what I do.
Still, I would rather have a flashy car than none at all when it comes to some of the obscure vehicles I would like to make. :D
Thanks for the encouragement. This project has always been a long shot but it gives me something to play around with in the shop.
- proxieken
- HRW SlotCar Veteran!
- Posts: 403
- Joined: Sat Sep 08, 2012 1:22 pm
Re: Mold progress
![]() by TuscoTodd » Sun May 20, 2018 8:38 am
by TuscoTodd » Sun May 20, 2018 8:38 am
That is still one IMPRESSIVE undertaking! It is great seeing this progress!!!
-

TuscoTodd - HRW Bouncer
- Posts: 7145
- Joined: Sat Aug 17, 2013 11:25 am
- Location: Rural Ohio
Re: Mold progress
![]() by proxieken » Mon Jun 11, 2018 2:28 pm
by proxieken » Mon Jun 11, 2018 2:28 pm
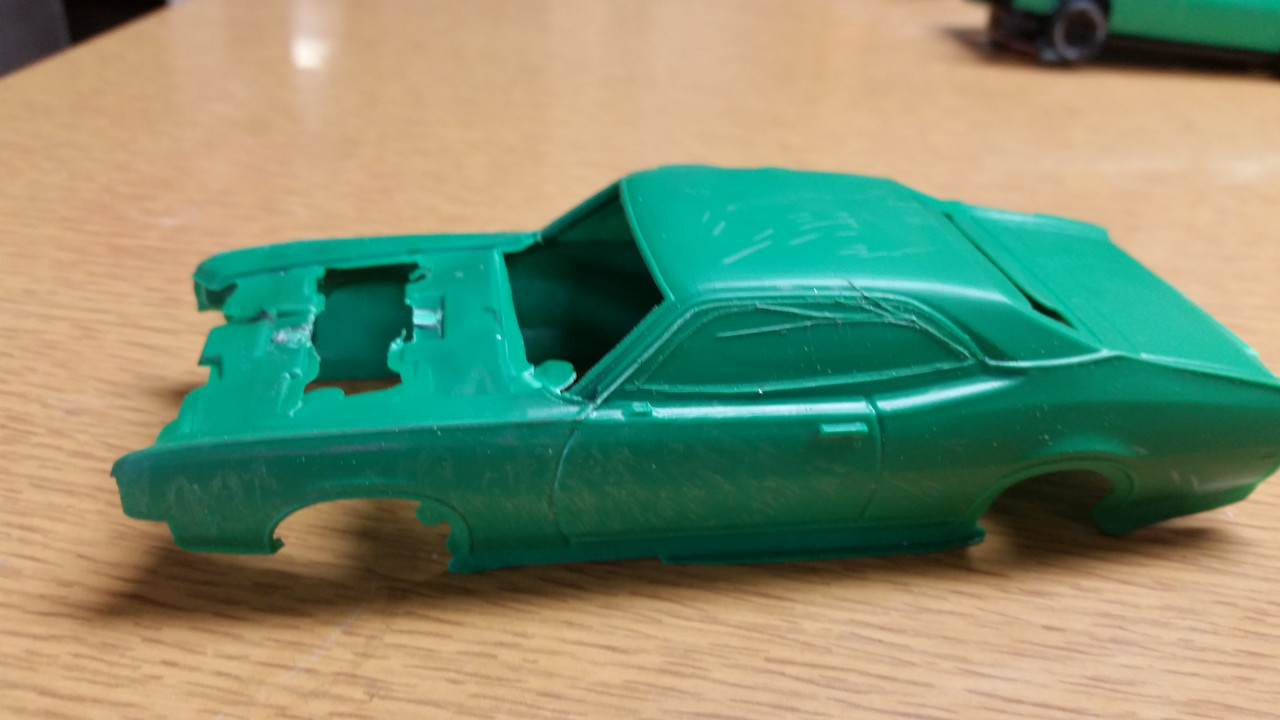
Had some time to play around with the mold again. The springs I am using are not working out. They are an assortment of old drum brake retaining pin springs. The first set was not compressing far enough, and this set is not opening far enough. I am going to go out shopping for some in between springs. The car is filling up OK but I still need to close it down a few more thousands because it is too flashy.
Here is a pic setting on a Pioneer Charger chassis after some serious flash filing. I find a lot of little mistakes, but it captures the shape of the car pretty well. The surface could use a bit more polishing, and the little bumps I put to glue the mirrors to are small. The rectangles underneath to locate the interior are too deep and create a shallow sinkhole. I can try to hold pressure or mix nitrogen in to the plastic to prevent the sink, but that will have to be sorted somehow.
Now to get to work on the rest of the parts. There are some decisions to be made here, because ideally the kit should contain 3 grills and 2 hoods to allow for the multiple options. This project has taken so long I just want to get something on the track. So anything is going to be OK to me.
- proxieken
- HRW SlotCar Veteran!
- Posts: 403
- Joined: Sat Sep 08, 2012 1:22 pm
Re: Mold progress
![]() by JULES » Tue Jun 12, 2018 6:08 am
by JULES » Tue Jun 12, 2018 6:08 am
Ken, it is good to see you are making progress. Here are some observations that may help:-
Where is the gate on your tool? Ideally, for a car shape, you would need it just under a door drip rail or maybe at the top center edge of the windshield.
The ‘Flashing’ is caused by one or two things or a combination of both.
Either:-
1/The two halves of your tool are not meeting and shutting with micro precision.
2/ The tonnage rating on your moving half is just not powerful enough to hold the two halves together for the cycle time you have set up.
The ‘Shrinkage’ (caused by where you have thicker plastic than the body panels in some areas) is taking longer to cool and therefore will retreat back by 0.50% or so over and above the remainder of the body. Even the best tool making can suffer from this. If you have not got any water cooling channels around your cavities then this will present a problem.
I can tell you that changing the compound of the base material you are using may help. Use a high modulus, lower melting point blend of ABS. Some plastics will also flow much quicker than others to help fill up the cavities faster and you’ll end up with a cleaner molding that is not flashing so much. There are many 1000’s of plastic types you could experiment with.
If it makes you feel better, I can tell you that I see Machine Technicians working my presses and it is always a battle to set them up. It can take many, many hours of experiments to get even the best tooling running nice.
You have made great progress. I wish you good luck with your endeavours.
Jules
-

JULES - HRW SlotCar Veteran!
- Posts: 343
- Joined: Thu Sep 06, 2012 6:14 pm
Re: Mold progress
![]() by proxieken » Tue Jun 12, 2018 7:06 am
by proxieken » Tue Jun 12, 2018 7:06 am
Thanks for the tips Jules.
I am using cooling. The plastic is injected directly in to the engine compartment, which is why the hood is a separate part.
The flashing is the result of the tool not closing completely. I actually found the problem and might run a few more today and see how they look. It needs a tiny bit of adjusting. That problem should be fixable.
The sinking is something I see on a lot of kits and might be fine as is. I can hold pressure for a while and see if that helps. Most likely it is not something that is going to go away with out adding nitrogen which works like a charm but adds a strange surface finish to the plastic. Meaning it will require painting.
The 28 ton press is over limit, but it kind of works most times. I may have said this before, but I worked in a junk yard as a kid. I can not tell you how many discarded vehicles we patched up and got running again. So making due with junk is something I am very familiar with. :oops:
I am using HIPS, which is what I think is used on most model kits.
Overall it kind of was a good day to actually get the wedges opening and closing properly and the shape of the car seems to be recognizable. Next up is going to be the mold for the windshield. And I am getting a graphic designer to work on the decals.
I have a friend who is already planning to make HO slot cars for the press now! I will just scale things down a bit and see if that works.
- proxieken
- HRW SlotCar Veteran!
- Posts: 403
- Joined: Sat Sep 08, 2012 1:22 pm
Re: Mold progress
![]() by proxieken » Fri Jun 15, 2018 8:48 pm
by proxieken » Fri Jun 15, 2018 8:48 pm

A handful of nitrogen in the hopper has reduced the sink hole. It does give a strange coloration that means the cars will require paint. The surface is still smooth, it just swirls a bit.
Not going to celebrate yet, but feel this is about 90% of the way. For my personal use I am extremely happy, but if I am to plan on offering them as a kit I have to further reduce flash.
The grill is going to be very hard to make, but it should be started next week. That mold will hold 3 styles of grill, rear spoiler, mirrors, and both bumpers. There is not enough room to include 2 hoods so the flat hood is not going to be included. If enough people want it I could make a small single mold with a flat hood. Race cars used a flush grill and flat hood.
The 72 Torino Sport will have 2 hoods and only a single grill. There is limited space to put parts. I am already looking forward seeing that car and I still have tons to finish on this. Kind of like the way my project pile will keep me busy for years and a new project always catches my interest. Staying on target is a major personal fault. I guess it is easy to get excited about a new project before the last one is done.
The interior tray and driver will be used for both kits.
So lots and lots to do, but will work as diligently as possible. It is great to be getting some results after over a year of planning.
Just to explain how bad my ADD is- I have CAD files for the 72 Mach 1, 70 Torino Cobra, and 72 Road Runner. Plus a 71 El Camino and the aforementioned 72 Torino Sport. With a one person shop that is years of work...............................
- proxieken
- HRW SlotCar Veteran!
- Posts: 403
- Joined: Sat Sep 08, 2012 1:22 pm
Re: Mold progress
![]() by Wobble » Fri Jun 15, 2018 10:28 pm
by Wobble » Fri Jun 15, 2018 10:28 pm
That looks pretty good to me and if it fits on a Pioneer Charger chassis it must be quite a good size. I did a Palmer Mercury Monterey that didn't look as sweet as that. Trouble is I've searched the whole thread and am still none the wiser as to what it is.
-

Wobble - HRW SlotCar Veteran!
- Posts: 602
- Joined: Mon Nov 23, 2015 2:02 am
- Location: Christchurch, New Zealand
Re: Mold progress
![]() by proxieken » Sat Jun 16, 2018 6:44 am
by proxieken » Sat Jun 16, 2018 6:44 am
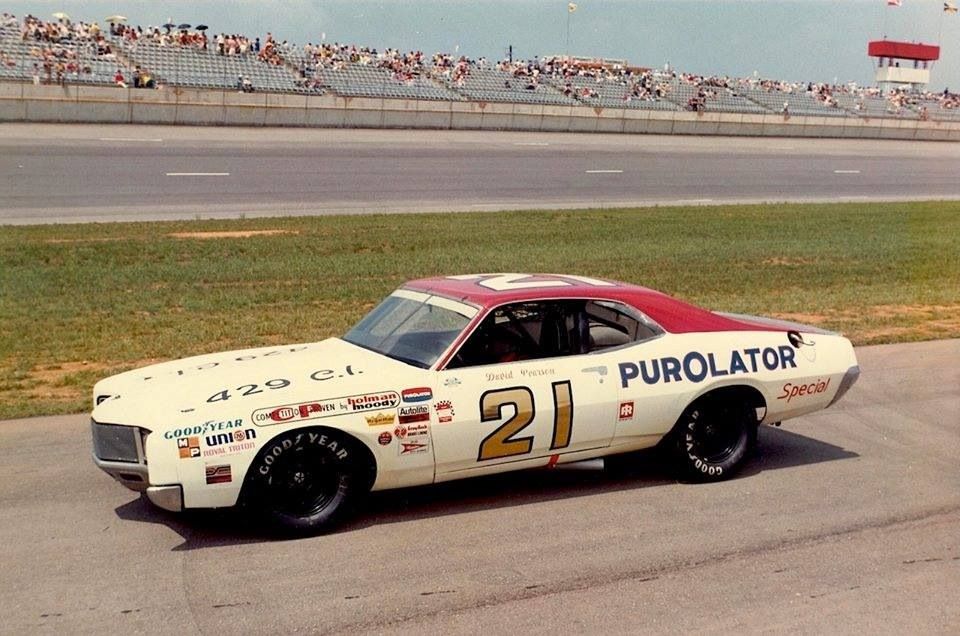
It is a generic muscle car from the early 70's... :?
It may resemble a 70 Cyclone...............
- proxieken
- HRW SlotCar Veteran!
- Posts: 403
- Joined: Sat Sep 08, 2012 1:22 pm
Re: Mold progress
![]() by Wobble » Sat Jun 16, 2018 3:56 pm
by Wobble » Sat Jun 16, 2018 3:56 pm
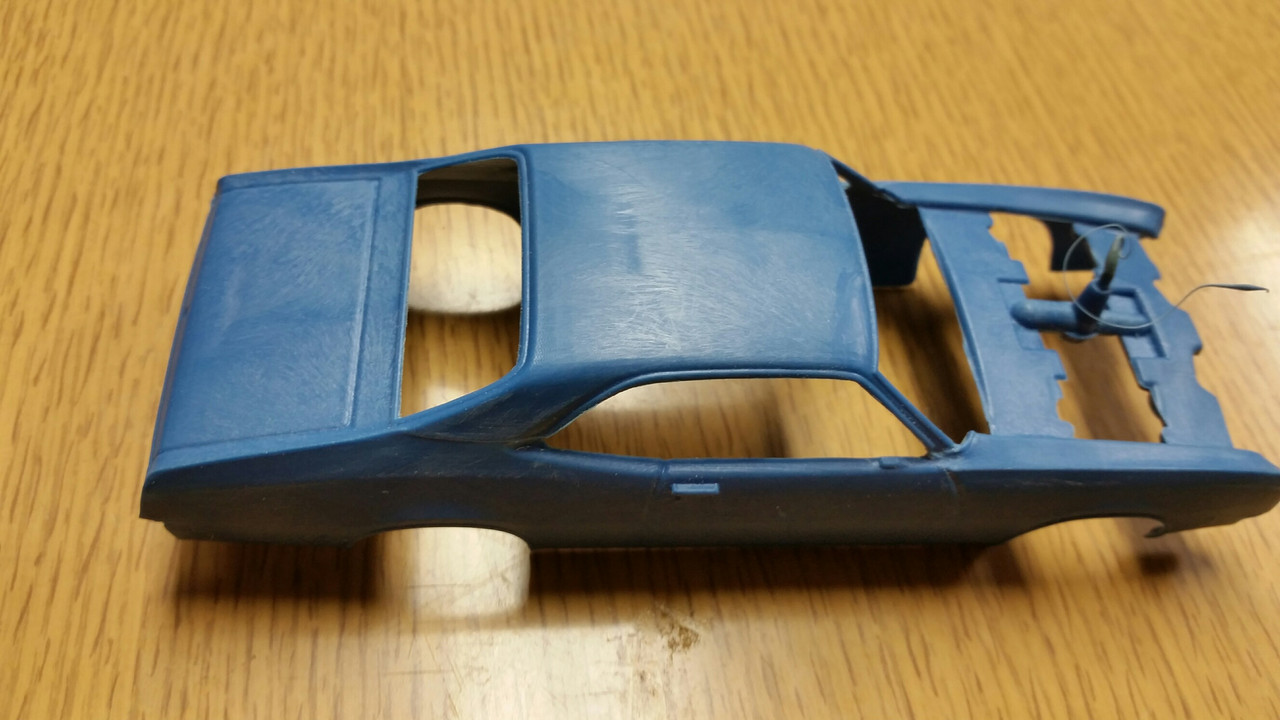
OK, I like that a lot. Love the shape looking at it from the side in primer. I just held a Pioneer Dodge Charger beside the photo on the screen and it's showing at almost 32nd scale. I could easily live with it as it is. Sign me up for a couple when you're done.
-
Wobble - HRW SlotCar Veteran!
- Posts: 602
- Joined: Mon Nov 23, 2015 2:02 am
- Location: Christchurch, New Zealand
Re: Mold progress
![]() by proxieken » Sat Jun 16, 2018 9:06 pm
by proxieken » Sat Jun 16, 2018 9:06 pm
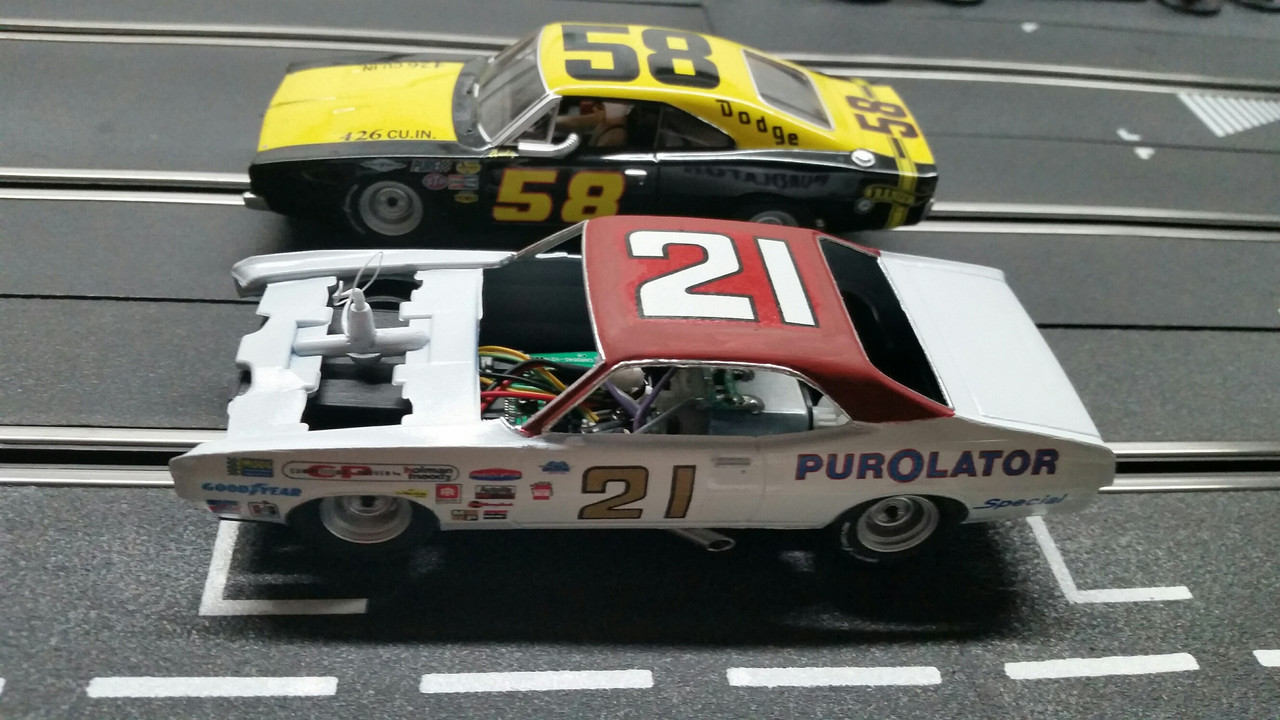
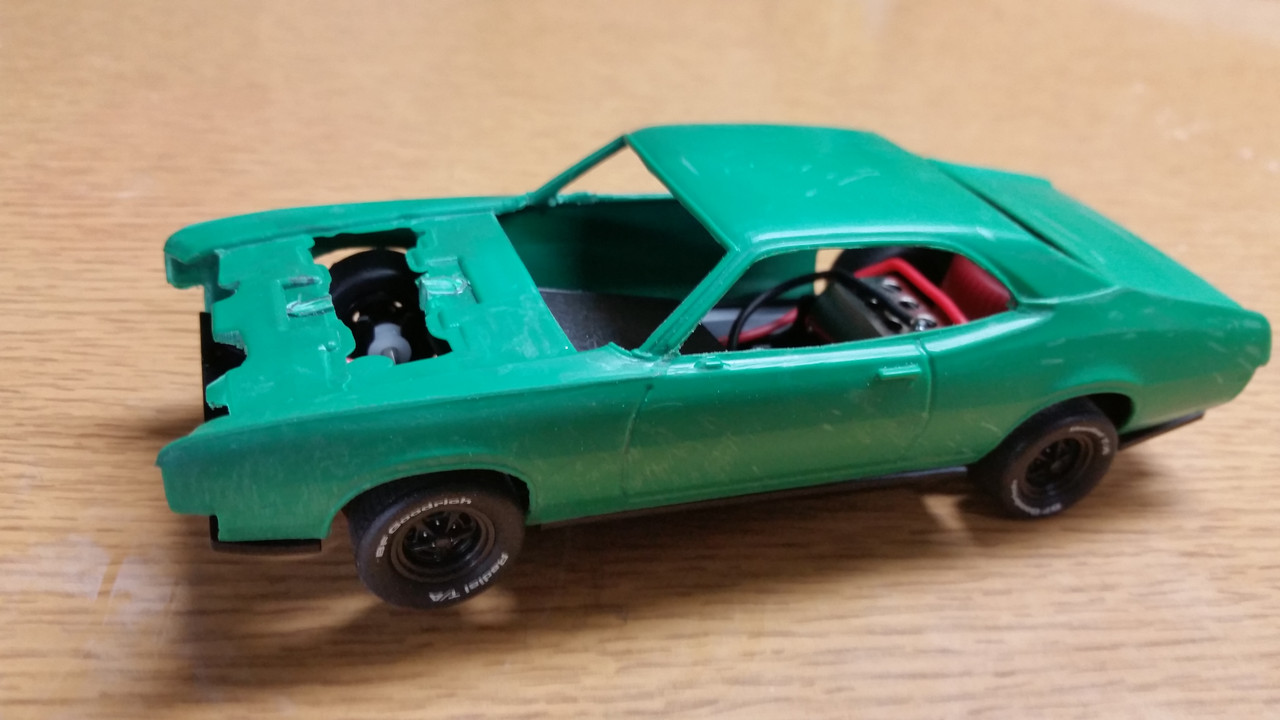
Here is my work in progress setting next to a Carrera Charger. It is also setting on an identical Carrera Charger chassis. The 2 cars match up quite well. It is 1/32 scale but tweaked to fit over the existing chassis.
It should blend right in to the crowd of the Nascar racers.
- proxieken
- HRW SlotCar Veteran!
- Posts: 403
- Joined: Sat Sep 08, 2012 1:22 pm
Re: Mold progress
![]() by slothead » Sat Jun 16, 2018 10:02 pm
by slothead » Sat Jun 16, 2018 10:02 pm
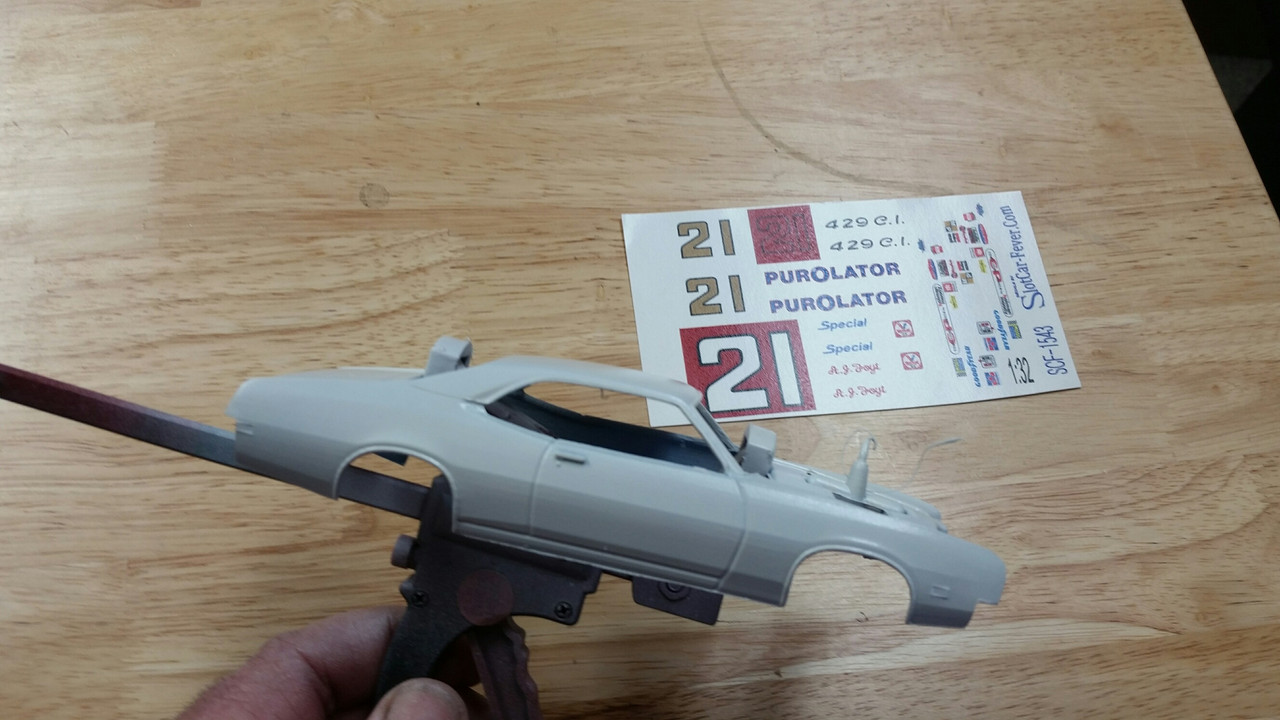
Really nice results - that's a great looking generic car with a 70's flair about it. But definitely not any specific make or model, Those #21 decals fit it real nice though.
I think the HRW crowd would be willing to purchase a bunch of these if you make them available.
Slothead
I think the HRW crowd would be willing to purchase a bunch of these if you make them available.
Slothead
-

slothead - The Doctor is IN!
- Posts: 1560
- Joined: Sun Mar 17, 2013 7:04 pm
Return to The Marty Stanley Scratchbuilders Shop
Who is online
Users browsing this forum: No registered users and 91 guests

Powered by phpBB® Forum Software © phpBB Group