As everyone seems to be developing their own way of building these I will share what I have learned, and am learning, regarding these cars. Some of the mods I made to my Wendell Scott Fairlane are being omitted here, while others could have also been omitted in retrospect. The mods are largely intended to remove wheel hop and body roll problems that one finds in these cars on wood tracks.
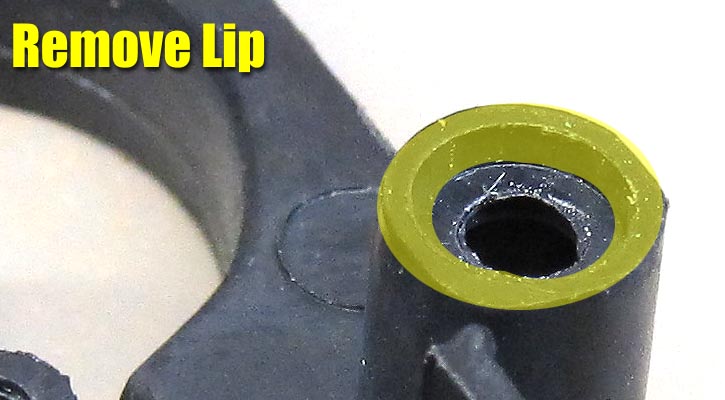
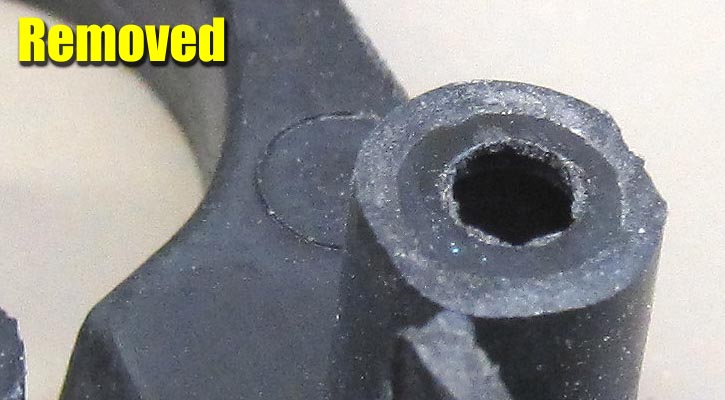
One change that I have made is to set the car up first with the rear magnet box in place and then when done grind off that box to provide track clearance. Ride height is being set by literally placing the magnet box on the set up block and then moving the rear axle up. To cut the chassis to allow this I basically patiently hand-turned the cutter (I believe it is a Dremel mower blade sharpening tool) supplied in the SCC Slot.It bushing alignment tool kit to change the key hole shape into a slot. The bushing can then be moved up and glued into place. I am certainly not the first person to do this.
I have ground away the edges of the chassis to improve float but I overdid it a bit. Pretty much all of the grinding of the edges of the chassis besides the front, rear, and side edges does not appear to have been necessary, but I copied what someone else has done. Looking at where the chassis rubs at least on this body a lot of it wasn't necessary. The tool I used made it very fast though. All of the grinding operations on the chassis have been completed with either a large or small 3M sanding drum on a 1/8" or 3/32" shank mandrel in a Foredom SR flexshaft tool. This allows very low speeds, down to 500RPM or so. The only mod to the interior besides some light sanding at the rear to ensure chassis clearance was to remove the interior and glass from the body and then cut the area of the 'glass' between the four lugs on the 'roof' with the small sanding drum, leaving the front and rear windows connected by a small strip on either side. The four lugs were also removed to make sure it would sit flat against the roof when re-assembled. This was not done in the interest of moving the interior up in the body but rather to remove some weight from the highest point in the car and thus improve the CG a little. This is another reason why I didn't bother to lighten the floor of the interior, as it is below the motor centreline.
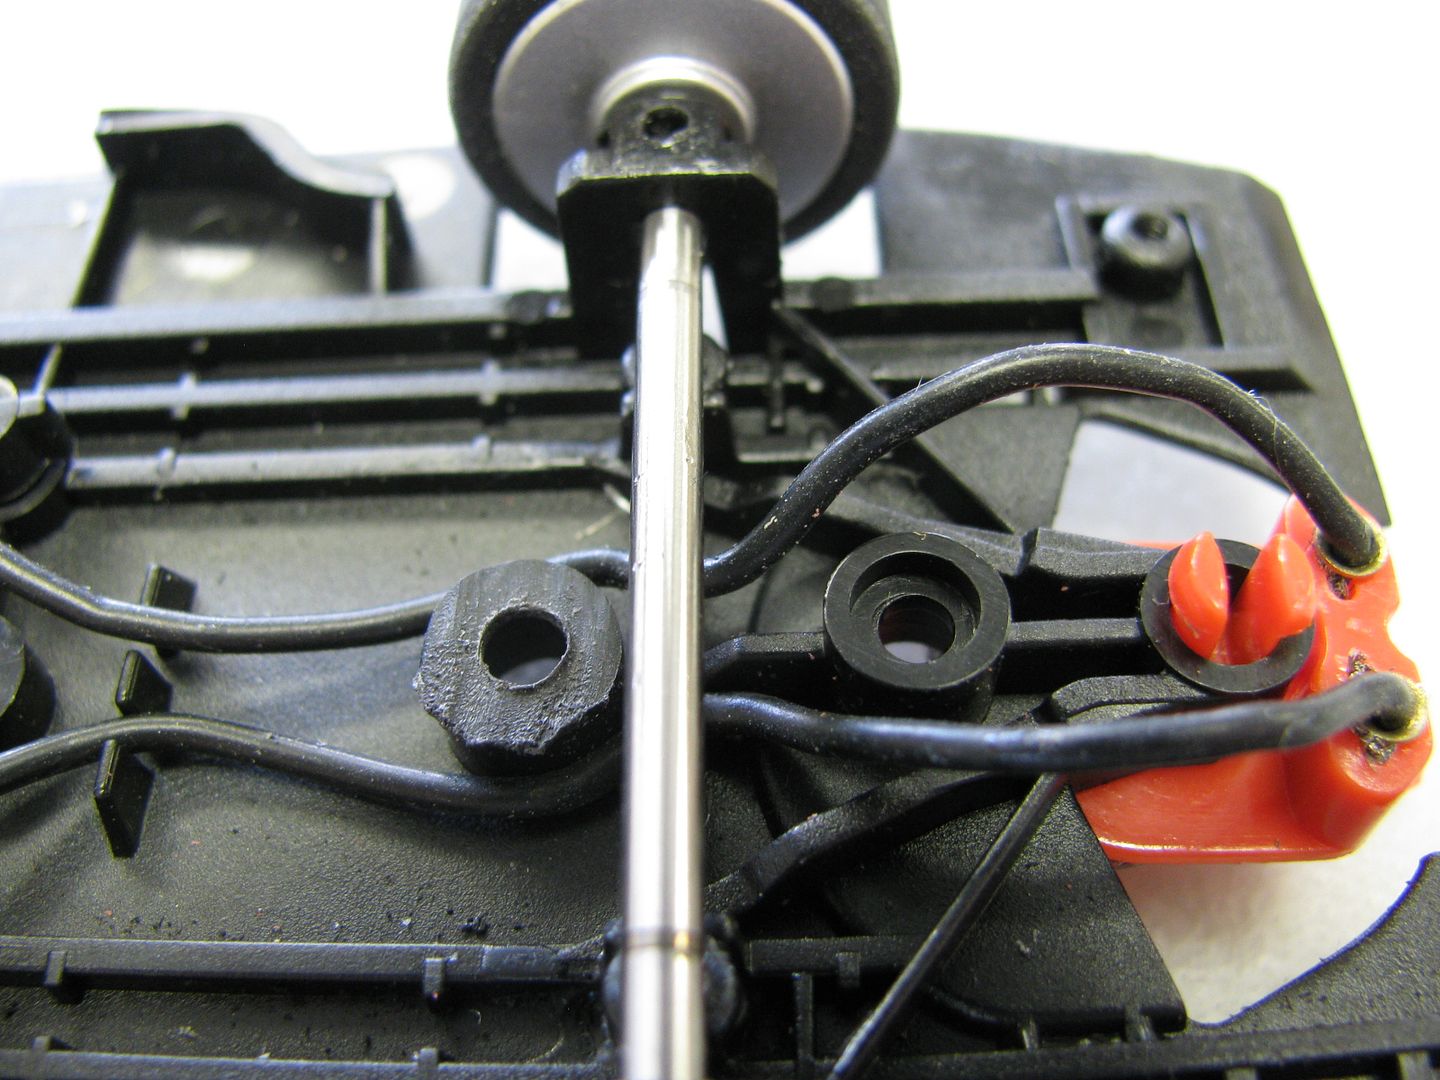
The most important mod besides the rear axle is the motor mount. The stock motor has been replaced with a Pioneer QS Typhoon to provide better braking on road race circuits. The gears have been replaced with an NSR 7.5mm 12 tooth pinion and a Slot.It 18mm 35 tooth spur. In order to fit this pinion/spur combination at the new axle height the axle mounts had to be ground away a little to enable the motor to be moved forward. The motor will be hot-glued in place. On the previous car I used a 6.75mm pinion which meant that the motor had to be moved back but this raised clearance problems with the Slot.It bushings and meant that the normal long pinion shaft on the bell had to be cut off to clear the tyre. Moving it forward rather than back meant that everything cleared and makes soldering the wire near the chassis a little simpler. By not cutting the motor shaft I can always put into a Pioneer or Scalextric car later if I want
The rear axle and bushings will be Slot.It and the rear wheels SCC 15x8 steel wheels. At the moment I am test fitting the ones from my Fairlane, hence the black paint. The final ones will be painted to match the front wheels.
At the front I have raised the axle using some styrene card. I'm not sure how thick it is, maybe 15 thou. I took it from an Evergreen assortment pack that I have laying around. I place the card under the axle box between it and the chassis mounts. Holes are drilled in the card to match the standard holes (using a Tamiya Handy Drill). I expect the front ride height to lift very slightly once the guide and braids are in. The whole car will be rewired with NSR wire and a Slot.It or Sloting Plus screw fit guide and SCC braids installed up front, but that has not been done yet (it is very straightforward but the axle box has been cut with the sanding drum to enable access to the top of the guide for the screw and also to run the wires over the top of the axle box.
I have not modified the body posts at all and do not intend to do so. I'm happy with the height achieved with the axle mods and do not want to cut the interior more or weaken the body mounts. Removing the extra layer of clear plastic under the roof probably improves the weight distribution nearly as much and I always end up placing lead in the belly of these anyway.
Here are some photos. The Goldsmith Plymouth is not modified and is just in one photo for a ride height comparison.