No time like the present to get started.
The 1:1's run a, more of less, stock front stub, but are purpose built from the firewall back.
No coil-overs allowed. A 4 1/2 inch diameter spring required.
Aluminum formed bodies with various total weight rules applied.
8 or 9 inch tires, with mandated manufacturers.
They run cast iron blocks with various engine rules, depending on the area of the country.
Many times there is an engine claim rule applied to try & limit the dollars spent.
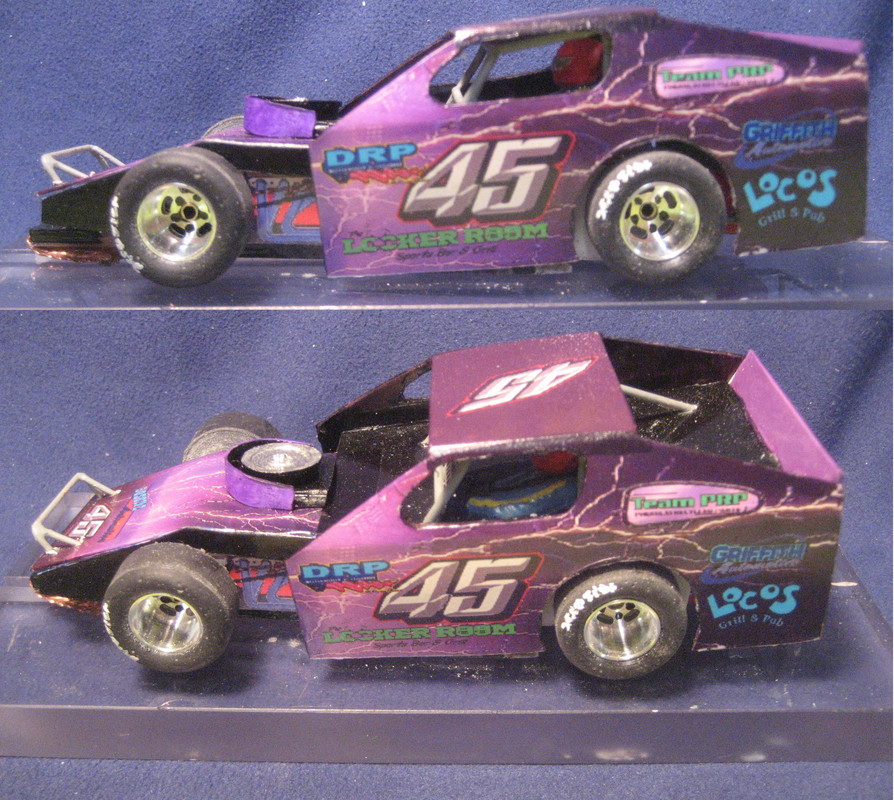
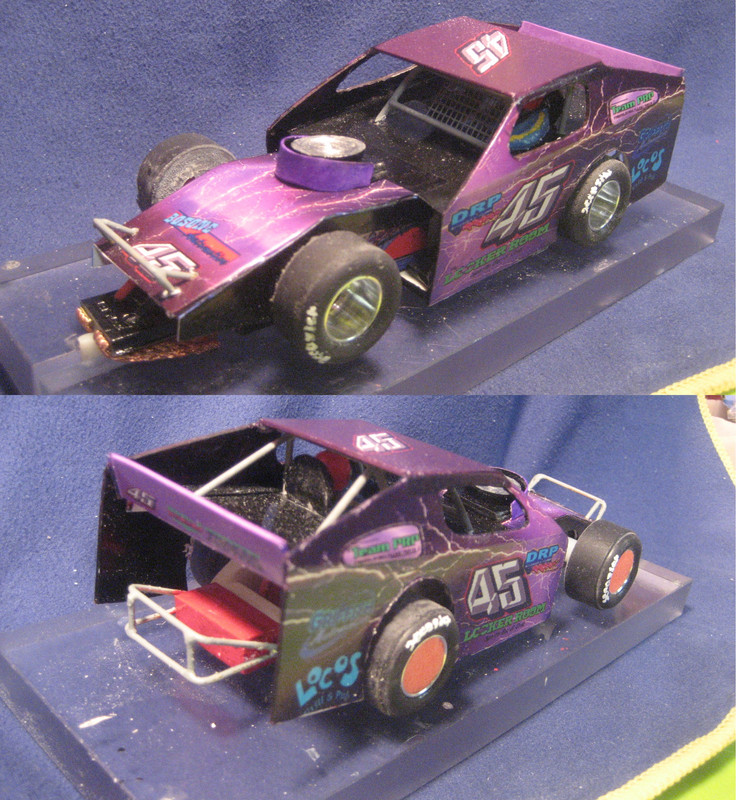
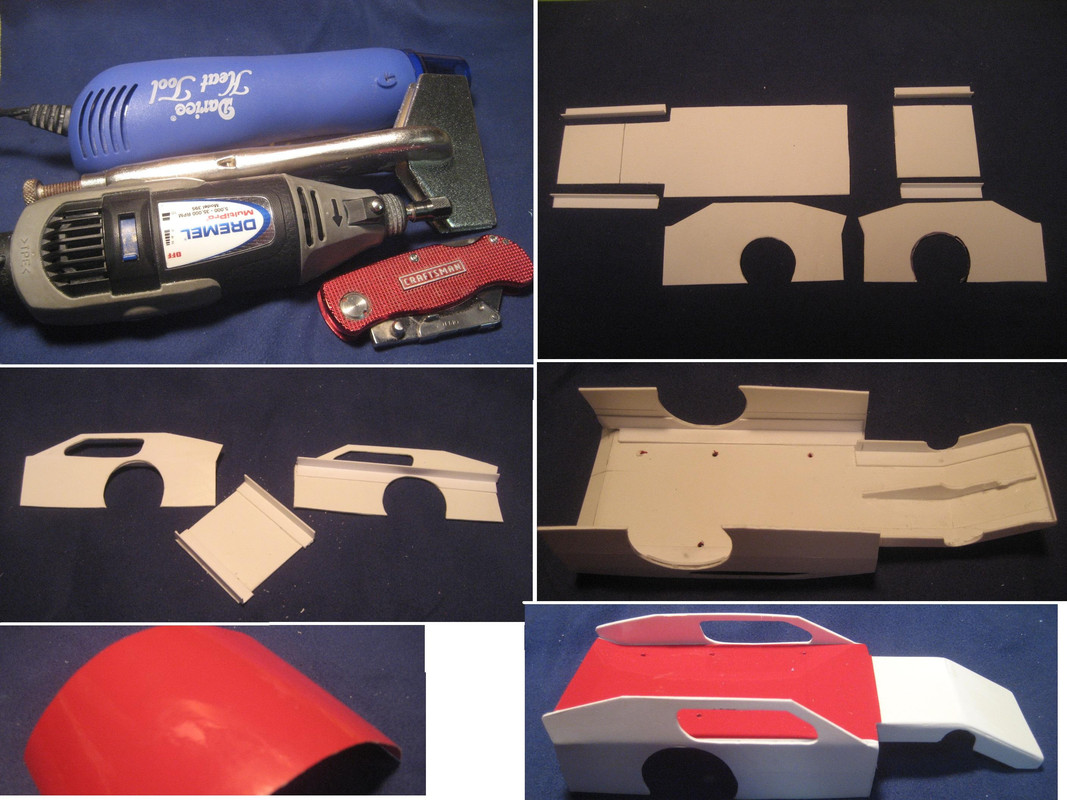
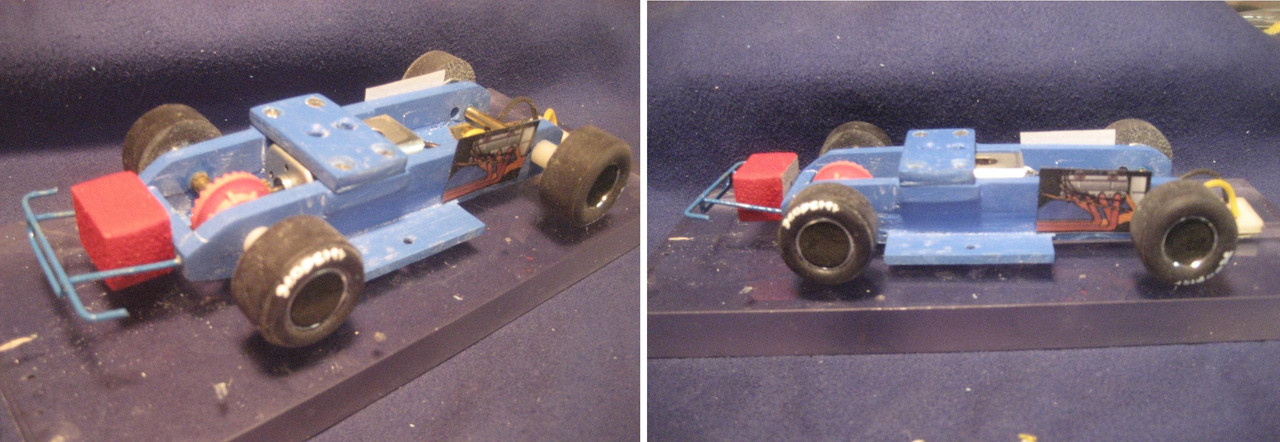
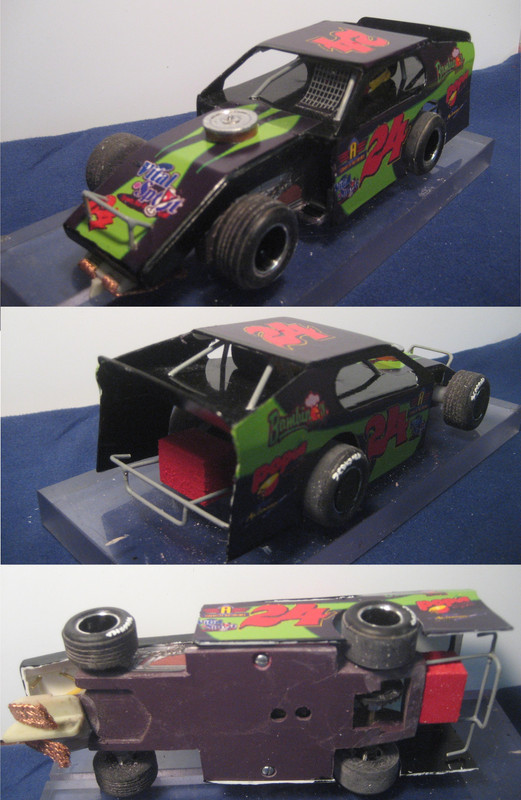
I started with my newer resin chassis & a Jaws motor.
3/8 wide Pro-Track wheels with about the same width Urethane tires that I cast.
This one has a 10 tooth pinion & a 28 tooth Parma crown gear, Parma guide & Big Mama braid.
Added a styrene fuel cell with a little bit of 3/64th brass rear bumper.
Offset provided by some hardware store vinyl spacers.
2 1/2" track width & 3" wheelbase.
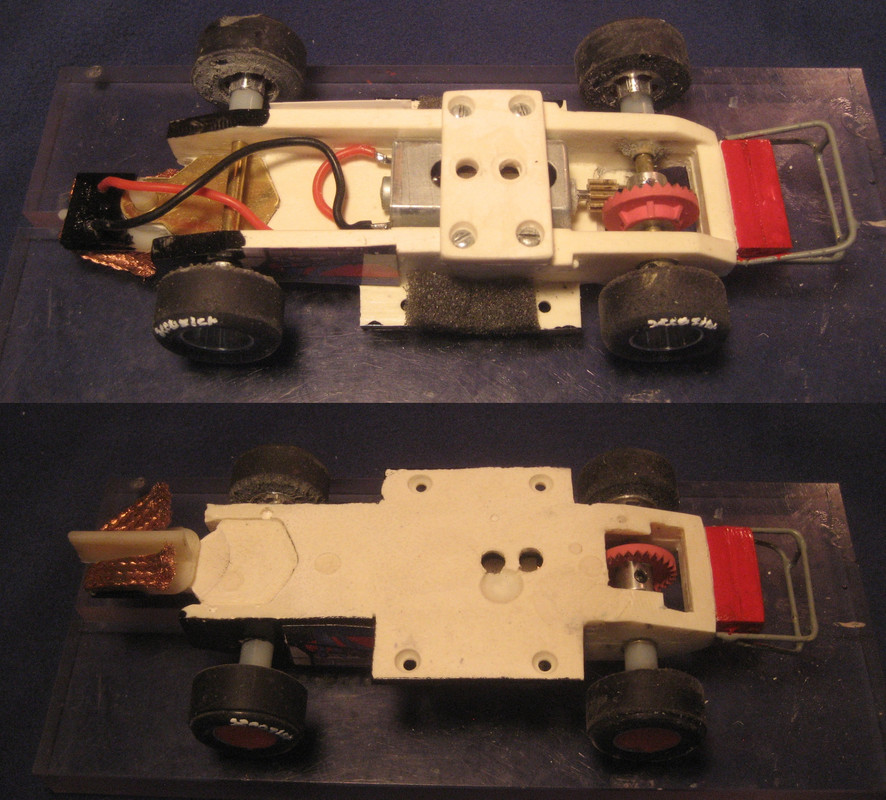
Made a pretty simple body from about 5 pieces of .030 styrene super glued together.
The cage is 1/16th styrene rod & the decal wraps are home-printed.
The engine is simply printed on .040 photo paper & glued on the chassis.
A small 3/64 brass front bumper along with the rear bumper is the only soldering required.
I used some foam earplugs for the mudplugs.
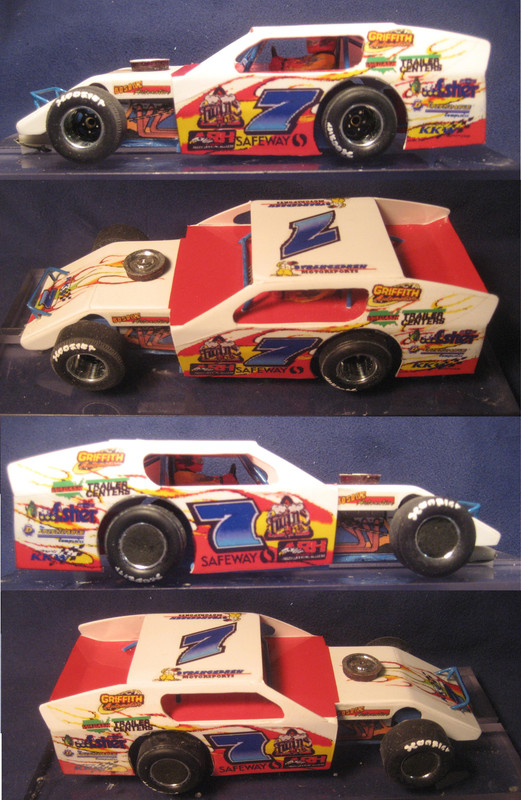
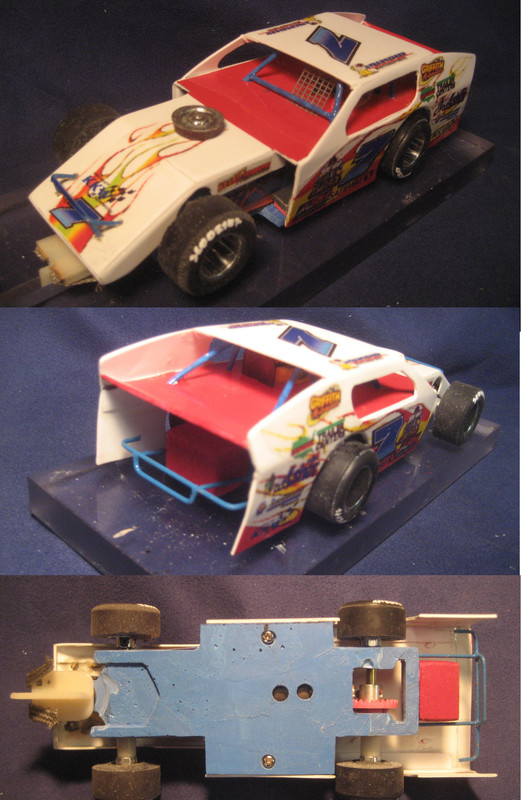
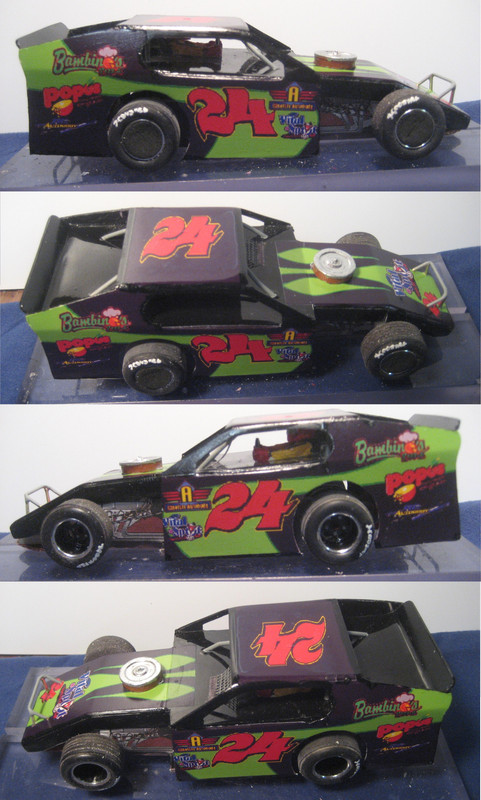
The goal was an very lightweight overall car. I don't have a scale to weigh it, but it
feels pretty light. :lol:
This is just a prototype body, but now that I see the photos............I need to do better.
It's a pretty simple matter to cut out the styrene & glue it together.
I have a "NO PAINT" plan for the bodies. Just covering them with decal wraps. :think:
It's turns some pretty fast laps on my track....Seems as fast as some Piranha cars. :shhh:
My plan is to build a few more & see if Harry invites my out to crash a few at headquarters.